How to restore your database or files using JetBackup 5
In this guide, we will cover the steps how to use Jetbackup 5 to restore or download files and databases.
If you have a web hosting plan with us, then you will have guaranteed automatic backups generated for up to 30 days.
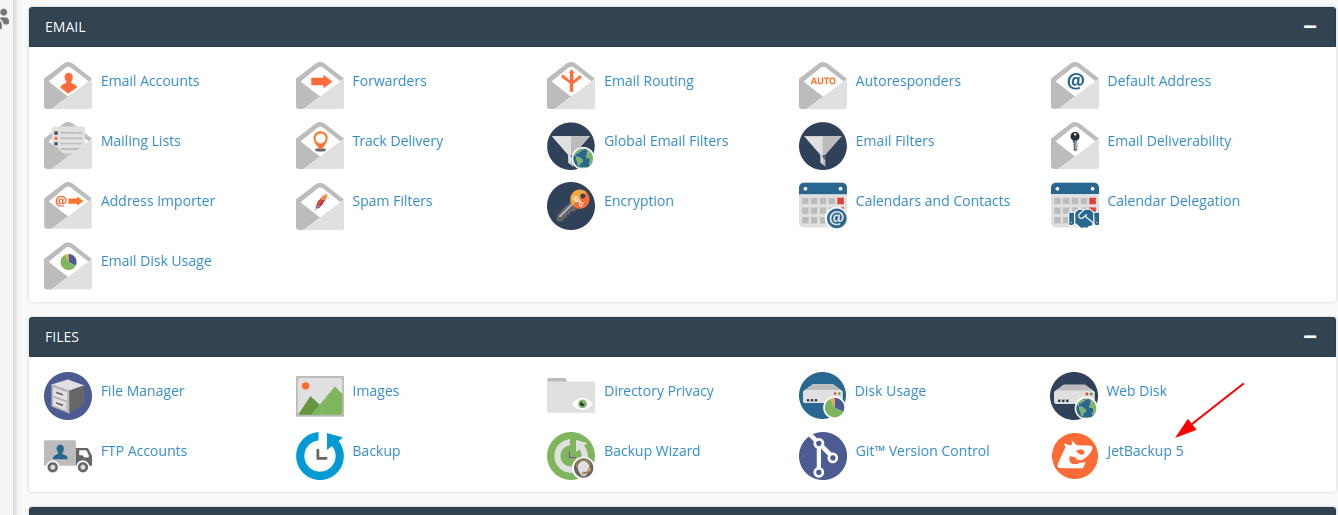
The Jetbackup 5 Plugin is located in your cPanel main menu. It can be found as a plugin button under “Files” section.
Restoring FIles
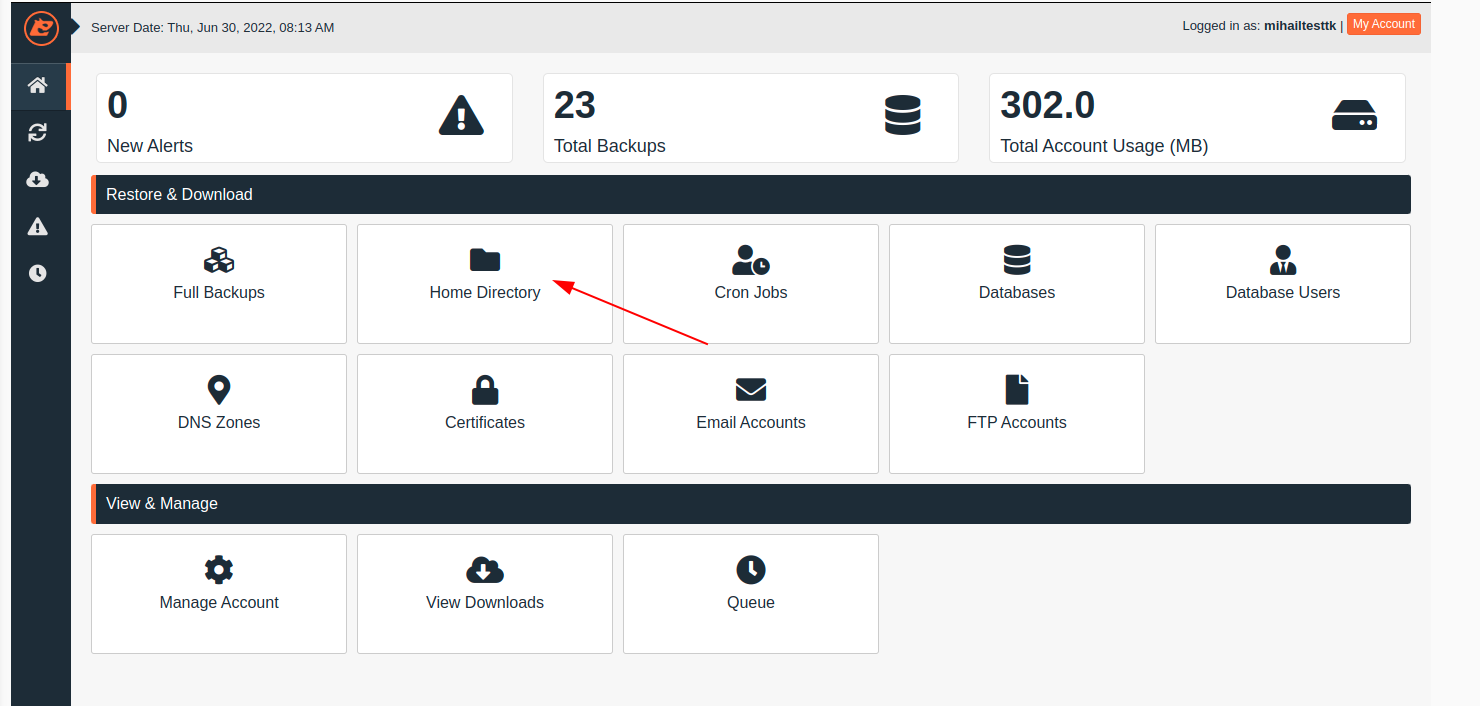
- To restore files, go to Home directory, select the date from which will be restoring. Later select “public_html” folder, if it is for the main site or select the relevant folder of the addon domain/subdomain.
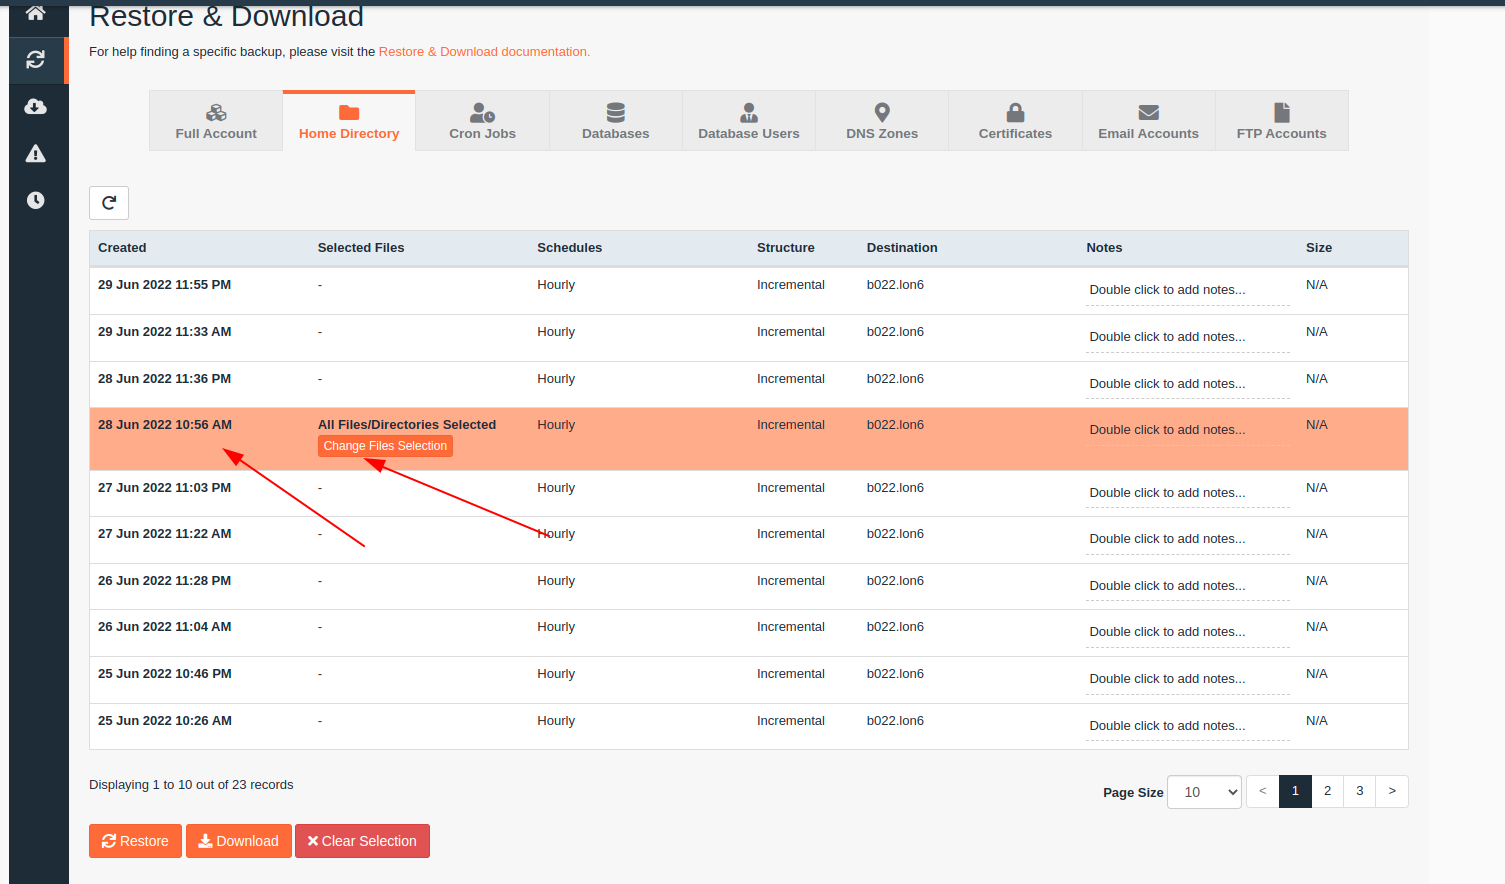
Would suggest always selecting the “Show hidden files” option as well, so to restore hidden files such as .htaccess, .env (files containing a dot at the beginning mostly).
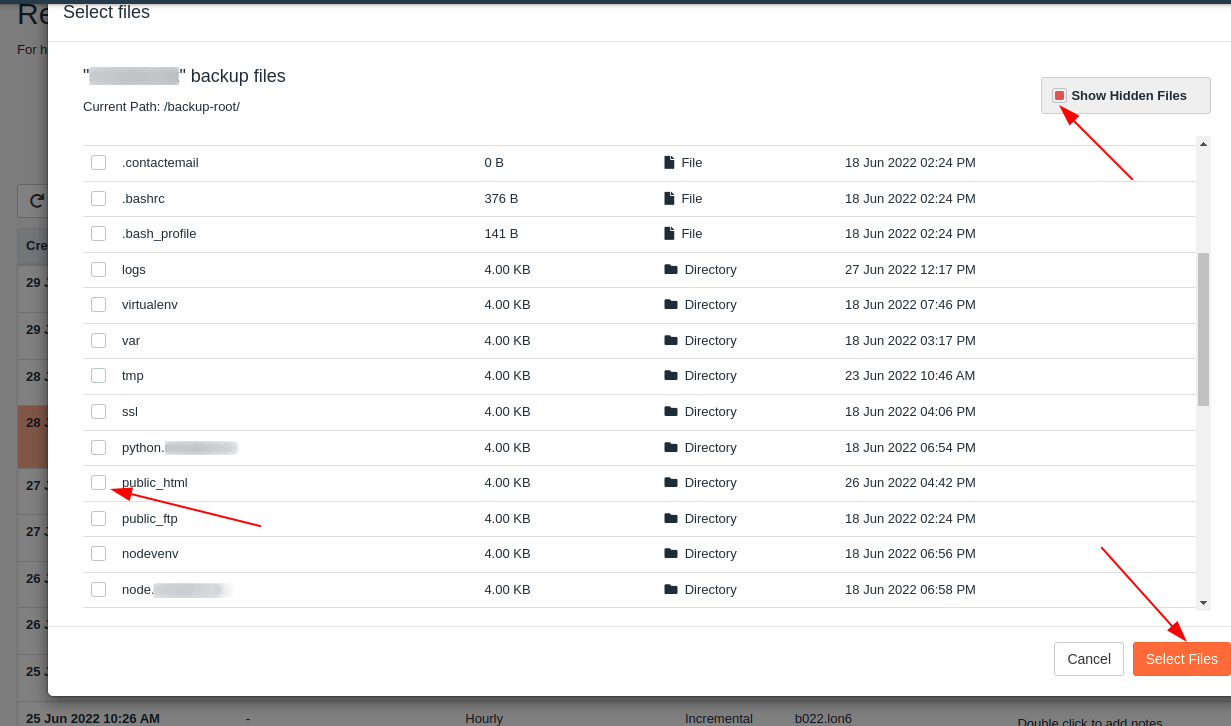
- After selecting the date/folder, you have the option to directly Restore or generate a Download for the files (if you want to save this locally on your computer).
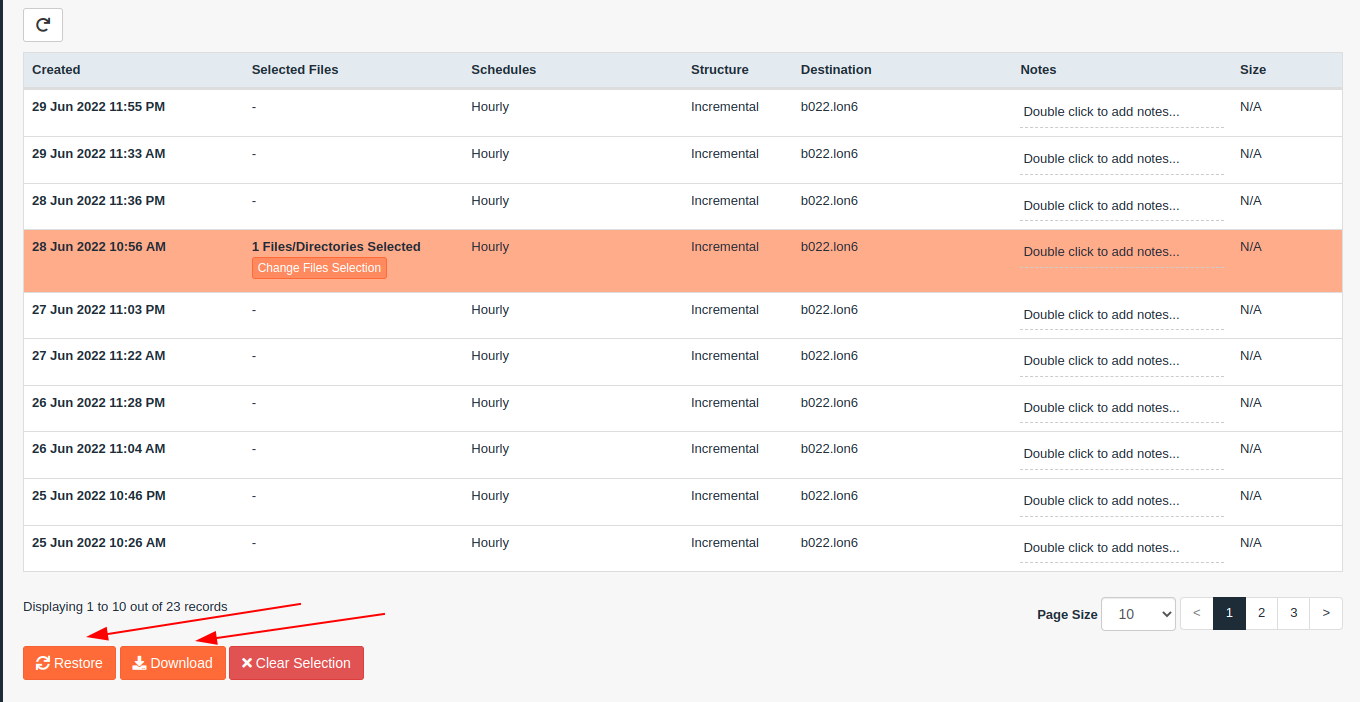
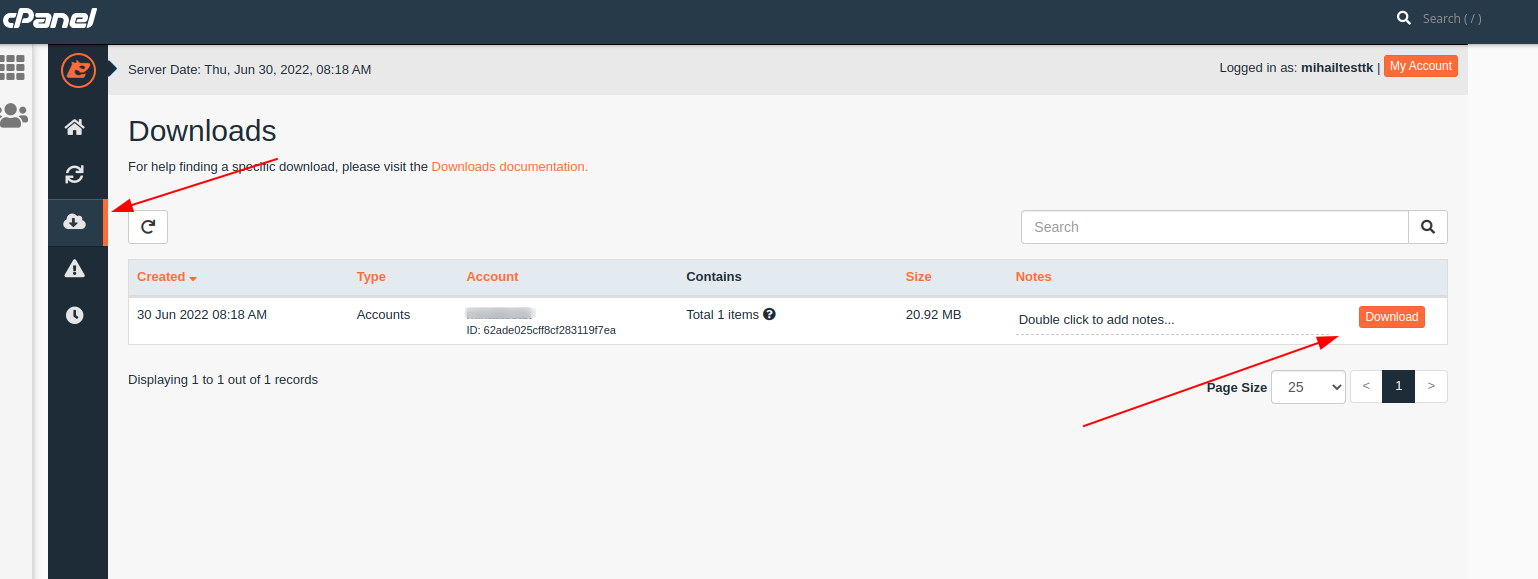
- If you choose to Download the backup, without restoring the files to your live website, after you wait for the process to complete, go to “Downloads” and will see the button to save the backup.
- If you are to proceed with the restore, please allow some time (depending on the content size, it may take a few minutes) and in the end should see the “Completed” status

Restoring Databases
- To restore a database, go to Jetbackup5 and then databases.
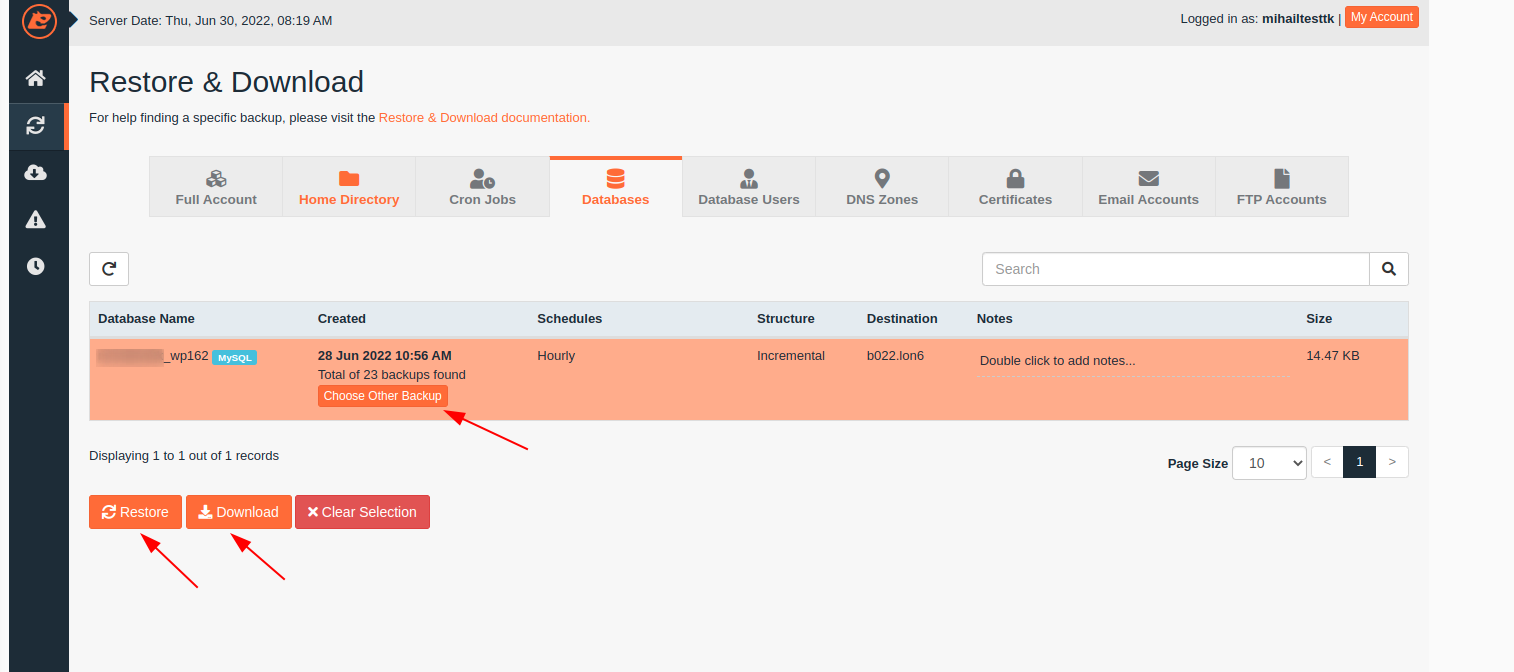
- Select your database (if you have multiple they will all be listed here so make sure to double check it's the correct one)
- Check the date you want to restore or download it from and proceed.
Note. If you restore a wordpress files from a backup, it is suggested to restore the site database afterward.
That's it! Your website is now restored.
Updated 9 months ago