# How to Use the Stablepoint Affiliate System
Source: https://kb.stablepoint.com/accounts-billing/affiliate-system/how-to-use-the-stablepoint-affiliate-system
You can earn passive income by joining the Stablepoint Affiliate System. It's free to join and there's no limit on how much money you can earn.
## How it works
You create a special affiliate link to a product on the Stablepoint website. You use that link in your digital marketing. For example, use the link in an email campaign or social media posts.
When a person comes to the Stablepoint website from your link, we call that a referral. Each time a referral makes a purchase, you earn a commission.
The more referral purchases, the more you earn.
## Who you can refer
This scheme is designed for you to get credit for referring your friends, or other businesses (basically, people you know). You cannot unfortunately refer yourself.
If you operate a website and want to add a link on there, you can by all means use the affiliate link.
## Commissions we pay
We pay the following commissions:
| Product | 1-5 referrals per month | 5+ referrals per month |
| :- | :- | :- |
| Shared - Go Plan | £10 | £20 |
| Shared - Starter, Medium, and Advanced Plans | £35 | £50 |
| Reseller Plan | £75 | £100 |
| Dedicated Server | £150 | £250 |
## Joining the affiliate program
To join the affiliate program, follow these steps:
1. Log in to the Hosting Panel at [https://clients.stablepoint.com](https://clients.stablepoint.com).
2. Click your initials in the top-right corner, and then click **Profile**:

3. Click the **Affiliate Program** tab, and then click **Opt-in**:

4. The **Overview** tab appears with statistics for your account. You are now ready to create affiliate links.
## Creating affiliate links
After you opt in to the affiliate program, you are ready to create some affiliate links. To do this, follow these steps:
1. On the **Affiliate Program** tab, on the **Overview** tab, scroll down to the **Links** section, and then click **Create new link**:

2. In the **Redirect URL**, type the URL that you want the link to redirect to.
3. In the **Label** text box, type a name for the link.
4. Click **Create affiliate link**. The link appears in the list of links on the **Overview** tab. You can now include it in your digital marketing.
## Monitoring your account
You can easily keep track of your referrals, commissions, and payouts:
* To see your referrals, on the **Overview** tab, scroll down to the **Referrals** section.
* To see your commissions, click the **Commissions** tab.
* To see your payouts, click the **Payouts** tab.
# Affiliate System
Source: https://kb.stablepoint.com/accounts-billing/affiliate-system/overview
This section explains the Stablepoint Affiliate System and how to earn commissions by referring customers.
# Accessing the Hosting Panel
Source: https://kb.stablepoint.com/accounts-billing/billing-accounts/accessing-the-hosting-panel
Learn how to register, log in, and log out of the Hosting Panel.
This article describes how to access the Hosting Panel. The Hosting Panel is your gateway to managing Stablepoint products and services.
## Signing up for an account
If you do not already have an account in the Hosting Panel, you must create one before you can log in. To do this, follow these steps:
1. Use your web browser to go to [https://clients.stablepoint.com](https://clients.stablepoint.com).
2. On the **Login** page, click **Create an account**:

3. Complete the fields, and then click **Sign Up**:

4. You will receive a message at the email address you specified. In the message, click **Verify Registration** to complete the account creation process.
5. You can now log in to the Hosting Panel using the email address and password you specified in step 3.
## Logging in to the Hosting Panel
To log in to the Hosting Panel, follow these steps:
1. Use your web browser to go to [https://clients.stablepoint.com](https://clients.stablepoint.com).
2. On the **Login** page, in the **Username** text box, type the email address you specified when you created your account:

3. In the **Password** text box, type the password you specified when you created your account.
4. Click **Login**. The Hosting Panel home page appears.
## Resetting your password
If you forget your password, you can reset it. To do this, follow these steps:
1. Use your web browser to go to [https://clients.stablepoint.com](https://clients.stablepoint.com).
2. Click **Forgot password?**:

3. In the **Email** text box, type the email address associated with your account, and then click **Send reset instructions**:

4. Follow the instructions in the email to reset your password.
## Logging out of the Hosting Panel
To log out of the Hosting Panel, follow these steps:
1. In the Hosting Panel, click the top-right icon, and then click **Logout**:

> [!NOTE]
>
> The letters that appear in the top-right icon vary -- they are your initials.
# Cancelling a product or service on the Hosting Panel
Source: https://kb.stablepoint.com/accounts-billing/billing-accounts/cancelling-a-product-or-service-on-the-hosting-panel
Learn how to cancel a product or service for your account using the Stablepoint Hosting Panel.
This article describes how to cancel a product or service for your account using the Stablepoint Hosting Panel.
## Cancelling a product or service
You can cancel a product or service associated with your account at any time. To do this, follow these steps:
1. Log in to the Hosting Panel at [https://clients.stablepoint.com](https://clients.stablepoint.com).
2. Locate the product or service you want to cancel, and then click **Manage**.
3. In the left sidebar, click **Billing**.
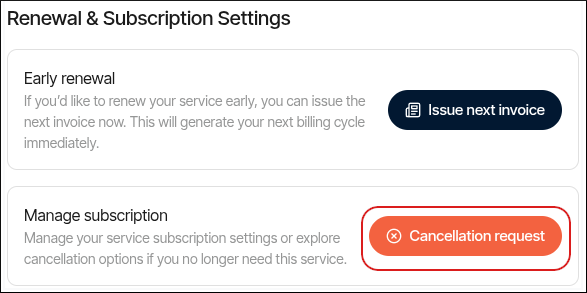
4. Scroll down to the end of the page, and then in the **Renewal & Subscription Settings** section, click **Cancellation request**:
5. In the **Product cancellation request** dialog box, please specify when you want the cancellation to take effect, and a reason for the cancellation:

> [!NOTE]
>
> For cancellations at the end of the billing period, accounts are suspended for 14 days. During this 14-day grace period, if you change your mind you can reactivate your account with all of your data intact. At the end of the 14-day grace period, the account is terminated and all data is removed.
6. Click **Request cancellation**.
## After cancellation
For cancellations at the end of the billing period, you have a subsequent 14-day grace period during which you can reactivate your account if you change your mind, or you can back up your data to a safe location. At the end of the 14-day grace period, the account is terminated and all data is removed.
For immediate cancellations, Stablepoint does not retain any data after you cancel a product or service. Make sure you back up any data that you want to save **before** an immediate cancellation.
> [!NOTE]
>
> To initiate an immediate cancellation, you must open a billing ticket on the Hosting Panel at [https://clients.stablepoint.com](https://clients.stablepoint.com).
Also, if you cancel a hosting account that uses Stablepoint for DNS, please note that you must update the DNS name server entries (and any additional custom DNS records you may have created).
## A few words about cancellation
We value you as a customer!
### Technical issues
If you are considering cancellation because of technical issues, we highly recommend that you [open a ticket](/accounts-billing/billing-accounts/working-with-tickets) with our support team before you submit a cancellation request. Our experienced support personnel can often provide a solution or suggest an alternative approach to any technical problem you may encounter. If you are dissatisfied with a response provided by technical support, please request an escalation, and we will double-check its accuracy.
### Non-technical issues
If you are dissatisfied with any non-technical aspects of our services, we also recommend that you [open a ticket](/accounts-billing/billing-accounts/working-with-tickets) before you submit a cancellation request. We will do our best to address your concerns.
# Domain management in the Hosting Panel
Source: https://kb.stablepoint.com/accounts-billing/billing-accounts/domain-management-in-the-hosting-panel
Learn how to use the Stablepoint Hosting Panel to manage your domains.
This article describes how to use the Stablepoint Hosting Panel to do domain management tasks, such as changing the domain's name servers and setting the registrar lock.
> [!NOTE]
>
> The information in this article only applies to domains purchased directly from Stablepoint. If you purchased a domain from a third-party registrar, check their documentation instead for information about how to manage your domain.
## Viewing domain information
To view basic information about your domain, such as payment and registration dates, follow these steps:
1. Log in to the Hosting Panel at [https://clients.stablepoint.com](https://clients.stablepoint.com).
2. In the left sidebar, under **Products & Services**, click **Domains**:

3. On the **Domains** page, click the domain you want to configure.
> [!TIP]
>
> You can filter the list of domains to only display active, canceled, or all domains. To do this, click the **Active**, **Cancelled**, or **All** tab.
4. Information about your domain appears.
## Viewing and changing the name servers for a domain
To change the name servers for a domain, or to just see the current name servers set for a domain, follow these steps:
1. Log in to the Hosting Panel at [https://clients.stablepoint.com](https://clients.stablepoint.com).
2. In the left sidebar, under **Products & Services**, click **Domains**:

3. On the **Domains** page, click the domain you want to configure.
> [!TIP]
>
> You can filter the list of domains to only display active, canceled, or all domains. To do this, click the **Active**, **Cancelled**, or **All** tab.
4. Click **Update Nameservers**:

5. In the **Update Nameservers** dialog box, type the nameservers you want to use. You must specify at least two (a primary and a secondary) nameservers:

6. Click **Submit**.
DNS changes can take up to 24 hours to fully propagate.
## Setting the registrar lock for a domain
For security reasons, you should keep your domain locked to prevent unauthorized transfers. To do this, follow these steps:
1. Log in to the Hosting Panel at [https://clients.stablepoint.com](https://clients.stablepoint.com).
2. In the left sidebar, under **Products & Services**, click **Domains**:

3. On the **Domains** page, click the domain you want to configure.
> [!TIP]
>
> You can filter the list of domains to only display active, canceled, or all domains. To do this, click the **Active**, **Cancelled**, or **All** tab.
4. Click **Lock/Unlock**:

5. In the **Lock/Unlock** dialog box, the lock options for the domain appear:
* To lock the domain, make sure the **Locked** check box is selected:

* To unlock the domain, make sure the **Locked** check box is *not* selected:

6. Click **Submit**.
## Changing registrant contact information
To change the registrant contact information for a domain, follow these steps:
1. Log in to the Hosting Panel at [https://clients.stablepoint.com](https://clients.stablepoint.com).
2. In the left sidebar, under **Products & Services**, click **Domains**:

3. On the **Domains** page, click the domain you want to configure.
> [!TIP]
>
> You can filter the list of domains to only display active, canceled, or all domains. To do this, click the **Active**, **Cancelled**, or **All** tab.
4. Click **Update Registrant**:

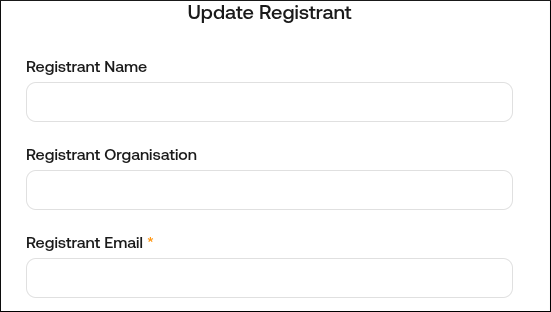
5. In the **Update Registrant** dialog box, update the domain registrant contact information:
6. Click **Submit**.
## Obtaining an EPP code
If you want to transfer your domain to another registrar, you must obtain an EPP (Extensible Provisioning Protocol) code first. The EPP code is an additional security measure that helps prevent unauthorized domain transfers.
Domain registrars may also refer to the EPP code as the *EPP key*, an *AuthInfo code*, a *transfer secret*, or something similar.
To obtain an EPP code, follow these steps:
1. Log in to the Hosting Panel at [https://clients.stablepoint.com](https://clients.stablepoint.com).
2. In the left sidebar, under **Products & Services**, click **Domains**:

3. On the **Domains** page, click the domain you want to configure.
> [!TIP]
>
> You can filter the list of domains to only display active, canceled, or all domains. To do this, click the **Active**, **Cancelled**, or **All** tab.
4. Click **Get EPP Code (Non-UK Domains)**:

5. The Hosting Panel notifies you that the EPP code has been generated.
> [!NOTE]
>
> The EPP code is sent to the registrant e-mail address for the domain.
## Updating the IPS tag (UK domains)
For UK domains, if you want to transfer your domain to another registrar, you must update the IPS (Internet Provider Security) tag for the domain. The IPS tag is an additional security measure that helps prevent unauthorized domain transfers.
To update the IPS tag for your domain, follow these steps:
1. Log in to the Hosting Panel at [https://clients.stablepoint.com](https://clients.stablepoint.com).
2. In the left sidebar, under **Products & Services**, click **Domains**:

3. On the **Domains** page, click the domain you want to configure.
> [!TIP]
>
> You can filter the list of domains to only display active, canceled, or all domains. To do this, click the **Active**, **Cancelled**, or **All** tab.
4. Click **Update IPS Tag (UK Domain Release)**:

5. In the **New IPS Tag** text box, type the IPS tag provided by the gaining registrar:

6. Click **Submit**.
# Managing billing in the Hosting Panel
Source: https://kb.stablepoint.com/accounts-billing/billing-accounts/managing-billing-in-the-hosting-panel
Learn how to manage billing for your Stablepoint account in the Hosting Panel.
Learn how to manage billing for your Stablepoint account. This article covers how to pay invoices, manage billing cycles, and more.
## Viewing orders
To view and manage your orders, follow these steps:
1. Log in to the Hosting Panel at [https://clients.stablepoint.com](https://clients.stablepoint.com).
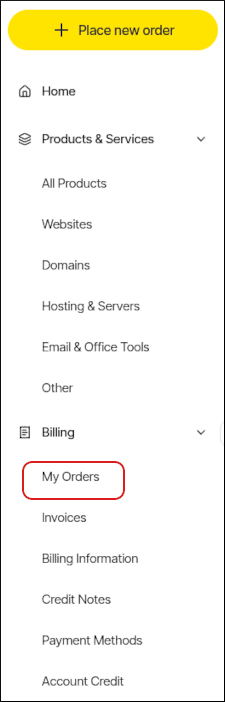
2. In the left sidebar, click **Billing**, and then click **My Orders**:
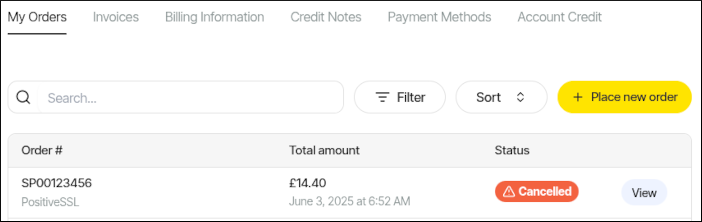
3. On the **Billing** page, the **My Orders** tab appears:
4. On the **My Orders** tab, you can:
* Search for a specific order in the **Search** text box.
* Click **Filter**, and then filter the orders that appear in the list by selecting from a list of criteria.
* Click **Sort**, and then sort orders by date, status, and other criteria.
* Place a new order for additional products and services.
5. To view an order in detail, click **View**.
## Managing invoices
To view and manage your invoices, follow these steps:
1. Log in to the Hosting Panel at [https://clients.stablepoint.com](https://clients.stablepoint.com).
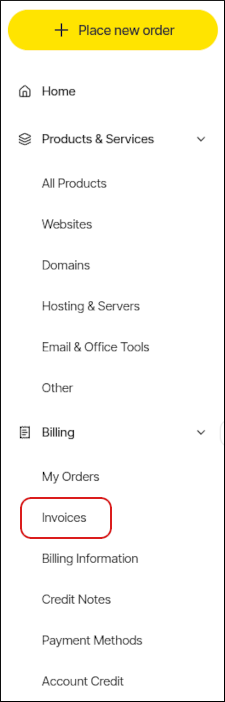
2. In the left sidebar, click **Billing**, and then click **Invoices**:
3. The **Invoices** tab appears:
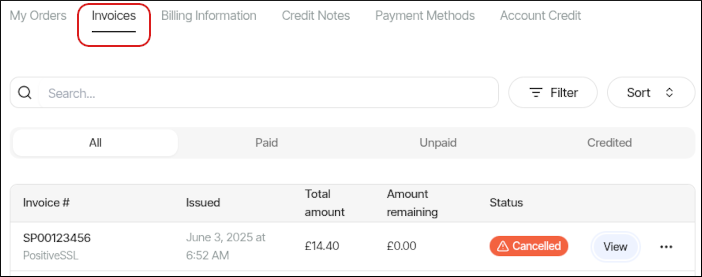
4. On the **Invoices** tab, you can:
* Search for a specific invoice in the **Search** text box.
* Click **Filter**, and then filter the invoices that appear in the list by selecting from a list of criteria.
* Click **Sort**, and then sort invoices by date, status, and other criteria.
* To view an invoice in detail, click **View**.
* To download an invoice, click the three-dot menu, and then click **Download**.
* To pay an invoice, click the three-dot menu, and then click **Pay invoice**.
## Setting billing information
You can specify your preferred currency and invoice consolidation options. To do this, follow these steps:
1. Log in to the Hosting Panel at [https://clients.stablepoint.com](https://clients.stablepoint.com).
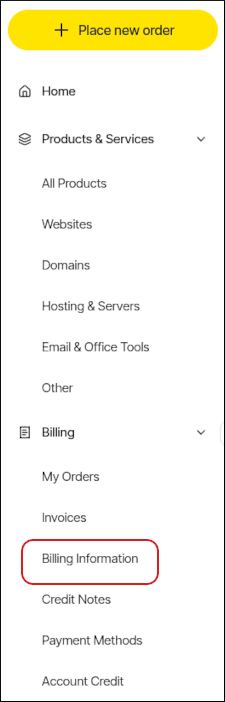
2. In the left sidebar, click **Billing**, and then click **Billing Information**:
3. The **Billing Information** tab appears:
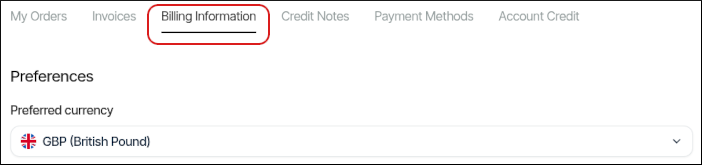
4. Specify the preferences you want, and then click **Save**.
## Managing credit notes
To view credit notes for your account, follow these steps:
1. Log in to the Hosting Panel at [https://clients.stablepoint.com](https://clients.stablepoint.com).
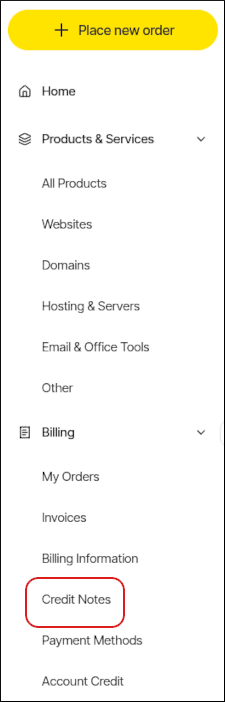
2. In the left sidebar, click **Billing**, and then click **Credit Notes**:
3. The **Credit Notes** tab appears:
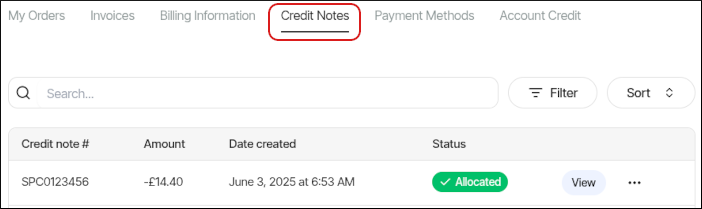
4. On the **Credit Notes** tab, you can:
* Search for a specific credit note in the **Search** text box.
* Click **Filter**, and then filter the credit notes that appear in the list by selecting from a list of criteria.
* Click **Sort**, and then sort credit notes by date and other criteria.
* To view a credit note in detail, click **View**.
* To download a credit note, click the three-dot menu, and then click **Download Credit Note**.
## Adding a payment method
To add a payment method to your account, follow these steps:
1. Log in to the Hosting Panel at [https://clients.stablepoint.com](https://clients.stablepoint.com).
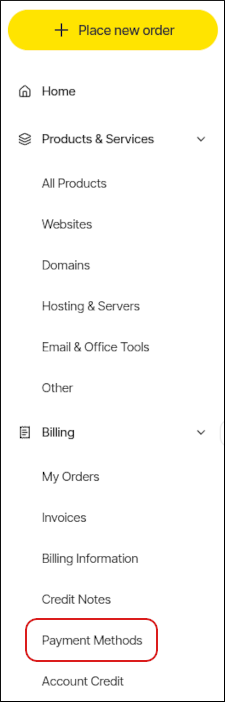
2. In the left sidebar, click **Billing**, and then click **Payment Methods**:
3. The **Payment Methods** tab appears:
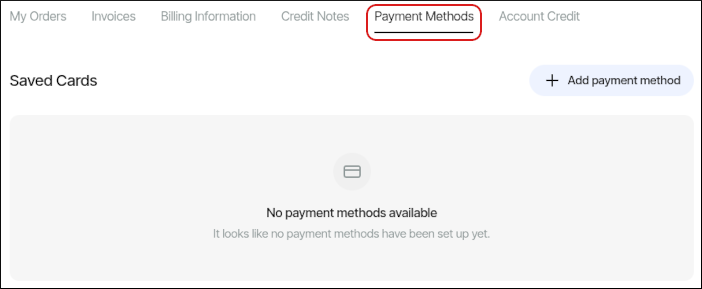
4. Click **Add payment method**.
5. In the **Add a payment method** dialog box, select one of the following:
* **Credit or Debit Card**: For a credit or debit card, specify the card details, and then click **Add payment method**.
* **PayPal**: For PayPal, we cannot save account details for future billing. However, you can still use PayPal when you complete an order.
* **Bank Transfer**: For bank transfers, we cannot save account details for future billing. However, you can still use a bank transfer when you complete an order.
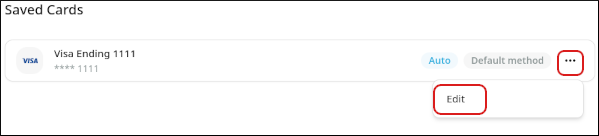
6. After you add a payment method, it appears in the list of payment methods. To edit the payment method, click the three-dot menu, and then click **Edit**:
## Managing account credit
To view and manage your account's credit, follow these steps:
1. Log in to the Hosting Panel at [https://clients.stablepoint.com](https://clients.stablepoint.com).
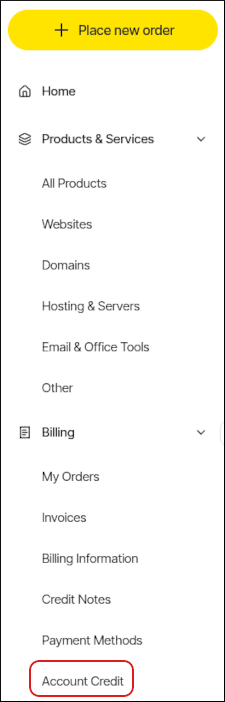
2. In the left sidebar, click **Billing**, and then click **Account Credit**:
3. The **Account Credit** tab appears:
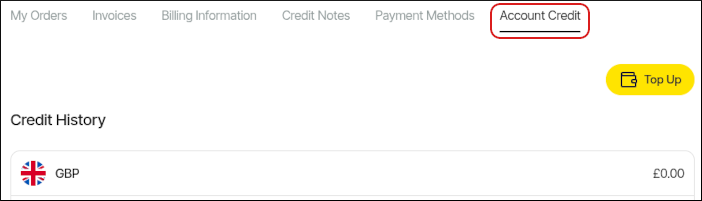
4. To add credit to your account, click **Top Up**. You can add a credit card, debit card, or PayPal account.
# Managing your profile in the Hosting Panel
Source: https://kb.stablepoint.com/accounts-billing/billing-accounts/managing-your-profile-in-the-hosting-panel
Learn how to manage the profile for your Stablepoint account in the Hosting Panel.
This article describes how to manage your profile and account details for your Stablepoint account. This article covers how to manage notifications, security, email history, account delegates, and more.
## Managing your personal information
To manage your personal information, follow these steps:
1. Log in to the Hosting Panel at [https://clients.stablepoint.com](https://clients.stablepoint.com).
2. Click your initials in the top-right corner, and then click **Profile**:

3. The **Personal** section appears. In this section, you can add and modify the following items:
* Name and preferred language: Update the fields, and then click **Save**.
* Email addresses: Click **Add new**, complete the fields, and then click **Add email**.
* Phone numbers: Click **Add new**, complete the fields, and then click **Add phone**.
* Addresses: Click **Add new**, complete the fields, and then click **Add personal address**.
* Companies: Click **Add new**, complete the fields, and then click **Add business address**.
> [!NOTE]
>
> * You must add a phone number and address before you can add a company.
> * You can add a VAT number and registration number for your company.
## Managing account notes
To manage account notes for your account, follow these steps:
1. Log in to the Hosting Panel at [https://clients.stablepoint.com](https://clients.stablepoint.com).
2. Click your initials in the top-right corner, and then click **Profile**:

3. In the left sidebar, click **Notes**.
4. To add a new note, click **Add new**, type the note, and then click **Add note**.
## Managing account security
To manage security settings for your account, follow these steps:
1. Log in to the Hosting Panel at [https://clients.stablepoint.com](https://clients.stablepoint.com).
2. Click your initials in the top-right corner, and then click **Profile**:

3. In the left sidebar, click **Security**.
4. In the **Login** section, you can change your Hosting Panel username.
5. In the **Change password** section, you can change your Hosting Panel password.
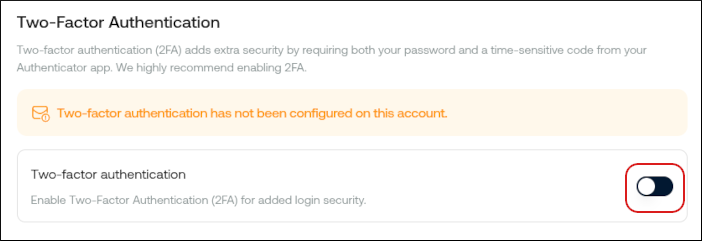
6. In the **Two-factor authentication** section, you can enable two-factor authentication (also known as "2FA"). To do this, click the slider:
* Scan the QR code with an authenticator app on your mobile device:

* In the **Enable two-factor authentication** dialog box, type the six-digit code that appears on your device's authenticator app.
* Two-factor authentication is now enabled. In addition to your username and password, you must provide a six-digit code generated by your device's authenticator app to log in to the Hosting Panel.
7. In the **Account Secrets** section, you can view your account secrets. Click **Add new** to add a secret.
8. To view your support PIN, in the right sidebar click **Support PIN**, and then click **Show PIN**. Support may ask you to provide this PIN to verify your identity when you contact them.
> [!TIP]
>
> You can generate a new support PIN at any time. To do this, click **Support PIN**, and then click **Generate new PIN**.
## Managing notifications
To manage notifications for your account, follow these steps:
1. Log in to the Hosting Panel at [https://clients.stablepoint.com](https://clients.stablepoint.com).
2. Click your initials in the top-right corner, and then click **Profile**:

3. In the left sidebar, click **Notifications**. You can change notification preferences for:
* Billing
* Marketing
* Support
* Service Updates
> [!NOTE]
>
> You cannot disable System notifications. These are essential for the security and operation of your account.
4. To change notification preferences, select or clear the **Email** or **In-App** options, and then click **Save**.
## Managing email history
To view and manage your email history, follow these steps:
1. Log in to the Hosting Panel at [https://clients.stablepoint.com](https://clients.stablepoint.com).
2. Click your initials in the top-right corner, and then click **Profile**:

3. In the left sidebar, click **Email History**. In this section, you can:
* Click the **>** icon to view a message in detail.
* Click **Filter**, and then filter the messages that appear in the list by selecting from a list of criteria.
* Click **Sort**, and then sort messages by date or subject.
## Managing delegates
You can designate delegates to act on your behalf in managing your account. You can grant delegates access to all of your products and services, or only a select number.
> [!NOTE]
>
> Delegates must have an existing account on the Hosting Panel to accept invitations.
To view and manage delegates for your account, follow these steps:
1. Log in to the Hosting Panel at [https://clients.stablepoint.com](https://clients.stablepoint.com).
2. Click your initials in the top-right corner, and then click **Profile**:

3. In the left sidebar, click **Delegates**. In this section, you can:
* Click the **>** icon to view a delegate in detail.
* Click **Filter**, and then filter the delegates that appear in the list by selecting from a list of criteria.
* Click **Sort**, and then sort delegates by their access type or date invited.
4. To add a delegate, click **Invite delegate**. In the **Invite delegate** dialog box, type the email address of the person you want to invite, select what type of access you want to grant, and then click **Send invitation**:

After the invitee accepts the invitation, they can then access the product or service you specified in step 5.
> [!TIP]
>
> Alternatively, if you want to quickly add a new delegate to one of your products or services, go to the product or service, click the **Settings** tab, and in the **Delegate Access** section, click **Invite**:
> 
# Billing & Accounts
Source: https://kb.stablepoint.com/accounts-billing/billing-accounts/overview
This section covers your Stablepoint account and billing: accessing and managing the Hosting Panel, invoices, domains, upgrades, cancellations, and account recovery.
# Recovering account access
Source: https://kb.stablepoint.com/accounts-billing/billing-accounts/recovering-account-access
Learn how to recover access to your Stablepoint account if you get locked out.
You can recover access to your Stablepoint Hosting Panel account if any of the following events occur:
* Your email address is no longer available.
* Your phone number is no longer available.
* You no longer have access to the device that generates two-factor authentication (2FA) codes for your account.
To recover access to your account, follow these steps:
1. Go to [https://clients.stablepoint.com/recovery](https://clients.stablepoint.com/recovery).
2. Select the type of account recovery you need:
* If your email address or phone number is no longer available, click **Lost Access to Hosting Account**. Answer the questions and provide the requested information.
* If your account has two-factor authentication (2FA) enabled and you can no longer generate codes, click **2FA Removal**. Answer the questions and provide the requested information.
3. Complete the online identity verification process.
> [!NOTE]
>
> You will need to provide a photo of a government-issued ID.
4. Our support team will process the request and notify you when account access is restored.
# Renewing a domain purchased from Stablepoint
Source: https://kb.stablepoint.com/accounts-billing/billing-accounts/renewing-a-domain
Learn how to use the Hosting Panel to renew domains you have purchased from Stablepoint.
This article describes how to use the Hosting Panel to manage renewals for domains you have purchased from Stablepoint.
## Configuring automatic renewal for a domain
For greater convenience, you can configure your domains for automatic renewal. When automatic renewal is enabled, Stablepoint automatically sends you a renewal invoice 14 days before before the domain expires. This provides you with enough time to complete the renewal process before domain expiration.
To configure automatic renewal for a domain, follow these steps:
1. Log in to the Hosting Panel at [https://clients.stablepoint.com](https://clients.stablepoint.com).
2. In the left sidebar, under **Products & Services**, click **Domains**:

3. On the **Domains** page, click the domain you want to configure for automatic renewal.
4. In the left sidebar, click **Billing**.
5. Scroll down the page to the **Renewal & Subscription Settings** section, and then click the **Auto-renew** slider to enable or disable automatic renewal:

## Renewing a domain
To renew a domain that you previously purchased from Stablepoint, follow these steps:
1. Log in to the Hosting Panel at [https://clients.stablepoint.com](https://clients.stablepoint.com).
2. In the left sidebar, under **Products & Services**, click **Domains**:

3. On the **Domains** page, click the domain you want to renew.
> [!TIP]
>
> You can filter the list of domains to only display active, canceled, or all domains. To do this, click the **Active**, **Cancelled**, **Pending Cancellation**, or **All** tab.
4. In the left sidebar, click **Billing**, and then pay the invoice for the domain renewal.
# Requesting site migration from another host to Stablepoint
Source: https://kb.stablepoint.com/accounts-billing/billing-accounts/site-migration-request
Learn how to request and initiate a site transfer from another hosting provider to Stablepoint.
Whether you want to upgrade your hosting package, or you’re bringing your site over from another hosting provider, Stablepoint offers seamless site migrations.
## Requesting a migration
To request a migration, follow these steps:
1. Log in to the Hosting Panel at [https://clients.stablepoint.com](https://clients.stablepoint.com).
2. On the home page, click **Manage support tickets**:

3. The **Support** page appears:

4. Click **Open support ticket**, and then in the **Submit a support ticket** section, complete the following information:
* In the **Subject** text box, type **Site migration request**.
* In the **Department** list box, select **Migrations**.
* In the **Message** text box, please specify the following:
* Destination product or service for the migration.
* The domain(s) for the migration.
* Any SSL certificates you may have.
* Access methods for your account, including any cPanel, FTP, or SSH connection details.
* Any other special directions or information you want us to know about your account.
5. Click **Submit ticket**. We will respond to your ticket as soon as possible.
## Fast migrations
We take great pride in providing fast migrations. However, several factors, such as the current host's network speed, the number of sites being migrated, and migration complexity can all influence the migration speed. Our Migrations team will keep you informed of your migration's progress.
A method you can use to expedite your migration is to obtain a cPanel-based backup of your hosting account from your old host, and use FTP or the cPanel File Manager to upload the backup to your account at Stablepoint. If you would like to take advantage of this, please [open a support ticket](https://clients.stablepoint.com) and provide the backup filename with the full path to the directory where you have uploaded it. Our migration team will begin the migration as soon as possible.
## Questions?
If you have any questions, our support team will be more than happy to help you with this process. Please open a ticket at [https://clients.stablepoint.com](https://clients.stablepoint.com) so we can assist you.
# Support Team
Source: https://kb.stablepoint.com/accounts-billing/billing-accounts/support-team
Our support team at Stablepoint are available 24 hours a day, 7 days a week just as you'd require for any questions or issues which may come by.
We believe in providing fast and robust customer service. We provide this via a few different channels:
* Phone Support: **020 3095 4270** (UK) or **+1 518 2506 256** (US)
* Live Chat (via our website)
* Support Tickets (via e-mail or your client area)
We try our best to help you as soon as your request is received and will go above and beyond to exceed your expectations at all times.
Our cloud hardware/network uptime can be seen here [Status Page](https://status.stablepoint.com) and is monitored 24/7, in case you have any issues please contact our support team for any assistance.
# Updating the default email address for your account
Source: https://kb.stablepoint.com/accounts-billing/billing-accounts/updating-the-default-email-address-for-your-account
Learn how to change the primary email address for your account in the Hosting Panel.
You can change the default email address for your Stablepoint account at any time in the Hosting Panel. To do this, follow these steps:
1. Log in to the Hosting Panel at [https://clients.stablepoint.com](https://clients.stablepoint.com).
2. Click your initials in the top-right corner, and then click **Profile**.
3. The **Personal** section appears. In the **Emails** section, locate the email address you want to set as the default, click the three-dot menu icon, and then click **Set as default**:

> [!NOTE]
>
> If the **Set as default** option does not appear, then you only have one email address linked to your account. Click **Add new**, specify a new address, and then click **Add email**. After you verify the new email address, the **Set as default** option appears.
# Upgrading or downgrading your hosting plan
Source: https://kb.stablepoint.com/accounts-billing/billing-accounts/upgrading-or-downgrading-your-hosting-plan
Learn how to upgrade or downgrade your Stablepoint hosting plan.
This article discusses how to upgrade or downgrade your Stablepoint hosting plan.
## About upgrades and downgrades
You can upgrade or downgrade your current plan to a plan that is compatible and available on our website. If you want to switch to a plan that is currently not listed on our website, please contact our support team at [https://clients.stablepoint.com](https://clients.stablepoint.com).
## Upgrading your hosting plan
For some hosting products and services, you can upgrade your plan in the Hosting Panel. To see if your product supports this, follow these steps:
1. Log in to the Hosting Panel at [https://clients.stablepoint.com](https://clients.stablepoint.com).
2. In the left sidebar, under **Products & Services**, click **Hosting & Servers**:
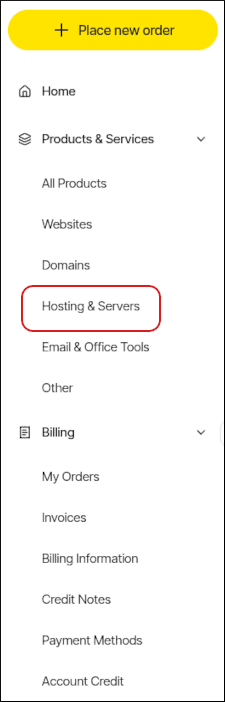
3. On the **Hosting & Servers** page, locate the product or service you want to upgrade, and then click **Manage**.
4. Click **Upgrade**.
> [!WARNING]
>
> If you do not see the **Upgrade** button, then you cannot upgrade your product or service using this method. Instead, please open a ticket on the Hosting Panel at [https://clients.stablepoint.com](https://clients.stablepoint.com). In the ticket, please specify the product you want to upgrade, and the product you want to upgrade it to.
5. Review the options, and then click the product you want.
6. Click **Next**.
7. Review the product plan change, and then click **Confirm Upgrade**.
## Downgrading your hosting plan
To downgrade any hosting plan, please open a ticket on the Hosting Panel at [https://clients.stablepoint.com](https://clients.stablepoint.com). In the ticket, please specify the product you want to downgrade, and the product you want to downgrade it to.
# Viewing and changing settings for cPanel hosting accounts
Source: https://kb.stablepoint.com/accounts-billing/billing-accounts/viewing-and-changing-settings-for-shared-hosting-accounts
You can use the Stablepoint Hosting Panel to view and change login settings for a cPanel hosting account.
This article describes how to use the Stablepoint Hosting Panel to view and change settings for a cPanel hosting account.
## Viewing and changing account login settings
You can use the Stablepoint Hosting Panel to view the username and change your password for your cPanel hosting account.
> [!NOTE]
>
> Your cPanel hosting username and password is different from the e-mail address and password that you use to log in to the Stablepoint Hosting Panel. You use your cPanel hosting username and password to access cPanel, SSH, FTP, and more.
To view or change your cPanel account login settings:
1. Log in to the Hosting Panel at [https://clients.stablepoint.com](https://clients.stablepoint.com).
2. In the left sidebar, under **Products & Services**, click **Hosting & Servers**:

3. On the **Hosting & Servers** page, locate your hosting account, and then click **Manage**.
4. In the **General** section, details appear for your account, including:
* Your username.
* Nameserver information.
* Server name for your account.
* Account IP address.
* Account domain name.
5. To log in to your control panel, click **Login to Control Panel**:

In a separate window, the Hosting Panel automatically logs you in to your cPanel account.
6. To change your password, click **Change Password**:

In the **New password** text box, type your new password, and then click **Change password**.
> [!WARNING]
>
> Make sure you choose a strong password. A strong password helps protect your account.
# Viewing your Support PIN
Source: https://kb.stablepoint.com/accounts-billing/billing-accounts/viewing-your-support-pin
Learn how to view your Support PIN in the Stablepoint Hosting Panel.
This article describes how to view the Support PIN for your account. The Support PIN is a code that Stablepoint uses to help verify account ownership.
> [!NOTE]
>
> We may use the Support PIN in phone calls, online chats, tickets, or any time we need to confirm your identity.
To view or change the Support PIN for your account, follow these steps:
1. Log in to the Hosting Panel at [https://clients.stablepoint.com](https://clients.stablepoint.com).
2. At the top of the page, click **Support PIN**:
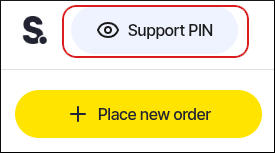
> [!NOTE]
>
> If you are using a mobile device, tap the settings icon:
> 
> Then tap **Support PIN**.
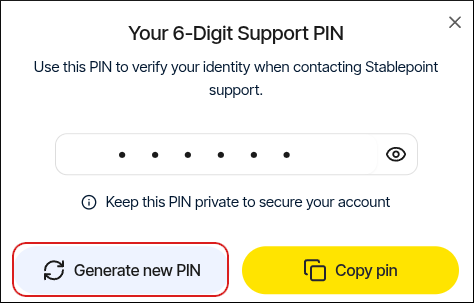
3. To view your support PIN, click the eye icon:
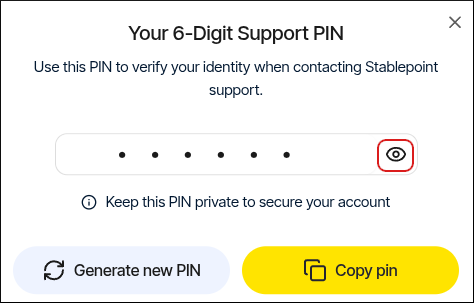
4. To copy your support PIN to the clipboard so you can quickly paste it into a chat with us, click **Copy pin**:
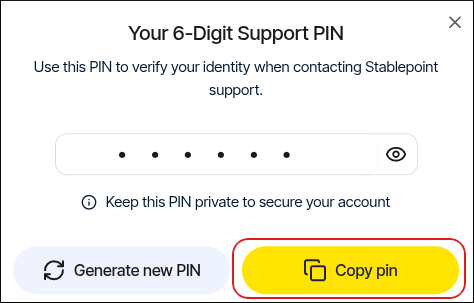
5. To generate a new support PIN, click **Generate new PIN**:
# Working with tickets in the Hosting Panel
Source: https://kb.stablepoint.com/accounts-billing/billing-accounts/working-with-tickets
Learn how to work with tickets in the Stablepoint Hosting Panel.
This article describes how to use the Hosting Panel to open a ticket and view your ticket history. It also includes some useful guidelines to assist you in writing a descriptive, helpful ticket.
## Opening a ticket
Opening a ticket with us on the Hosting Panel is easy. To do this, follow these steps:
1. Log in to the Hosting Panel at [https://clients.stablepoint.com](https://clients.stablepoint.com).
2. On the home page, click **Manage support tickets**:

3. The **Support** page appears:

4. Click **Open Support Ticket**, and then in the **Submit a support ticket** section, complete the following information:
* Ticket subject.
* The department you want to send the ticket to.
* Ticket message: Please follow the suggestions in the section below to write a descriptive, helpful ticket.
* File attachments (optional): You can attach files to the ticket. The currently supported file formats are **PDF**, **JPG**, **PNG**, and **DOCX**.

5. Click **Submit ticket**. We will respond to your ticket as soon as possible.
## Writing a helpful ticket
Writing a helpful ticket is the first step to getting a prompt and correct response. Use the list below as a guide for helpful items to include in your ticket. This list is not exhaustive, and not every item applies to every situation.
1. Try self-help: Our [Knowledge Base](https://kb.stablepoint.com) has solutions to many common problems. Some issues have multiple possible solutions. Any possible solution you try reduces the number of things support needs to investigate, and you might just solve the problem yourself!
2. Include all details: When resolving a ticket, nothing saves time as much as including all of the details. Useful details include:
1. What you have already tried to fix the issue, and what the results were.
2. If an error message is shown, please provide the exact error message received.
3. Tell us about the environment:
1. What operating system are you using on your computer?
2. What browser and version is installed?
3. What CMS (Content Management System) is installed and what version?
4. Describe any recent changes:
1. Was there a manual or automatic update to the software?
2. Was a lot of new data uploaded?
3. Was the site recently migrated?
5. Can the problem be repeated? If so:
1. When did the problem start?
2. Does it happen from multiple locations?
3. Does it happen across multiple browsers?
4. Does it happen at all times of day?
6. If mail delivery is an issue, we may need the complete headers of the e-mail message.
3. Screenshots: Include any screenshots that help describe the issue.
## Viewing your ticket history
You can use the Hosting Panel to view a list of all tickets you have opened previously. To do this, follow these steps:
1. Log in to the Hosting Panel at [https://clients.stablepoint.com](https://clients.stablepoint.com).
2. On the home page, click **Manage support tickets**:

3. The **Support** page appears, with a list of all tickets you have submitted:

* You can search for a specific ticket in the **Search** text box.
* You can click **Filter**, and then filter the tickets that appear in the list by selecting from a list of criteria.
* You can click **Sort**, and then sort tickets by date, subject, and other criteria.
* To view a specific ticket, click the ticket in the list. You can post a reply or close the ticket.
# Server Maintenance Policy
Source: https://kb.stablepoint.com/choosing-stablepoint/legal/server-maintenance-policy
### 1. Purpose
This Server Maintenance Policy discusses the ways in which we maintain our technology to improve and administer the Services (as defined in the Terms of Service) and how you will be impacted by those actions. Capitalized terms used but not defined in this policy have the meaning given to them in our Terms of Service.
### 2. Availability
We target a 99.9% uptime level. We will use our commercially reasonable efforts to provide the Services twenty-four (24) hours a day, seven (7) days a week. However, in order to operate in an efficient and secure manner, servers and network equipment require routine maintenance and upgrades ("Scheduled Downtime") and you acknowledge that from time to time the Services may be unavailable for various reasons, including due to Scheduled Downtime or causes beyond our control. We will provide advance notice of Scheduled Downtime beyond that defined in our Maintenance policy below where possible, and will use commercially reasonable efforts to minimize any other disruption, inaccessibility, or inoperability of our Services. Scheduled Downtime shall not be considered a failure of the Services.
### 3. Maintenance
Planned and unplanned maintenance activities may result in temporary interruptions, delays, or reduced performance of the Services. Such maintenance is required to ensure the ongoing security, stability, and performance of the Services and will not be considered a failure to meet any applicable uptime commitment.
#### a. Definitions
We distinguish between the following types of maintenance:
1. **"Routine Maintenance"** means maintenance activities carried out as part of our normal operations, including routine updates and patches. These activities are expected and are typically performed on an ongoing basis. Routine Maintenance does not require advance notice.
2. **"Scheduled Maintenance"** means planned maintenance activities, including elective work such as infrastructure or network upgrades, which may result in service interruption.
3. **"Emergency Maintenance"** means unplanned maintenance required to address critical issues, including but not limited to security vulnerabilities, system instability, or service-affecting incidents, which may be performed without prior notice and may result in service interruption where necessary.
All maintenance activities may be performed based on the location of the relevant infrastructure or operational requirements.
#### b. Maintenance Scheduling and Execution
Maintenance activities are performed on an ongoing basis and may occur at varying intervals depending on the nature of the Services and underlying infrastructure.
* Routine Maintenance is performed on an ongoing basis as part of normal operations.
* Scheduled Maintenance is typically planned in advance and, where reasonably practicable, performed during off-peak hours, taking into account regional usage patterns. Maintenance activities are coordinated across global infrastructure and may correspond to overnight periods in Europe, the Americas, or Asia-Pacific.
* Emergency Maintenance may be performed at any time as required.
* Certain updates may be deployed on a rolling or automated basis, particularly where no service interruption is required.
* Some maintenance activities, including those affecting certain operating systems or infrastructure components, may require service restarts or reboots.
Maintenance schedules and practices may vary across regions, platforms, and service types, and are subject to change from time to time without notice.
#### c. Update Practices
We employ a range of update and patch management practices depending on the operating environment, including:
* **Linux-based systems** which are generally updated through automated or rolling update processes, which are typically applied on an ongoing (e.g. daily) basis and are not expected to require system reboots in most cases.
* **Windows-based systems** follow vendor-driven update cycles, including common industry release schedules such as Microsoft's Patch Tuesday, and often require system reboots. These typically require less than 30 minutes' downtime but occasionally may require longer depending on the number and nature of updates published by Microsoft and other vendors.
* **Where reboots are** required, they are typically scheduled during off-peak hours for the relevant region. This means that, as an example, a Windows server located in the USA may be offline between 4am and 4:30am UTC during a Patch Tuesday update cycle.
The timing, frequency, and method of updates may vary depending on the system configuration and operational requirements.
#### d. Notification of Maintenance
Routine Maintenance generally does not require advance notice.
We will provide advance notice of Scheduled Maintenance through our status page. In cases where maintenance is expected to result in extended or material service impact (e.g. beyond 30 minutes service outage, or impact during regional business hours), additional notifications may be provided, including via email or other direct communication methods.
Emergency Maintenance by its nature may be performed without prior notice; however, we will use commercially reasonable efforts to provide updates where appropriate.
#### e. Limitations
This Server Maintenance Policy includes but is not limited to: (i) shared servers and accounts, (ii) reseller servers and accounts, (iii) VPS servers and accounts, (iv) dedicated servers and accounts, (v) all network equipment, and (vi) internal websites such as billing and support. Maintenance requirements and details may vary depending on the nature of the Services and infrastructure.
### 4. Backup of Data
Before attempting to troubleshoot any issue yourself or engaging us to assist with Service issues, please **backup any and all data**. You are solely responsible for maintaining adequate and up-to-date backups of your data at all times. To the extent permitted by applicable law, Stablepoint shall not be liable for any loss, damage, or unavailability of your data, regardless of the cause.
### 5. Customer Responsibilities
* **a.** It is the responsibility of the customer to make sure that all Services being provided on their servers are setup to resume operations automatically upon reboot or restart of the particular Service you have with us. Stablepoint will not be held responsible for any problems or service outages caused due to reboots during standard maintenance periods.
* **b. WE HAVE NO RESPONSIBILITY FOR DOWNTIME RESULTING FROM YOUR ACTIONS.**
* **c.** Please contact support at your customer panel and file a ticket if you have any questions.
*Last updated on: 05/29/2026*
# cPanel Transfers
Source: https://kb.stablepoint.com/choosing-stablepoint/moving-to-stablepoint/cpanel-transfers
cPanel allows backups to be transferred between servers and restored as-is. This means that we can take a cPanel backup from your old hosting provider, and restore it to our servers.
This is something that *we must do for you* as the cPanel restore functionality requires root access. As we provide fully managed hosting, we do not provide root access.
Our migrations team can handle cPanel migrations for you at any time.
## Requesting cPanel Transfers
You can request a cPanel transfer by creating a support ticket in our client area.
There are two ways of requesting moves
1. Provide us with access to your existing cPanel account (or WHM account if a reseller). Let us know which accounts to transfer.
2. Generate a full backup on your existing cPanel account and upload it to webspace with us. You can use the cPanel inbuilt SFTP/FTP option to transfer the backup. Then let us know the location.
# Email migration
Source: https://kb.stablepoint.com/choosing-stablepoint/moving-to-stablepoint/email-migration
Traditionally, you can move your e-mails between providers using mail clients. Each mail client has specific instructions to how e-mails can be moved.
[Outlook](https://support.microsoft.com/en-us/office/export-or-backup-email-contacts-and-calendar-to-an-outlook-pst-file-14252b52-3075-4e9b-be4e-ff9ef1068f91)
[Thunderbird](https://www.mboxtooutlook.org/blog/thunderbird-import-export-tools-ng.html)
These are the most commonly used mail clients, if you are using other specific ones it would be best to research what options you have available in that specific client.
## Stablepoint Migration
In terms of Stablepoint, we provide a client area based mail transfer tool as well. You will find the tool when you login to your account and Place new order for Email Migration tool.

Once you have your product active in your account click on the Login button.

!! You will need to create the mailboxes on our servers as well prior to this action.

Once both mailboxes are added, you can start the IMAP transfer.
If you experience any issues with our custom tool feel free to contact us for assistance.
The third option would be to request a migration from us, since we offer free migrations we can perform this operation for you if you don't have the time to or need assistance in general.
You just need to open a new migration , and provide us with `Username ; Password ; and Imap server used for login via mail clients given by your provider`
# Choosing a server location
Source: https://kb.stablepoint.com/choosing-stablepoint/moving-to-stablepoint/hosting-location-choices
Stablepoint is able to offer you the opportunity to host your website in many locations around the world. By offering cPanel in more locations than any other provider, we can offer an easy managed hosting experience - where we manage the hosting services, backups and monitoring leaving you to upload your website and go.
On our [reseller](https://stablepoint.com/reseller-hosting) plans we have 7 regions available. On our [standard web hosting](https://stablepoint.com/web-hosting) we have 9 regions available.
## Why does location matter?
Firstly, the most important point is website performance. By placing your website geographically as close to the bulk of your site visitors, you'll find their website browsing experience of your site is significantly improved. There are figures out there that suggest that conversion rates are significantly better for faster loading sites, and many visitors will click away (bounce) from your site if your site loads altogether too slowly. If you want to target a mainly UK audience, hosting your site in the UK is therefore the best option for you, whereas if you wanted to target users in the East then perhaps Singapore is the best option for your site.
Secondly, the other important benefit of placing your site is an aspect of search engine optimisation (SEO). Google likes to give users somewhat curated results for searches that they make and as such will tend to rank sites that are hosted 'locally' for that user higher than those that are hosted elsewhere. So a site hosted in Europe will tend to rank higher for Google searchers searching from France than a site in the USA, and vice versa.
## What location should I choose?
Choose the location closest to the majority of your customers. Our highest specificiation servers are available in
| Region Name | Included Locations | Typical customer area |
| :- | :- | :- |
| London | London. | UK, Europe and North America. Global. |
| USA. East Coast. | NYC, Washington DC. Also Toronto (sorry, Canada!) | North America, UK, Europe. Global |
| USA. West Coast | San Francisco, Dallas | North America, Central America, South America, Asia |
| Europe | Frankfurt, Amsterdam | Europe, UK, Africa, Middle East |
| Singapore | Singapore | Asia, Global |
| India | Bangalore, Mumbai | India |
## Common questions
Here are the answers to common questions we get:
**Q. What is the best location for...**\
A. Choose the location closest geographically to the majority of your users. All the hubs we offer servers in are well connected. If your users are spread out throughout the whole globe, we tend to recommend NYC or London as locations.
**Q. Can I choose a specific city or infrastructure provider...**\
A. No. We choose the best location for hardware, reliability, and performance. If you need more granular controls you should choose a dedicated server which we can deploy in the datacentre of your choice.
# Pointing your domain
Source: https://kb.stablepoint.com/choosing-stablepoint/moving-to-stablepoint/how-long-does-dns-take-to-propagate
Once you are ready to put your website live with Stablepoint, you need to update your nameservers on your domain to ours:
ns1.stablepoint.com\
ns2.stablepoint.com\
ns3.stablepoint.com\
ns4.stablepoint.com
Name server changes are usually quite quick, but in some cases can take up to 48 hours to fully start working. This period, called propagation, is the projected length of time it takes for root name servers and cache records across the entire web to be updated with your website's DNS information.
## What factors affect DNS propagation time?
When you update the DNS (Domain Name System) records in your domain name's zone file, it can take up to 48 hours for those updates to propagate throughout the Internet. While we strive to make updates as quickly as possible, the DNS propagation time for your domain name depends on several factors that we cannot control.
Factors that affect DNS propagation time include:
* Your TTL (Time to Live) settings — You can set the TTL for each DNS record in your domain name's zone file. TTL is the time period for which servers cache the information for your DNS records. For example, if you set the TTL for a particular record to one hour, servers store the information for that record locally for an hour before retrieving updated information from your authoritative nameserver. Shorter TTL settings make can increase propagation speed. However, shorter settings also increase the number of queries to your authoritative nameserver, and that increased load slows your server's processing time.
* Your ISP (Internet Service Provider) — Your ISP caches DNS records (stores the data locally rather than retrieving fresh data from your DNS server) to speed up Web browsing and reduce traffic, which slows your propagation time. Some ISPs ignore TTL settings and only update their cached records every two to three days.
* Your domain name's registry — If you change your domain name's nameservers, we relay your change request to the registry within minutes, and they publish your authoritative NS (nameserver) records to their root zone. Most registries update their zones promptly. For example, VeriSign refreshes zones for .com domain names every three minutes. However, not all registries make updates that quickly. Registries often protect their root nameservers from overuse by setting a high TTL of up to 48 hours or more for those NS records. In addition, even though recursive nameservers should not cache the root NS records, some ISPs cache the information anyway, which can result in a longer nameserver propagation time.
# How to Order Your Hosting Account
Source: https://kb.stablepoint.com/choosing-stablepoint/moving-to-stablepoint/how-to-order-your-hosting-account
In this article, learn how to order a hosting account from Stablepoint.
### Viewing the options
1. Log in to your account.
2. Click the Place new order menu tab.
3. On the left menu, click Cloud Web Hosting or Dedicated Cloud Servers to read about our current offerings.
We offer unique hosting services for charities and nonprofits. Availability is limited and subject to verification.
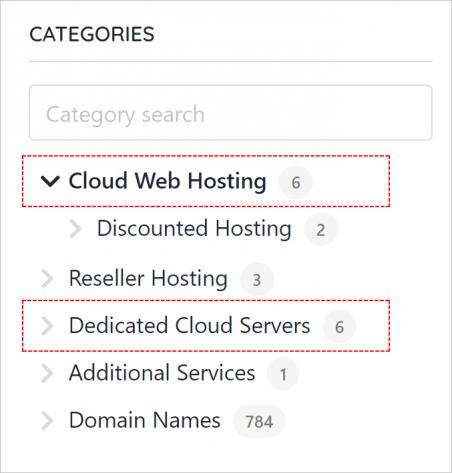
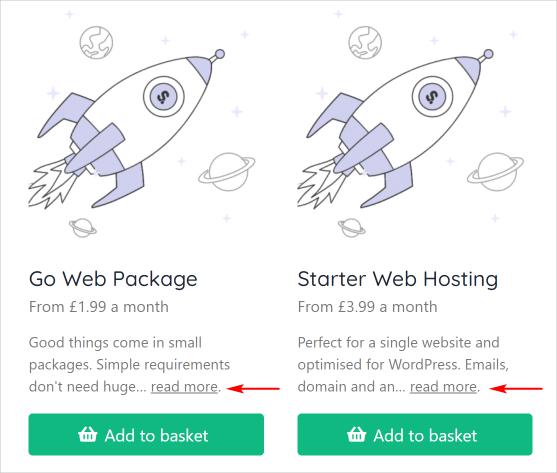
Click an icon or the Read more link to see hosting service details.
### Ordering a service
1. Click the Add to basket button.
2. Review the options and select a billing term.
3. Select a server location.
4. Enter your account domain name (e.g. [www.example.com](http://www.example.com)).
5. Click the Add to basket button.
6. Review the order details.
7. Add discount code. (optional)
8. Click the Continue to checkout button.
##### Checkout page
1. On the Checkout page, review the order one more time.
2. Add payment details.
3. Click the Place order & pay button to complete the transaction.
Stablepoint displays the Order complete page. We also send you a confirmation email message.
# Previewing websites
Source: https://kb.stablepoint.com/choosing-stablepoint/moving-to-stablepoint/how-to-preview-your-website-on-our-servers
Whether we just migrated your website to ourselves, or you just want to develop a website without making it live right away as you work on it, here are a few tips that will show you how to see the website without it actually being live from ourselves yet. Included will be instructions for every popular OS currently in use.
### Quick preview in browser
We have created a tool you can use to preview your site quickly without setting up the above. You will need to go here: [https://sitepreview.org/](https://sitepreview.org/)
You only need to enter your domain name, the tool will automatically pick up which server your website is on. **However** if there is any error or if you have your domain name added to multiple servers from us, you might want to untick the box "Lookup IP against mysecurecloudhost.com nameservers" and enter the IP manually in the second field.
### Windows 10
You will need to open Notepad using administrator priviledges, you can easily do that with the search function. Type Notepad -> Right click on it -> choose "Run as administrator"; like so:
# Migration process
Source: https://kb.stablepoint.com/choosing-stablepoint/moving-to-stablepoint/migration-process
Stablepoint offers a free migration service with all of our hosting packages. This means we can move your site with minimal or even zero downtime - all that we need from you are your existing hosting log-in details so that we can get access to your files and database(s).
## Requesting migrations
To start this process you just need to raise a ticket with us under the **Support** section in your client area and enter your details there. If this is for a *new* hosting account or server you should first place the order for that new service.
You can request as many migrations as you like, at any point. You do not need to do all of your migrations at once.
## How long do migrations take?
Usually we can do migrations quickly and start immediately. However, please note that manual migrations can take a couple of days depending on the size and complexity of your website as well as depending what ways to transfer the data are allowed on the outgoing server.
You can also request that a migration start at a specific time, or be done out of hours.
## cPanel Migrations
If you are using a provider that uses cPanel as well, we can move your content (databases,files,emails,forwarders,etc.) in one go.
cPanel has the function to quickly create a full backup file which we can easily restore from our end. To do this, we will need your existing host's cPanel login details, and it is also important that your host allows you to create your own cPanel account backups (unfortunately some hosts disable this and we have to do it manually which can take longer).
## Non cPanel Migrations
* If your provider doesn't use cPanel, we will manually copy your site files using FTP (or SSH, if it is available) and download a copy of your database(s).
## Mail migrations
If you are moving email accounts, we have a free [mail migrations tool](https://clients.stablepoint.com/order/product?catid=81e580e7-3028-d174-e7e5-4965e36d9129\&pid=75de9701-92e1-d042-0956-465378325869). This performs an IMAP transfer from the old server to the new server.
## Previewing migrations
Once the migration is completed, you can have a look at the final result using a hosts file. [Check out our step-by-step guide how to setup a hosts file](/choosing-stablepoint/moving-to-stablepoint/how-to-preview-your-website-on-our-servers)
## Putting the new site live
Once you confirm everything is working as it should you're ready to point your nameservers to ourselves:
* ns1.stablepoint.com
* ns2.stablepoint.com
* ns3.stablepoint.com
* ns4.stablepoint.com
Once the nameservers are updated, your domain name will start pointing to our servers and load your content from here.
If you have any questions regarding the above feel free to contact us for more info.
# Why Choose Stablepoint?
Source: https://kb.stablepoint.com/choosing-stablepoint/moving-to-stablepoint/overview
This section explains why Stablepoint is the right choice and how to move your hosting to us, from ordering and migrations to DNS propagation.
# Upgrading and Downgrading
Source: https://kb.stablepoint.com/choosing-stablepoint/moving-to-stablepoint/upgrading-and-downgrading
We want to make it as easy as possible to move between packages. We do not want to penalise you for starting with a smaller package and upgrading as you require more resources.
In general, we can easily upgrade and downgrade you between packages as long as they of the same category (e.g. shared hosting, reseller hosting, servers).
## How to upgrade
You can upgrade at any time by raising a ticket with our support team in your client area. Automation for these upgrades is coming soon.
We will charge the *pro rata difference in price*.
In most cases an upgrade is automatic - the limits are just soft limits. For example if you upgraded from our Go plan to our Starter plan this is a simple change and results in no disruption in downtime. Equally, migrating between any of our Reseller plans results in no downtime or disruption. Upgrading or downgrading a server requires a simple reboot we can do at any time.
## Moving between shared and reseller hosting
We can add reseller privileges to a shared account. However there is no way for us to merge multiple cPanel accounts into one account, or to split one cPanel account into multiple accounts.
## Upgrading to a server
If your site has reached the level of traffic or importance that it requires a dedicated server, we would be delighted to handle this for you. Our systems team will take care of the move and upgrade for you seamlessly. We would generally recommend ordering a new server here and then we will handle the migration.
## Downgrades
Downgrades can be done at any time. However please note we will not credit you back for unused time on the higher plan. Our pricing per period scales down the longer you commit. If you think you will only need a higher plan for a shorter period, please choose our monthly billing cycle.
# What is Web Hosting?
Source: https://kb.stablepoint.com/choosing-stablepoint/moving-to-stablepoint/what-is-web-hosting
If you are new to web hosting and need a summary of what to expect, here are a few points to help you understand web hosting better.
What does it mean? In full term it's called "Website Hosting" . It refers to a package that gives you space and resources to host your website data inside.
Very important to note, is that this is a separate service from "domain names". A domain name is the URL in your browser ('website.com' for example) , and it connects to the Website Hosting package in order to display that data. You need both of these services to have a website.
So in order to start making a website, the first step is to purchase 1. A domain name , and 2. Web hosting package.
There are many different types of website hosting and in order to avoid any confusion, we will describe only the types that we do provide.
## cPanel hosting.
This refers to the single account plans that we offer. It is one cPanel account with the specifications listed in front of each plan. You should select the plan that best fits your needs based on those specifications.
You may have website/s and email/s and manage them with various tools.
These packages are located on a shared server, with other users having similar packages. The accounts are completely separated using Cagefs so your data is safe no matter what happens with other users on the same server.
## Reseller Hosting
Resellers receive a limited amount of accounts (ex: 50 , 100) and a control panel to manage each of them as well as their reseller tools. The name of this reseller control panel is "WHM".
They can create packages (much like our single account plans) and give them as many resources as they want, then sell them to customers for a price. These packages are located on a shared server as well.
## Dedicated Servers
Dedicated servers are exactly that , an entire server dedicated to your needs. There are two types of servers: one is unmanaged and it means you need install everything from scratch, and two is the one that we offer: managed servers which we handle at software end so that all you need to do is manage your cPanel accounts and data.
This is a great option if you wish to be independent and have your own server.
If you need assistance with picking a hosting for you, don't hesitate to get in touch with us!
# Can you host adult content?
Source: https://kb.stablepoint.com/choosing-stablepoint/offers-limitations/can-you-host-adult-content
We allow adult content as long as it is legal under UK and US law. We do not allow video streaming or tube websites.\
[**Content Restrictions and DMCA Compliance**](/choosing-stablepoint/offers-limitations/content-restrictions-and-dmca-compliance)\
[**Terms of Service**](/choosing-stablepoint/legal/terms-of-service)
# Charity Hosting
Source: https://kb.stablepoint.com/choosing-stablepoint/offers-limitations/charity-and-not-for-profit-hosting
We offer [free charity hosting](https://stablepoint.com/charity-hosting) at Stablepoint. This provides a powerful free web hosting account at absolutely no charge for registered charities.
We also provide the same plan to not-for-profits, for a low monthly price.
To sign up just go through our usual order process from the [charity hosting page](https://stablepoint.com/charity-hosting). Please note that the account must be in the name of the charity.
## Charity discounts on higher level plans
We can offer a 20% recurring discount on our shared and reseller plans also. Please contact our support team to arrange.
# Content Restrictions and DMCA Compliance
Source: https://kb.stablepoint.com/choosing-stablepoint/offers-limitations/content-restrictions-and-dmca-compliance
The following content is forbidden on our hosting:
* Any bots, including IRC or other social bots e.g. Telegram bots
* Any Warez (i.e. copyrighted content you do not have rights to)
* Phishing Content
* Bulk mailing
* Audio streaming
* Video "tube" websites
* IP Scanners, Brute Force Programs;
* Any financial institution websites (banking, insurance, investment) unless explicitly approved in writing from our team who will ask to see proof of regulatory approval.
* Pharmaceutical websites
* Lottery sites
* File Storage, including movies, applications, computer backups
* File upload websites
* Distribution of confidential and personal information;
* Mobile app downloads
* NextCloud/OpenCloud
* Any account found to be hosting the above will be immediately taken offline.
### Do you Allow Adult Sites?
We allow adult sites which are legal in the United States of America and the United Kingdom.
### Do you supprot media streaming?
We support HTTP streaming on shared servers; however, live streaming is not supported.
### DMCA Compliance
Most of our infrastructure is in the US, which puts your web presence under the jurisdiction of US law. Laws like the Digital Millennium Copyright Act (DMCA). We may be required by law to send you notices such as DMCA takedown notices, UDRP notices, etc, please note that we will comply with the requests.
# Banned countries
Source: https://kb.stablepoint.com/choosing-stablepoint/offers-limitations/countries-with-potential-service-restrictions
As you may know there are a few countries which are restricted by the `US Export restriction` laws. For instance our top providers: Linode, Digital Ocean, Amazon, Google - they are all based in the US and their laws apply to our servers as well, regardless of the location of the data centre.
For these countries we cannot guarantee that you will be able to view your websites on our servers without a VPN to another non-sanctioned country \~ and also we can `NOT` issue free SSLs for.
* AF Afghanistan
* CU Cuba
* ER Eritrea
* GN Guinea
* IR Iran, Islamic Republic of
* KP Korea, Democratic People's Republic of
* LR Liberia
* North Cyprus
* SD Sudan
* SL Sierra Leone
* SS South Sudan
* SY Syrian Arab Republic
* ZW Zimbabwe
If you are a resident of the above mentioned countries please keep the above mentioned in mind, we recommend pursuing local providers to ensure the best service for your websites.
# Discounts and Promo Codes
Source: https://kb.stablepoint.com/choosing-stablepoint/offers-limitations/discounts-and-promo-codes
Stablepoint pricing is extremely competitive, but we have discounts and promotions available which can help you to get on board with us.
## Money Back Guarantee
We have a [Money-Back Guarantee](/choosing-stablepoint/offers-limitations/money-back-guarantee) which applies to new shared and reseller orders with Stablepoint.
## Discounts for Larger Billing Periods.
We provide significant discounts if you commit for a longer period than just monthly.
For example, if you pay yearly, you usually get the equivalent of two months free. For example:
Here is our [Unlimited Reseller](https://stablepoint.com/reseller-hosting) pricing in monthly and annual form.
| Currency | Monthly Price | Annual Price | Annual Price per Month |
| :- | :- | :- | :- |
| GBP | £19.99 | £199 | £16.58 |
| USD | \$27.99 | \$279 | \$23.25 |
| EUR | €24.99 | €249 | €20.75 |
## Promotional Discounts
From time to time we offer discounts and promotions on our services. You may find these online, in advertising, or on our website.
Well done for finding this page -- you can also use one of the following:
MOVEME - This will give you 90% off the first month.\
AWESOME - This will give you 20% off a yearly order.
## Migrations
Note that we also have a free migration service, which can make it very straightforward to transfer your websites over to Stablepoint. Read more about our [migration process in this article](/choosing-stablepoint/moving-to-stablepoint/migration-process).
# Email Limits
Source: https://kb.stablepoint.com/choosing-stablepoint/offers-limitations/email-limits
On our shared and reseller hosting we apply some high limits to prevent abuse of the system affecting other users.
**These are:**
* Each cPanel account can send a maximum of 100 emails per hour. Our system is not designed for bulk mailing. You should use a bulk mailing provider like mailgun, or newsletter software like CampaignMonitor or Mailchimp.
* You can have as many mailboxes as you like. However we recommend mailboxes are capped at a 10GB limit. The reason for that is that we offer unlimited NvME/SSD disk space, backed up multiple times day. We do have a fair usage policy which we will enact if we consider you to be using a larger amount of disk resources than suitable for shared hosting (typically a single cPanel over 50GB within a reseller of 350GB+)
# LVE Resource Limits Explained
Source: https://kb.stablepoint.com/choosing-stablepoint/offers-limitations/lve-limits-explained
In this article we will explain what exactly is being offered when you look at our packages, in terms of LVE limits.
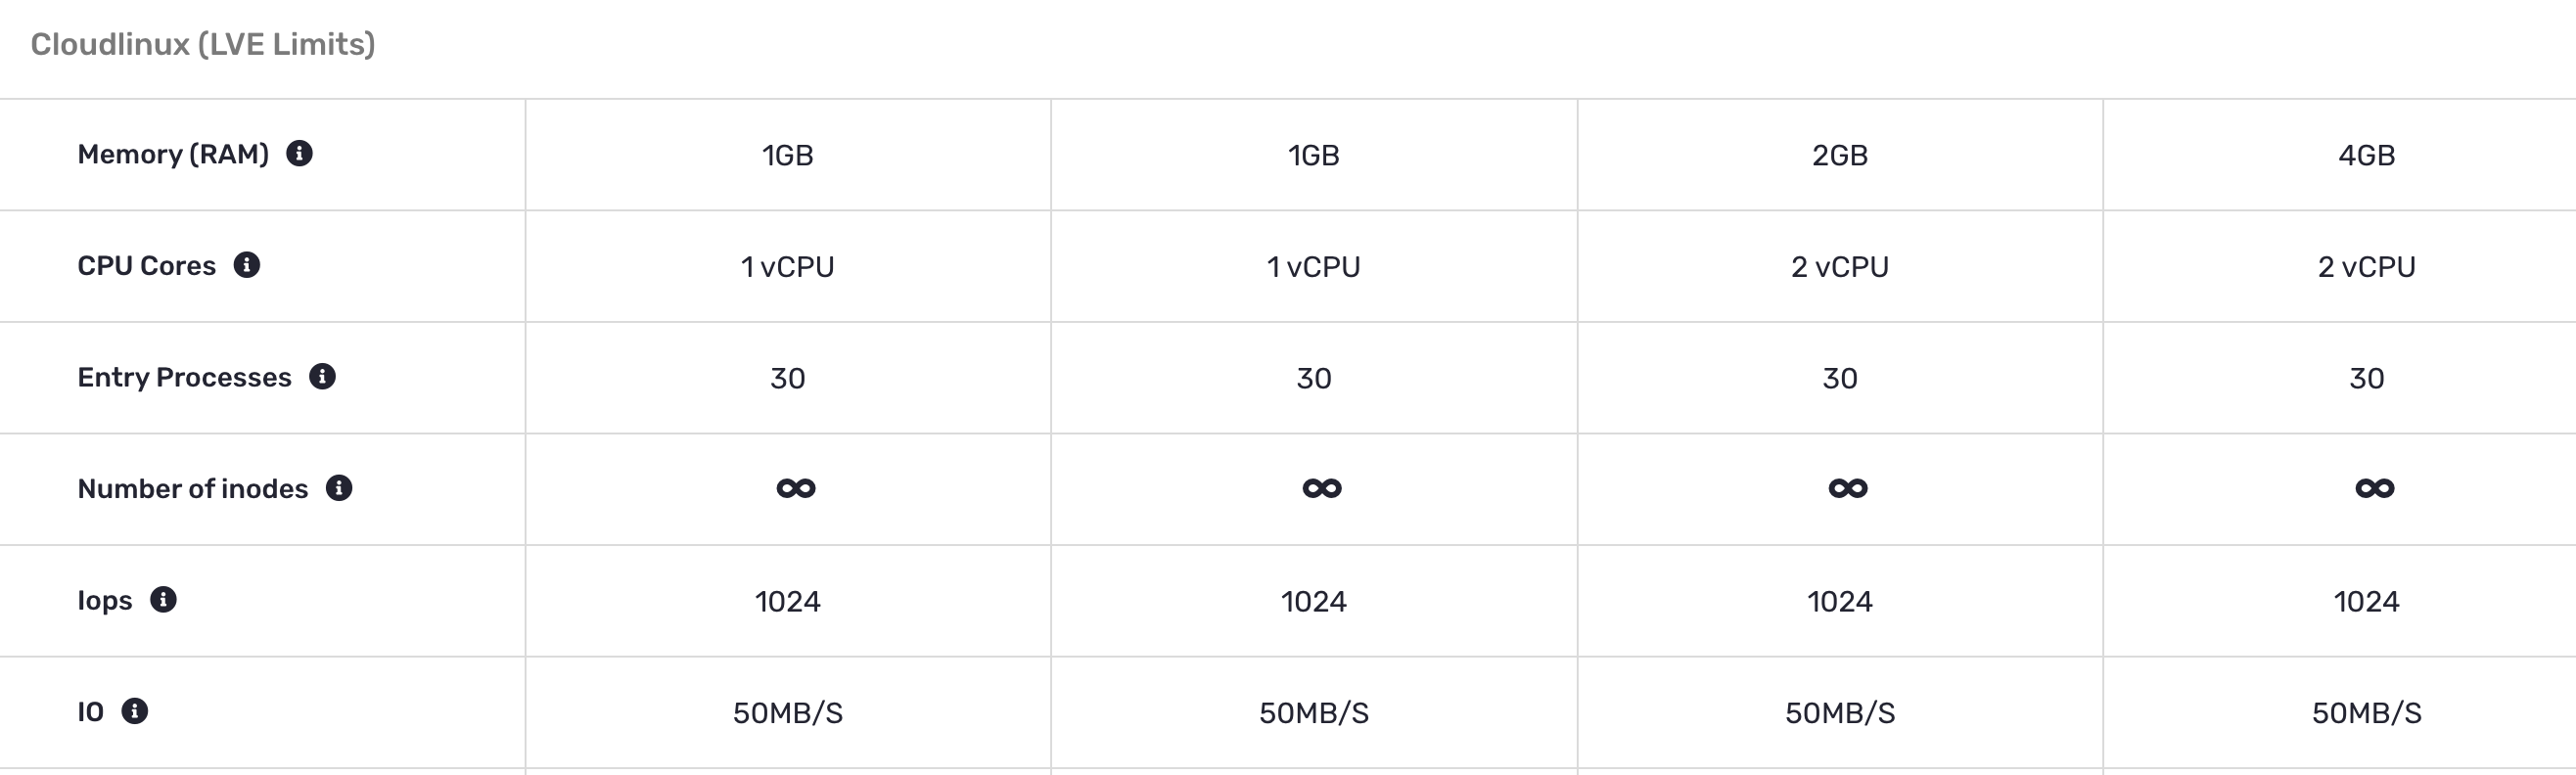
Here are our LVE limits on the current plans we have:
## Normal single cPanel plans
## Reseller plans
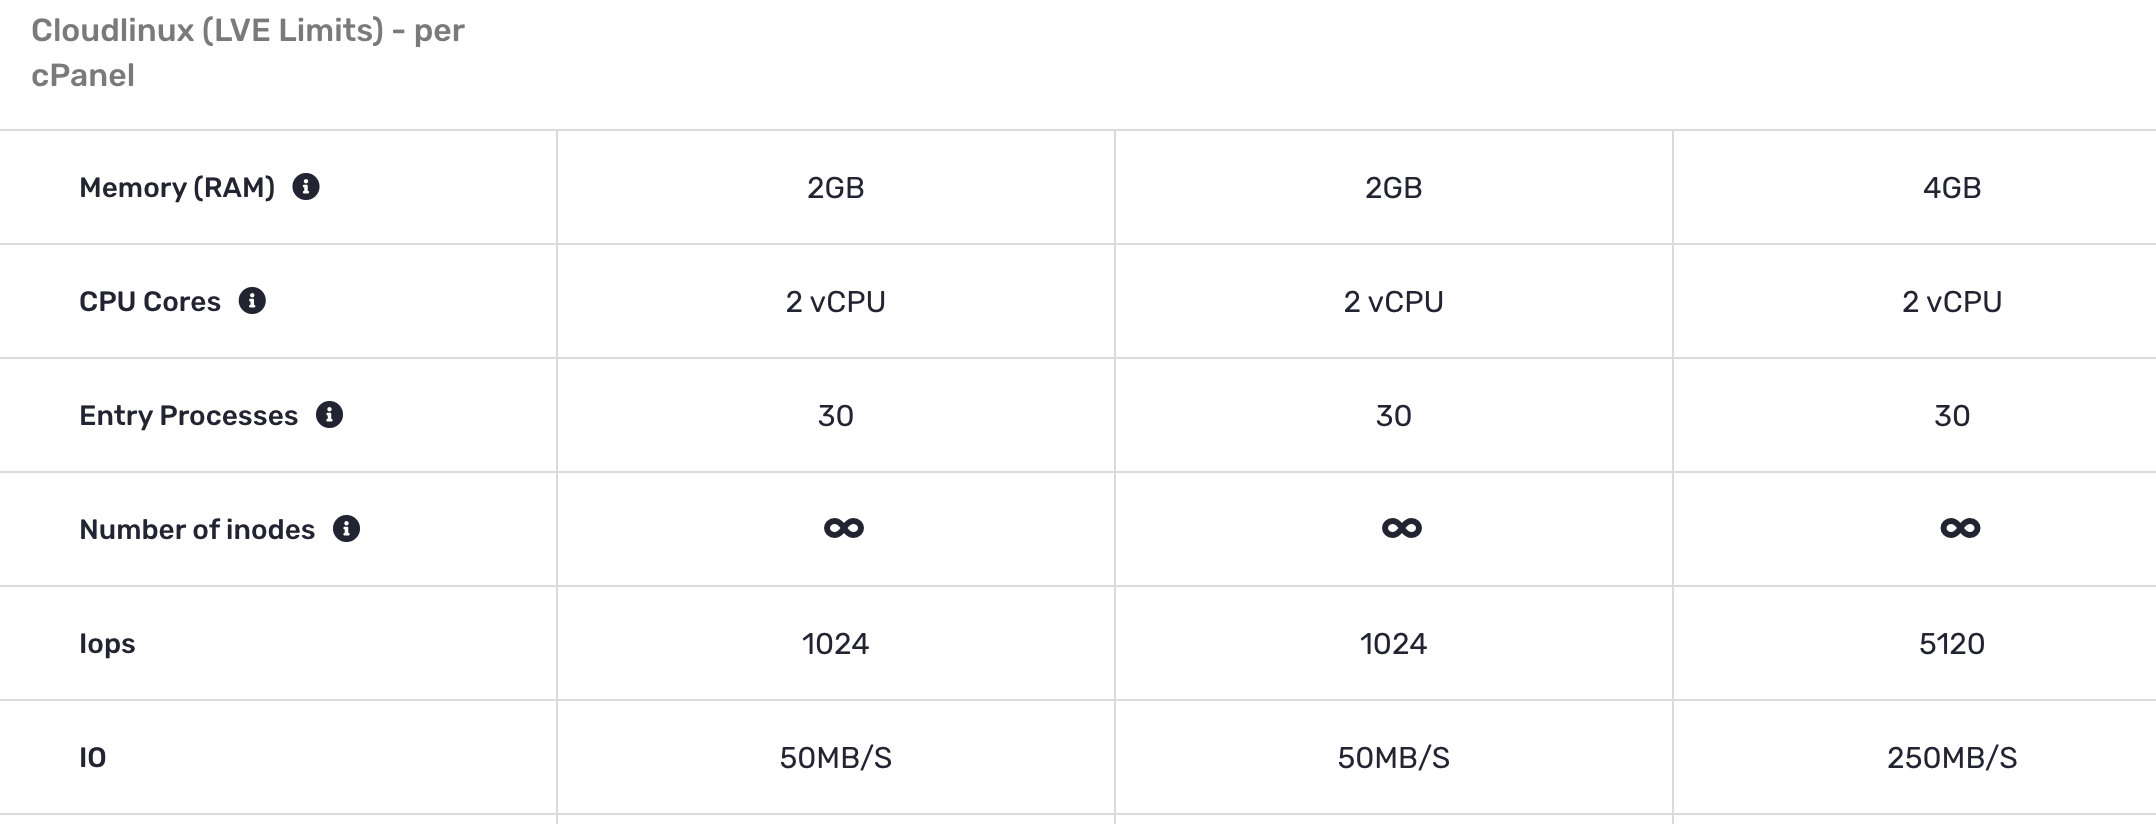
## **Memory(RAM)**
RAM memory is storing temporary data needed to perform tasks. This resource is affected by scripts, actions you take on your website as well as users accessing various pages of your website and MySQL data queries. Once a task is completed, the data is then removed so the space can be used by the next task. We allocate an X amount of Gigabytes(GB) for each package to your use.
A few tips to keep your RAM usage optimal:
* Install a caching plugin! - Serving cached content to users will reduce the active tasks that use up RAM from repeated visits;
* Disable automatic cron tasks (example: wp\_cron from Wordpress) from running by themselves, and have them running at set intervals of time from the "Cron Jobs" tab in cPanel;
* Keep your CMS tidy with the latest versions of Core,Plugins and Themes. Make sure to remove unneeded plugins to avoid straining the memory usage with tasks that you don't need.
* Optimize
## **CPU Cores**
CPU is basically a piece of hardware used in processing of data, it has sockets with "cores" that each perform tasks requested. CPU will first serve cached data if available, and if not it will refer to the data served by RAM to be processed during the actions taken over your site (as mentioned above for RAM usage). We allocate an X number of cores that your account can use to process tasks.
A few tips to keep your CPU usage optimal:
* Caching!!! CPU will always serve Cache first before RAM, Cache is served much easier and faster than a new task processed via RAM, the more cached content the less strain on CPU cores;
* Use a CDN like Cloudflare which you can enable from your cPanel menu. This option helps offload searching and delivering of your website data, which also helps keep strain off the server;
* Again, make sure your website is optimized, up to date, and tidy(remove content/data you don't need).
## **Entry Processes**
Entry processes are the number of processes that enter your account: for example every PHP page accessed by a user, SSH sessions and cron jobs. These are usually come-and-go, they are processed fast by the CPU depending on the type of request that is being made. We allocate an X number of processes being called at once.
A few tips to keep your Entry Processes from hitting the limit:
* Optimise your SQL queries;
* Simplify the code in your website, so the process can be dealt with faster;
* Disable automated tasks like wp\_cron and admin-ajax.php(for Wordpress) ;
* Condition search engine crawlers using a robots.txt file;
* Optimize website to avoid unnecessary processes from running.
## **Number of inodes**
Inodes are, to explain in simple terms, little storage "boxes" used to hold the data of each file and folder under your hosting space. So let's say 70.000 inodes used = 70.000 files and folders.
There are no limits to how many inodes you can use on any of our hosting plans.
## **Iops and IO**
IOPS stands for Input/Output Operations Per Second. This limit affects the number of write/read data blocks served on your website.
IO stands for Input/Output and is measured in MB per second. This limits affects the size of write/read data blocks served on your website.
It is generally affected by the other limits mentioned above, should you optimize those appropriately, you shouldn't have issues with these two either.
## **CageFS Security**
CageFS is a feature offered by Cloudlinux, it defines the LVE limits explained above for each account, not allowing them to interfere with other accounts. It is the wall that prevents your neighbor from entering/harming your apartment in a block (so to speak).
Please note that this does not apply for MySQL. While the resources are separated and maintained per cPanel account, MySQL is elementary for all accounts to use.
If you require a visualisation of this, think of it just as the above comparison with the apartments - while you have your own space and resources, the piping is shared through the walls, so if you were to break a pipe it would affect all residents until fixed. That being said please be mindful of others when organizing your database operations.
If you have any further questions or concerns on the matter, feel free to contact our support team any time - we are available to help 24/7.
# Money-Back Guarantee
Source: https://kb.stablepoint.com/choosing-stablepoint/offers-limitations/money-back-guarantee
We offer a no-quibble 30 day money-back guarantee on all shared and reseller hosting packages. If you cancel for whatever reason within the first 30 days we will refund you in full.
Our premium unlimited reseller package comes with an additional 15 days - so in total a 45 day money back guarantee.
Our dedicated servers come with a 7 day money back guarantee (not those on top of hyperscalers such as AWS/Google, or bespoke configurations).
We want all customers to enjoy using our service and have faith in the speed of our hosting, and the quality of our support team.
## Conditions
* The money back guarantee offer applies to all of our shared and reseller hosting packages.
* You can cancel at any point in the first 30 days after service activation and you will receive a full refund.
* Other than the off-the-shelf dedicated specifications we offer, domains, dedicated servers and other products are non-refundable and do not qualify for our money-back guarantee. We register domains immediately and their registration is non-reversible. The domain is fully yours and you can point it elsewhere or transfer it away from Stablepoint however.
* If you have received a free domain registration or transfer with your hosting package, the standard price of that domain registration or transfer will be deducted from the refund. However the domain will be fully yours to use as if you had purchased it standalone.
* Claiming under our money-back guarantee does not stop you from ordering from us again in future. However, we only offer one money-back guarantee per customer. I.e. if you purchased a hosting plan today and cancelled and were refunded tomorrow, you could order another hosting plan next week but would not be able to again receive a refund should you cancel it.
## Why do you offer a money back guarantee?
We think our service is awesome and we want you to be able to try it without fear of commitment. We never tie our customers into long-term contracts.
# Offers & Limitations
Source: https://kb.stablepoint.com/choosing-stablepoint/offers-limitations/overview
This section covers our offers, discounts, guarantees, and the limitations that apply to Stablepoint hosting services.
# Server Specification
Source: https://kb.stablepoint.com/choosing-stablepoint/server-specification
As of March 2022 we are upgrading all hardware we provision new accounts to high specification NvME servers with AMD EPYC CPUs. As a result of this performance boost we are also increasing resource allowances on all accounts. Full details of these changes are included below.
## Server Choices
We can offer our high specification NVME hosting in the following locations:
* US-West
* US-East
* London
* Singapore
* India
* Europe
* Australia
We can offer additional locations on our shared hosting plans and on dedicated servers though these may not be at this high specification. We strongly recommend choosing one of the above locations when ordering.
We use a mixture of cloud infrastructure providers and we choose the best provider based on performance and reliability. You cannot choose a more specific location or provider. If you choose Europe you may be in Frankfurt or Amsterdam; in US-East you may be in New York City or Washington DC. If you need a more granular choice you should opt for a dedicated server.
## Service Specification
All servers are provisioned indentically and while they may vary slightly, include:
* NvME Volumes
* AMD EPYC CPUs
* CloudLinux 8
* Redundant RAID Storage
* Offsite Backups
* 10GBIT+ Network
* LiteSpeed
* Imunify360
* Softaculous Pro
* SitePad
* Anycast DNS
* Inline DDOS protection (although we do not protect clients against DDOS attacks and may take sites offline if they are under attack).
On these servers our default CloudLinux limits (per cPanel) are:
* Up to 4GB RAM depending on package
* Up to 2 vCPU depending on package
* IO - Between 20MB/S and 100MB/S depending on package
* Iops - Between 1024 and 5200 depending on package.
## Existing Clients on Older Servers
We will be upgrading all clients to this new hardware if not already updated. We will be in touch to arrange the move, or clients can get in touch in advance to request the update.
If an existing client wishes to migrate more websites to our hosting, the reseller account will need to be moved to the new hardware first.
## LVE Manager
LVE Manager *will* be available on Premium Resellers only by default. It will not be available on any other reseller packages. If a reseller sets the limit higher than the package allows (4GB) it will be automatically reduced.
## Mailing Limits
By default each cPanel account has a mailing limit of 100 emails per hour.
On request we can increase this to 300 emails per hour. Beyond that we recommend a mass mailing solution such as mailgun or MailChimp.
## Unlimited Disk Space
We are extremely generous with disk space and offer an unlimited web hosting experience on some of our packages. On these packages we do not limit disk space as long as the space is used for websites and not for archive or storage of data.
At some stage a site outgrows shared hosting and we do have a fair usage policy. If your whole account is larger than 250GB we will get in touch and assist you in reducing usage of any cPanel account greater than 50GB. We can offer you alternatives that are more suitable, or may be able to allow you to purchase additional space at the cost of \$0.30c per GB per month.
This supersedes any other usage limits such as mail quotas.
# Cloning a Dev Wordpress Site to Domain
Source: https://kb.stablepoint.com/cloning-a-dev-wordpress-site-to-domain
> [!NOTE]
>
> **How to move a developer's version of a website to its own new URL**
Building websites for clients with our flagship reseller plan is very easy to do thanks to its powerful WordPress Toolkit. But many of us don’t know what to do in a situation where you’ve built your clients website in a temporary URL and you want to now move it to its own account. How do you update URLs? How do you change hard-coded links? The WordPress Toolkit makes all of this easy to do.
**Scenario**
You’ve built a customer's website on a subdomain so you can show your customer the new website you’ve built and want to get their “OK” before moving it to their primary domain. The customer has signed off on it and is ready for you to put the website you’ve just built onto either a newly created account that is empty, or to replace the site the client currently has on their website with the copy you’ve designed. Here are the steps
1. In Enhance, log into (or ‘impersonate’) the account that holds the website you have built for your client. In this example, we have built it in [dev.reseller.com](http://dev.reseller.com).
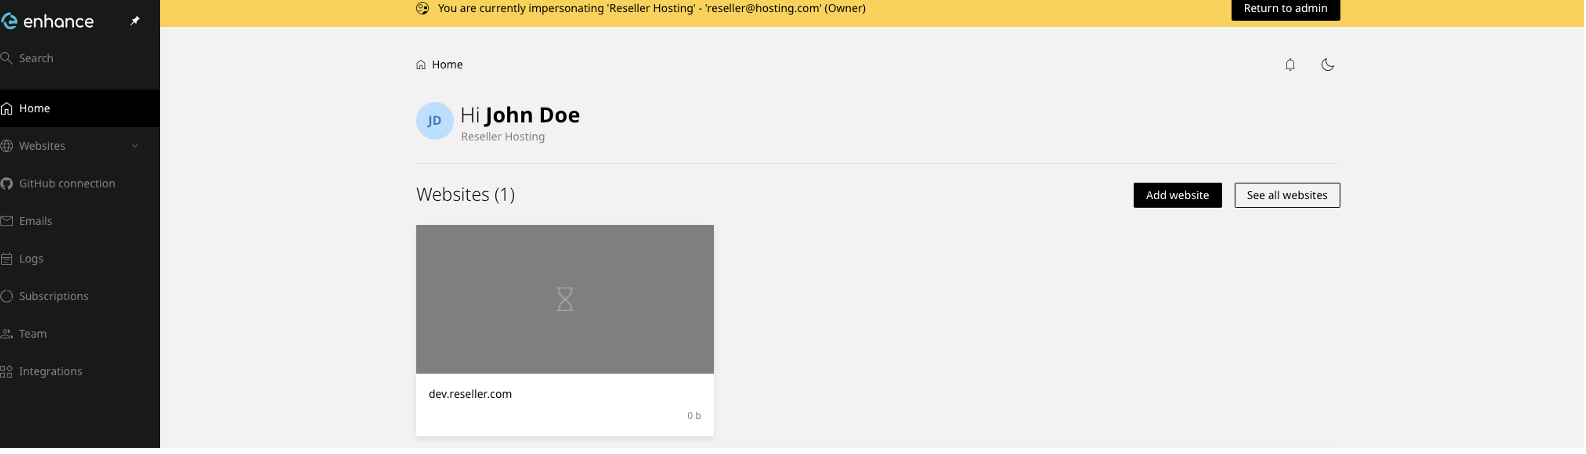
2. Click their website name so you’re taking to the control panels primary page for this account. Here, you will see a ‘Clone’ button with a drop down. If the primary website does not yet exist and you’re not replacing a preexisting website, select “To a new Website”. \
**If you are overwriting a preexisting Website, please skip over to 2B**
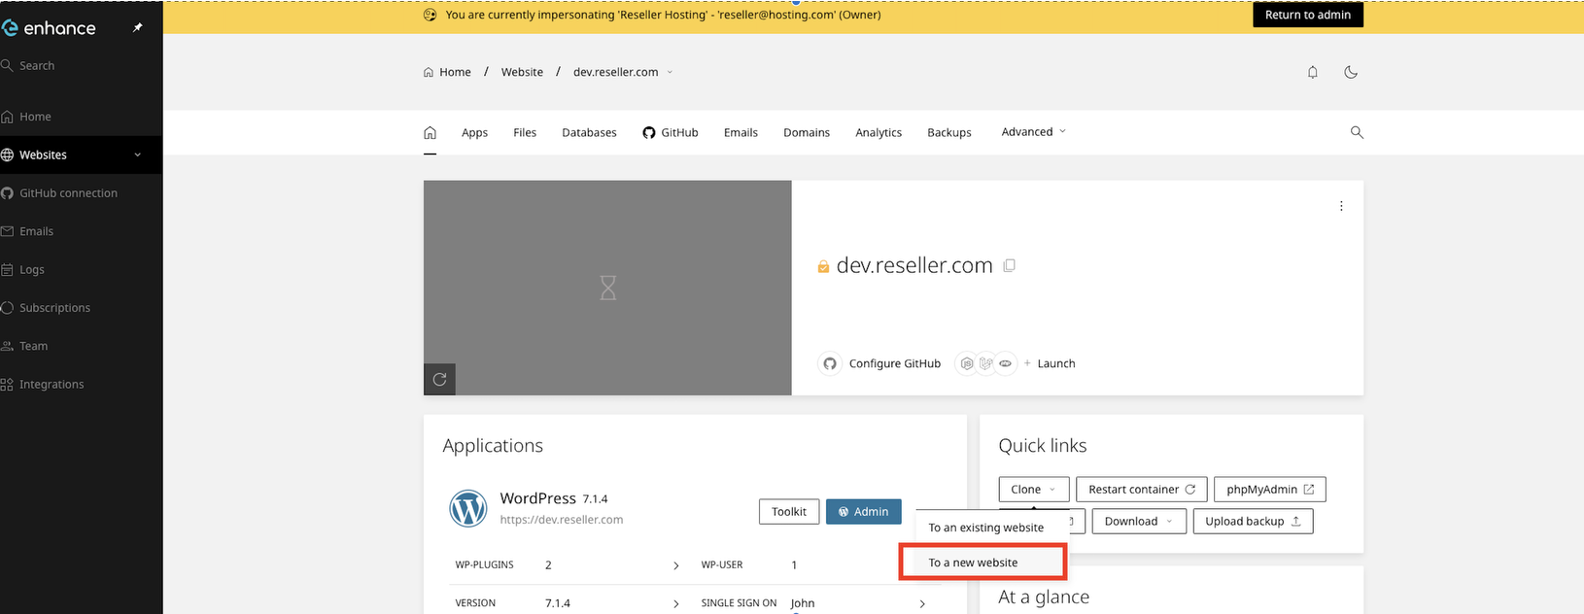
**2B**. If the client already has a preexisting WordPress website that you would like to overwrite, you want to select “To an existing website”
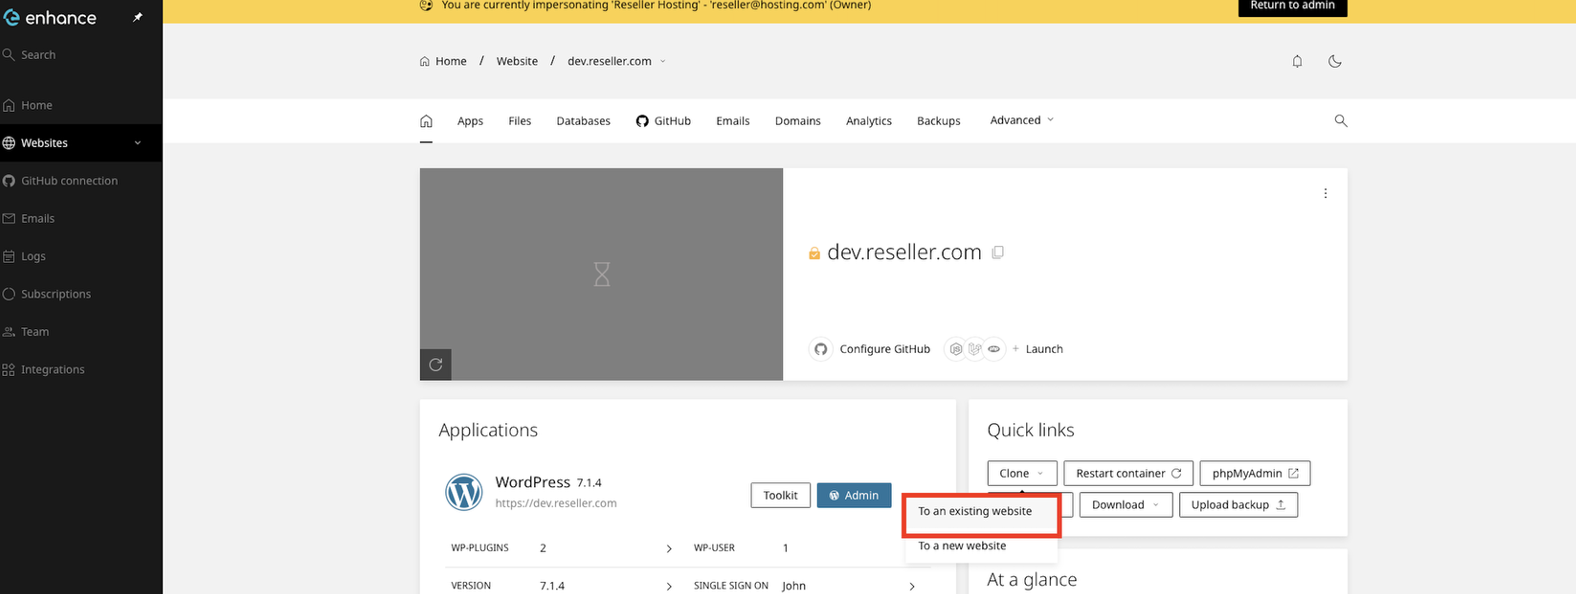
\
\
**2B.** On the pop-up, select the domain of their existing website and leave everything else as-is. You would only exclude wp-config.php or wp-content in an event where the customer wants to keep their old data from their old site. So select the website, click “clone”. Then SKIP step 3 and proceed to Step 4
3. On the popup, put in the name of the domain you would like to copy this dev copy of their website to. Make sure to have “Perform a WordPress search and replace” enabled because this is where the magic happens. The toolkit will scan and update the URL’s needed to make your WordPress website work on a different domain. Then click on ‘Clone’
4. The powerful WordPress Toolkit will now scan your WordPress website for any old database names, URLs and more so that they correctly work on the new domain for you. When it’s done, you will see “Manage Website” and will want to click it.
5. That’s it! The entire website has now easily been cloned over from the development copy you were working on over to their real primary domains.
> [!TIP]
>
> You can keep the old dev copy if you would like or just delete it when it’s safe to do so since everything has been copied over.
# Creating Unlimited Websites on Your Enhance Reseller Plan
Source: https://kb.stablepoint.com/creating-unlimited-websites-on-your-enhance-reseller-plan
If you're moving to Enhance from a cPanel/WHM reseller account, you're used to a repetitive process: create one cPanel account, then add as many “addon domains” under it as you like — none of which count against your account quota.
Enhance uses the same underlying idea, but it introduces one extra layer that cPanel doesn't have: Customers. Understanding this one difference is the key to unlocking unlimited websites on your plan, and it's the most common point of confusion for anyone coming from cPanel.
This guide walks through exactly how it works.
| **cPanel / WHM** | **Enhance** |
| :- | :- |
| Create a cPanel account | Create a Customer |
| Log in to that cPanel account | Impersonate that Customer |
| Add unlimited “**addon domains**” under the account | Create 1 website, then add unlimited “**domains**” under that website |
| WHM shows “1” account no matter how many “addons” exist | Your quota shows 1 website no matter how many “domains” exist |
# Step-by-step walkthrough
## 1. Create the Customer
Start by creating a Customer record. This is the layer that doesn't exist in cPanel — think of it as the container your end user's hosting lives in.

## 2. Check the package quota
Before creating anything, check the package you assigned to the Customer. In this example, the package allows 1 website (and 1 staging website). That's expected, correct, and **IMPORTANT**— don't increase this number. Giving the customer more than 1 website means you’re essentially giving them more than 1 hosting account.

The package you created under Settings > Packages should show “1” website quota but then as many ‘domains’ you need, also known as “addon domains” in the cPanel world

## 3. Impersonate the Customer and create their one website
Impersonate the Customer (this is the Enhance equivalent of logging into their cPanel account) and add their website.

Once it's created, you'll see it listed under their account:

## 4. Go to the Domains tab of that website
This is where the “unlimited addon domains” experience lives in Enhance. Click the website you just created and then click into its Domains tab.

## 5. Add a domain
Click Add domain. You'll see that your package allows you to create unlimited Addon domains, and each one gets its own document root — exactly like an addon domain in cPanel.

Repeat this step for every additional site the Customer needs. None of these count against the 1-website quota, because they're domains living inside that single website — not separate websites.
# If you resell hosting to your own customers
Enhance includes master-reseller capabilities, meaning you're able to sell reseller hosting to your own customers. This is powerful, but it's also where most of the confusion comes from — so here's what to know if you're setting up packages for people below you.
## **When you build a package for your own customer, set “Number of websites” to 1.**
If your customer currently runs 10 sites, your first instinct is to give them a package with a 10-website quota. **Don't**. On a cPanel reseller plan, those 10 sites were never 10 separate “accounts” — they were 10 addon domains under a single account. The Enhance equivalent is the same: your customer should have 1 website, with as many domains under it as they need. If you set “Number of websites” higher than 1, you're effectively selling your customer multiple separate hosting accounts rather than the single reseller-style account they're expecting — and each additional website will draw down your own quota.
## **So where does your customer get unlimited sites, then?**
Further down the same package-creation screen, you'll find a Domains section. This is the direct equivalent of cPanel's addon domain limit. Set this to whatever number you'd like your customer to have (or leave it unlimited) — this is what lets them create additional domains under their one website, just as they could with addon domains on a cPanel reseller plan.

# Quick recap
* Customer = the container for an end user's hosting (doesn't exist in cPanel)
* Website = the equivalent of a cPanel account — this should stay at 1 per customer
* Domains (added inside a website) = the equivalent of cPanel addon domains — this is where you set your unlimited (or high) number
Following this pattern keeps your quota usage accurate and gives your customers the same unlimited-site experience they had on cPanel.
# Accessing your web site before DNS propagation is complete
Source: https://kb.stablepoint.com/domain-management/accessing-your-website-before-DNS-propagation
DNS propagation must complete before starting to use your domain name. Read this article to learn methods for viewing your site before it completes.
After you update your domain's name server settings, DNS propagation can take 24 hours to complete. During this time, you cannot use your domain name. However, you can bypass DNS and view your web site by using a shared URL or the *hosts* file.
> [!WARNING]
>
> **Important**
>
> Some content management systems (CMS) and web applications may not display correctly when you use a shared URL. This is because they are configured to use your domain name, which is different from the shared URL. For example, you must update two database settings every time you use a different domain name with WordPress.
## Method #1: Use the hosts file
Another method for bypassing DNS is to use the *hosts* file on your local computer. The *hosts* file contains domain name to IP address mappings. These mappings mimic the function of a DNS server, and allow you to "trick" your computer into associating a domain name with a particular IP address.
To use the *hosts* file to bypass DNS for your domain, follow these steps:
1. Open the *hosts* file in a text editor. The location of the *hosts* file depends on your computer's operating system:
* On Microsoft Windows computers, the *hosts* file is located at *%SystemRoot%\system32\drivers\etc\hosts*.
> 📘 Note
>
> * On Windows Vista, Windows 7, and Windows 8, click **Start**, search for Notepad, right-click the icon, and select **Run as Administrator**.
> * On Windows 10, Windows 11, click **Start**, type `notepad`, right-click **Notepad**, and then click **Run as administrator**.\
> This starts Notepad with the elevated privileges necessary to open, modify, and save the *hosts* file. Note that in Notepad's **Open** dialog, you must use the **All Files** filter to see the *hosts* file.
* On Apple Macintosh computers, the *hosts* file is located at */etc/hosts*. For example, in a terminal window\
type `sudo nano /etc/hosts` to open the file in a text editor with the correct permissions.
* On Linux computers, the *hosts* file is located at */etc/hosts*.
> 🚧 Important
>
> The *hosts* file is a plain text file, so you should use a plain text editor like Notepad or nano to edit it. Do **not** use a word processor like Microsoft Word, which can add additional formatting and cause more problems than it solves!
2. When you open the *hosts* file, you should see an entry that resembles the following line:
```text theme={null}
127.0.0.1 localhost
```
3. To create a new mapping for your domain, add the following line to the file:
```text theme={null}
192.0.43.10 example.com www.example.com
```
Replace the IP address with your Stablepoint server's IP address, and replace *example.com* with your web site's domain name. You can obtain your account's IP address by logging in to [https://clients.stablepoint.com/](https://clients.stablepoint.com/)
4. Save the *hosts* file and exit the text editor. For example, if you are using the nano text editor, press **Ctrl+O**, press **Enter**, and then press **Ctrl+X**.
> 🚧 Important
>
> If you are using macOS, you should also clear the DNS cache.
5. To test the configuration, restart your web browser and go to [*http://example.com*](http://example.com) or [*http://www.example.com*](http://www.example.com), where\_example.com\_ represents your domain name. You should see your web site's main page (assuming you have created some content).
> 🚧 Important
>
> After DNS propagation is complete, make sure you go back and remove the relevant entries from the *hosts* file!
## SSL certificates before propagation
Modern browsers increasingly expect SSL connections and generate error messages when SSL is not used. To get the best preview of your site before DNS updates, use one of the following methods. These methods only work with the *hosts* file method described above.
### Copying an existing SSL certificate
If your site currently has an SSL certificate, you can move it to your new location. To move the SSL certificate, make a copy of the certificate and the private key. It is not necessary to move files; you can simply copy the certificate and key to your computer's clipboard and then paste it in place.
### Using a self-signed certificate
If you do not already have an SSL certificate, you can create one and use it temporarily to view your site with SSL. When your site is ready to go live, you should replace the self-signed certificate with a certificate from a recognized certificate authority (CA).
## More information
For more information about the *hosts* file, please visit [http://en.wikipedia.org/wiki/Hosts\_(file)](https://en.wikipedia.org/wiki/Hosts_\(file\)).
# DNS settings
Source: https://kb.stablepoint.com/domain-management/dns-settings
In order to change your domain name's DNS settings from Stablepoint first make sure your nameservers are correctly pointing to us:
* ns1.stablepoint.com
* ns2.stablepoint.com
* ns3.stablepoint.com
* ns4.stablepoint.com
Once your DNS is pointing to us, you can login to your hosting plan with us, in cPanel you will see the "Zone Editor" button
From here you can manage your DNS by adding new records as well as editing or deleting existing ones.
If you need any assistance or have any questions regarding the adding of new DNS records or editing existing ones you can contact our support channels 24/7.
# How to manage your domain?
Source: https://kb.stablepoint.com/domain-management/domain-management
Managing your domain names is easy with Stablepoint. With any domain registered or transferred to Stablepoint, you'll be able to manage it in the [Client](https://my.stablepoint.com) area.
From here you can point your domain name to our systems/infrastructure from the "Nameservers" tab :
* ns1.stablepoint.com
* ns2.stablepoint.com
* ns3.stablepoint.com
* ns4.stablepoint.com
By default, domains registered with us will point to these nameservers but domains transferred in to us will retain their old nameservers. To link your domain to your hosting with us, just make sure the nameservers point to those above. It can take up to 24 hours for DNS changes to propagate, so after making the change it is a case of being patient. If there are still issues after 24 hours, please let us know and we can investigate.
# Domain Transfers
Source: https://kb.stablepoint.com/domain-management/domain-transfers-1/domain-transfers
Transferring a domain to Stablepoint is a very easy process. However if you need any help or get stuck at any point please remember we are here to help - just get in touch and we can assist at any point in the process. The domain transfer method is slightly different depending on the domain extension (e.g. com, .net, .co.uk) because they are handled by different registry organisations.
Whatever the domain, the first step is to place your domain transfer order [through our order form](https://clients.stablepoint.com/order/shop?catid=8179365e-d861-2504-1055-4e9d37718203).
In the main, there are two main branches:
**.uk domain transfers**
.uk domains (.co.uk, .me.uk, org.uk, .uk) are free to transfer in. This means you do not pay when you checkout with a .uk transfer in your cart through Stablepoint. The expiry date of your domain remains the same when you transfer a domain in and so your renewal becomes due on the same date as before, it's just that you'll pay Stablepoint to renew the domain instead of your old provider.
[To transfer the domain, please order the transfer through here.](https://clients.stablepoint.com/order/shop?catid=8179365e-d861-2504-1055-4e9d37718203)
Once you've ordered the domain, you then just need to ask your existing provider to change the IPS tag to
**HOSTINGUK**
.uk transfers are generally very fast (usually less than an hour). Once the transfer completes, the domain will show as 'active' in your [Client](https://clients.stablepoint.com) area under 'Domains'. From here you can then set the nameservers to point to Stablepoint. Our nameservers are:-
* ns1.stablepoint.com
* ns2.stablepoint.com
* ns3.stablepoint.com
* ns4.stablepoint.com
**GTLD (.com, .net, .org, and most others)**\
Most other domains are considered 'GTLDs' - this is short for 'Global Top Level Domains', so are not country specific. The transfer process for these domains is slightly different and relies on an authorization code or EPP key. When you order a GTLD transfer, you pay the same as a 1 year registration or renewal because as part of the transfer process, an additional year is added on to the domain expiration date.
The steps to transfer a GTLD domain are:
**- Step 1** - Unlock the domain name with your current provider(usually called Registrar Lock) ;
**- Step 2** - Obtain the EPP key (sometimes called an authorization code) from your current provider ;
**- Step 3** - Order the domain transfer from Stablepoint : [My Services->Domain Names->Add New](https://clients.stablepoint.com/domains/new) ;
**- Step 4** - Once the order is paid for, you'll receive an email to the admin contact on the domain you're transferring. There'll be a link to click and this is where you need to approve the domain transfer to Stablepoint.
**- Step 5** - Once you've approved the transfer, it can take several days for the transfer to go through (depending on the registry it's coming from), but you'll receive an email from Stablepoint once the transfer is completed.
If you're using a country specific domain name extension, feel free to contact us for more information about how you can bring it over.
# Domain Transfers
Source: https://kb.stablepoint.com/domain-management/domain-transfers-1/overview
This section explains how to transfer domain names to Stablepoint, including the different processes for UK domains and generic TLDs.
# UK Domain Transfers
Source: https://kb.stablepoint.com/domain-management/domain-transfers-1/uk-domain-transfers
UK domains have a different transfer procedure to standard domains. They are straightforward to transfer and usually instant. They also do not include a compulsory one year domain renewal.
UK domains include
* co.uk
* me.uk
* org.uk
* ltd.uk
* uk
We are fully accredited Nominet members. Note that .gov.uk is run by JISC and is standalone. We can also offer .gov.uk registrations.
1. Place the [order](https://stablepoint.com/domain-names) for the [domain-transfer](https://stablepoint.com/domain-names). There is no charge for this order.
2. Go to your existing provider and change the IPSTAG to ours: **HOSTINGUK**
## What happens to the expiry date
A UK domain transfer does not change the domain name expiry date. That will remain exactly as it was prior to transfer.
## Will nameservers update on transfer?
No. Nothing will change on the transfer of your domain to us.
# Do we still need Whois Privacy Protection?
Source: https://kb.stablepoint.com/domain-management/registering-domains/do-we-still-need-whois-privacy-protection
From Stablepoint's point of view no, you no longer need whois privacy protection in certain conditions.
Since the GDPR rules were introduced, the whois privacy protection has been added as default to domains registered in the EU.
If your domain name is showing details instead of "REDACTED FOR PRIVACY" , and you wish to have whois protection enabled please contact us.
# Registering Domains
Source: https://kb.stablepoint.com/domain-management/registering-domains/overview
This section covers registering domain names with Stablepoint, including premium domains and Whois privacy protection.
# Premium Domain Names
Source: https://kb.stablepoint.com/domain-management/registering-domains/premium-domain-names
Even if you find the domain is available, the price will be confirmed AFTER purchase has been initiated. (the new TLD's are charging different rates for "premium" names)
If the name you choose is a premium name and you do not want to pay the "premium" rate, you will not be charged (or you will be refunded) the original purchase price.
Unfortunately this is how the new TLD's are now operating, they want as much money as they can get for premium names.
They are the only ones who determine what constitutes a premium name and what the cost will be for the respective domain, outside of the fixed prices visible on our website.
# Configuring an email client
Source: https://kb.stablepoint.com/email/accessing-email/configuring-an-email-client
Here we include the information you need to connect an email account to your device (phone or mail client)
At Stablepoint we offer free POP and IMAP email accounts with all hosting packages. These work with any desktop or mobile email client (such as Outlook, Mac Mail, iPhones, Android, Thunderbird etc). Outbound email works using SMTP.
In this article, you will find the correct way of setting up your email account on your personal device, whether it's a laptop/desktop or mobile. While each email client can be different in its layout, the settings that are needed are the same.
> [!NOTE]
>
> **SSL Security**
>
> We include free SSL certificates. Therefore, we recommend *always* using SSL for mail. This ensures that no one can steal your credentials if you are for instance on a public WiFi connection.
## IMAP vs POP
We recommend using IMAP as a mail protocol.
POP is a way of downloading messages from your mailbox to your local device.
IMAP syncs your local device with the mail server. This allows multiple devices to effectively check mail at once.
## Email Configuration Settings
Please replace any references to yourdomain.com with your domain name. Note that references to yourdomain.com will only work when [your domain points to our hosting](/choosing-stablepoint/moving-to-stablepoint/how-long-does-dns-take-to-propagate).
| Setting | Configuration Value |
| :- | :- |
| Incoming Server | Either mail.yourdomain.com or the server hostname |
| Outgoing Server | Either mail.yourdomain.com or the server hostname |
| Username | Your full email address (e.g. [you@yourdomain.com](mailto:you@yourdomain.com)) |
| Password | Your email account password as set in [cPanel](/email/email/creating-an-email-account) |
| Incoming Port | 993 for IMAP (Recommended), 995 for POP |
| Outgoing Mail Server (SMTP) Port | 465 |
| SSL | On / Yes |
| SMTP Authentication | Required. If asked, use the same username and password as above. |
| SPA / Secure Password Authentication | Off |
There is also a way, that you can obtain these settings throughout your cPanel account, that you have with us, and all you need to do, is to login to it first. Then, head down to the **"Email Accounts"** tool and after your email address, there will be a **"Connect Devices"** option, in which this and other useful information is displayed.
## Old email clients
Some older email clients have trouble with SNI based SSL certificates. This means you will need to use the server hostname instead of mail.\[yourdomain.com] for the incoming and outgoing server hostname. If you stumble upon any issues, please feel free to contact us and we'll be happy to help you.
# How to access Webmail
Source: https://kb.stablepoint.com/email/accessing-email/how-to-access-webmail
Are you looking to access your emails over the Web? This article will cover the steps needed for achieving this.
The path to use, once your domain name is pointing to our servers, is:
[**http://yourdomain.com/webmail**](http://yourdomain.com/webmail)
*Or alternatively:*
[**http://webmail.yourdomain.com**](http://webmail.yourdomain.com)
The **Username** is the email address you are trying to access.
The **Password** is the password set for the above email address.
For example: If you’ve set up **"info”** as an email account on **“yourdomain.com”** for username, enter [*info@yourdomain.com*](mailto:info@yourdomain.com), and whatever password you’ve set up.
Alternatively you can login via cPanel. Once logged in to your hosting plan go to **Email Accounts** and click **CHECK EMAIL** to login automatically.
If you find yourself in a tight spot with accessing this up, please feel free to get in touch with us and we'll be more than happy to assist you further with this and with any other questions.
# How to Open and read invoices
Source: https://kb.stablepoint.com/email/accessing-email/how-to-create-and-view-support-tickets
In this article, clients learn how to open and read invoices.
### Opening an invoice
1. Log in to your account.
2. Click the Billing menu tab.
3. Click My invoices on the left menu.
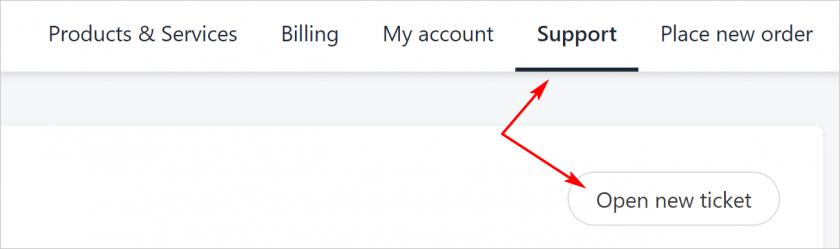
4. On the My invoices page, click an invoice number to open the document.
5. If you have a lot of invoices, go to the left menu and click Paid, Unpaid, and Credited to filter the list.
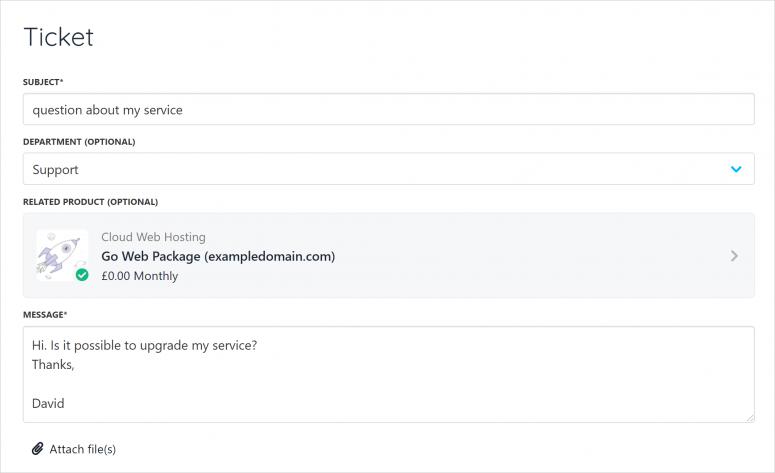
##### Document options
1. Click the Download button to save a PDF version of the invoice.
2. Click the Share button to create a URL link to the online version of the invoice. You can send the link to other people (e.g. email).
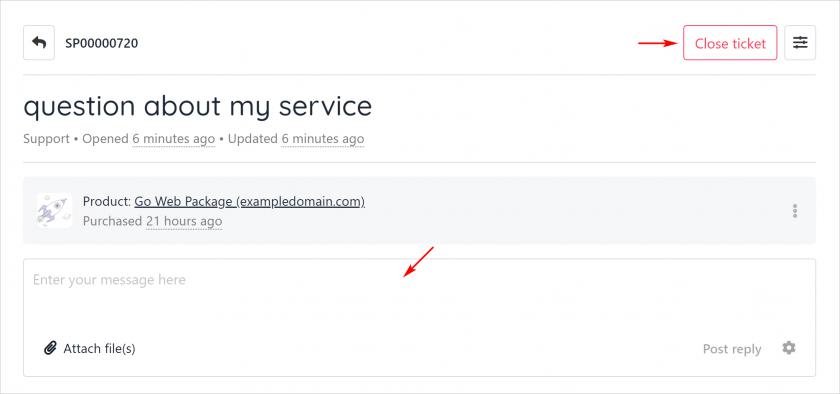
# How to easily setup your E-mails with Gmail
Source: https://kb.stablepoint.com/email/accessing-email/how-to-easily-setup-your-e-mails-with-gmail
You may want to use our mail service, but be able to use your mailbox with Gmail instead. This may be your personal preference but no worries, here is how you can do that:
## **Method 1: Using your Gmail mailbox to send/receive**
You can [Setup a mail forwarder](/email/email/setting-up-an-email-forwarder) from our servers to your g-mail address. This way you can receive the e-mails to your gmail account.
**Warning: Spam e-mails will also be forwarded to that mailbox - this may cause gmail to block e-mails coming from our server (even if it was not us who sent the spam)**
And then from your Gmail mailbox open the `Settings` tab > click `See all settings` -> click on `Accounts and Import` -> click on **Send mail as:\[Add another email address]**

Here you will have a series of screens to setup your mailbox, let's go in order:

Enter your name, and e-mail address with us.

Enter your server hostname with ourselves. Enter port 465 with SSL and press Add Account >>

You will now be sent a verification code to your mailbox with us at stablepoint, check your mailbox and enter the verification code, then click Verify

Now your account is all setup!
You can choose to make this mailbox default, or which mailbox to always reply from. You can change the address at the time of your reply if you prefer.
## **Method 2: Check your mailbox via POP3**
This method is similar to logging in to a mail client.
**Warning: Using this method you will notice that e-mails will arrive 20-30 minutes slower than on our servers. It is normal, and a downside of using this way to check e-mails with us.**
Let's get started!

Back to the same screen as earlier, this time click on "Check mail from other accounts: \[Add a mail account]"
You will then be prompted a series of settings to set:

Enter your e-mail address with us.

Use the selected option for POP3.

**!!!! In the Username field you will see only the first part of your e-mail`user` - you need to change that to your full mailbox name `user@domain.com` !!!!**
POP server is you server hostname, port 995 and SSL always on. The other two options are custom, you can change as you need these are the defaults.

Now you choose whether you want to be able to send e-mail as this address or not, if you choose yes you will be prompted to also do the above step `Send mail as:` , if you choose **No** you will only be able to see incoming e-mails.
Overall both these options are usable, with downsides. If you absolutely need to use gmail, we recommend Gsuite best for the task. For any questions feel free to contact us anytime.
# Accessing email
Source: https://kb.stablepoint.com/email/accessing-email/overview
This section explains how to access your Stablepoint email through webmail, mail clients, and mobile devices.
# Setup Email Accounts on iPhone
Source: https://kb.stablepoint.com/email/accessing-email/setup-email-accounts-on-iphone
## How to Set Up Email On iPhone with IOS 13
1. From the Home screen, choose **Settings**.

2. Next, tap **Passwords & Accounts**.
3. In the Passwords & Accounts section, select **Add Account**.

4. Choose **Other**.
5. Select **Add Mail Account**.
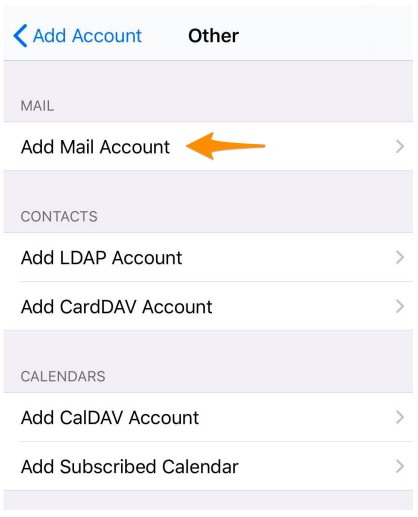
6. Enter your Account Information. Then tap **Next**.
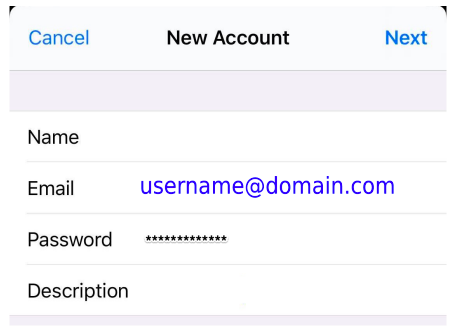
a. Name: Your user's first and last name.\
b. Email: Your full email address ([**username@domain.com**](mailto:username@domain.com)).\
c. Password: Your email user's password.\
d. Description: A personal description (this does not have a functional effect on your email).
7. You will be prompted to enter further Account Information. Then tap Next. *Although entering some of this information may seem redundant, you will want to ensure all sections are fully completed in order to ensure the email is added successfully.*
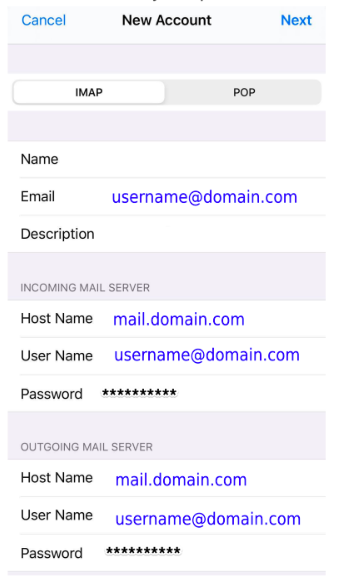
a. Ensure IMAP is selected at the top.\
b. Name: Your user's first and last name.\
c. Email: Your full email address ([**username@domain.com**](mailto:username@domain.com)).\
d. Description: A personal description.\
e. INCOMING MAIL SERVER:\
i. Host Name: **mail.domain.com**.\
ii. User Name: Your full email address ([**username@domain.com**](mailto:username@domain.com)).\
iii. Password: Your email user's password.\
f. OUTGOING MAIL SERVER:\
i. Host Name: **mail.domain.com**.\
ii. User Name: Your full email address ([**username@domain.com**](mailto:username@domain.com)).\
iii. Password: Your email user's password.
8. Ensure that the Mail option is selected. You can also choose to sync Notes as well to your email user. Then click **Save**.
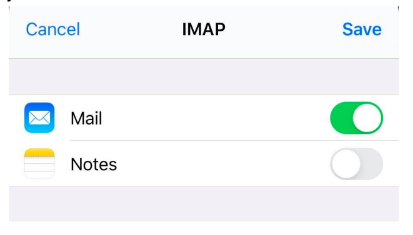
9. That's it! Your email account should be successfully added at this time. You can check your email through the Mail app on your iPhone.

## How to Set Up Email On iPhone with IOS 14 and Newer
1. From the Home screen, choose **Settings**.

2. Next, tap **Mail**.
3. In the Mail section, select **Accounts**.
4. Tap **Add Account**.
5. Choose **Other**.
6. Select **Add Mail Account**.
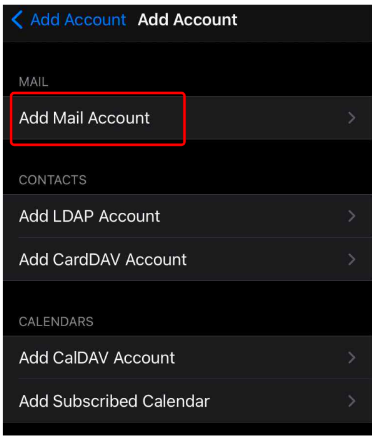
7. Enter your Account Information. Then tap **Next**.
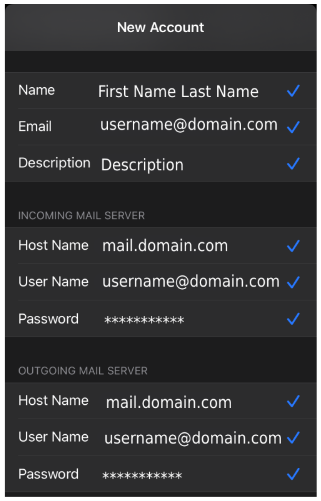
a. Name: Your user's first and last name.\
b. Email: Your full email address ([**username@domain.com**](mailto:username@domain.com)).\
c. Description: A personal description (this does not have a functional effect on your email).\
d. INCOMING MAIL SERVER:\
i. Host Name: **mail.domain.com**.\
ii. User Name: Your full email address ([**username@domain.com**](mailto:username@domain.com)).\
iii. Password: Your email user's password.\
e. OUTGOING MAIL SERVER:\
i. Host Name: **mail.domain.com**.\
ii. User Name: Your full email address ([**username@domain.com**](mailto:username@domain.com)).\
iii. Password: Your email user's password.
8. Ensure that the Mail option is selected. You can also choose to sync Notes as well to your email user. Then click **Save**.
9. That's it! Your email account should be successfully added at this time. You can check your email through the Mail app on your iPhone.

# Synchronizing cPanel® Calendar, Contacts, and Email on Android with ActiveSync
Source: https://kb.stablepoint.com/email/accessing-email/synchronizing-cpanel-calendar-contacts-and-email-on-android-with-activesync

It is always helpful to have your cPanel calendar, contacts, Email on your android device so that you can stay connected on the go. Before understanding how to sync cPanel® Calendar, Contacts, and Email on Android, you need to understand the required plugins for that. These plugins include Z-push, Exchange Active Sync (EAS), Calendar, and Contacts Server.
Also, the instructions shared here using ActiveSync are android-specific. iOS has an inbuilt CalDAV/CardDAV/IMAP sync that works well enough, so ActiveSync is not especially required.
## What is ActiveSync?
The Android users have limited choices to access their cPanel calendars without ActiveSync. The reason behind this is that Android doesn’t possess native CalDAV support. Before ActiveSync, the best solution was to install an intermediary third-party app that would connect the device’s calendar to the CalDAV server. But this required the user to install and configure this third-party app.
ActiveSync was developed to eliminate the need to use a third-party app. ActiveSync uses WBXML, a lightweight XML version that optimizes traffic as mobile devices often encounter unreliable or slow internet connections.
Using ActiveSync, you don't need any third-party app; you can simply log in to your cPanel account and sync Calendar, Contacts, & Email Server.
## What is Zpush?
Z-Push is open-source software that collaborates with cPanel & WHM to support ActiveSync. It is bundled with the Calendar and Contact Server (CCS) and enables CalDAV and CardDAV.
## Why use ActiveSync?
ActiveSync is preferred when you want to sync all three, Calendar, Contacts, and Email. For syncing just the Email, it is better to use IMAP.
## How does ActiveSync work?
EAS enables access to Global Address Lists (GAL) or the combined list of users accessible from email and calendar clients.
GAL ensures that you don't have to type the complete email address of any user on it. Once you type in a few letters, it will automatically suggest the full address. Therefore, you should definitely sync GAL. There are two account types that you can select from, so you can have the required user database in GAL.
## GAL Account Types
The two GAL account types include:
* System default email account — Setting up a system default email account brings you the list of all users under a cPanel account, including those within its domains and subdomains. So if your cPanel has multiple domains and each domain has a few subdomains, the users under all of these will appear in your synced GAL.
* Specific domain email account — In this case, instead of syncing the whole cPanel account, you only sync a selected domain. This makes you see only the users from that particular domain and not the users from other domains or subdomains in that cPanel account.
## Step by Step process of syncing your device
1. Go to Settings on your android device

2. Tap on Accounts to open the Accounts interface. (Sometimes Accounts is also called Cloud and Accounts, as the name varies on different android devices.)


3. In the accounts interface, click on “Add Account."

4. Select “Microsoft Exchange ActiveSync” or “Exchange." In case both these options appear, click on Microsoft Exchange ActiveSync

5. Enter the email address you use on IMAP or Webmail
6. Select “Set-up Manually”

7. Enter Password to that Email
8. Domain\Username, Server, and Security type fields get auto-populated
9. Enter 2091 in the port

In case there is no separate port field, you can enter the port in the exchange server field as shown below:

10. Click next, and your Email should be ready.

After completing this process, you can also enable push updates, although this is optional. Below are the steps to do that:
1. Go back to the accounts interface
2. Select the newly added account
3. Click on account settings
4. Change sync frequency to “Automatic (Push)."
## Common issues that can occur and how to fix them
1. Port filed becomes 443: Sometimes, the port gets auto changed to default value 443. Be careful about it and ensure it is correctly set to 2091
2. Connection failure: This can sometimes occur, even when the port filed is 2091. It happens when the client doesn’t support the syntax hostname:port or if the network blocks traffic on that port. You can skip appending the port, and the connection will complete using a proxy port.
3. Calendar events don’t show up: This is because the default calendar in your android device is the Google calendar of the account the device is running on. For events to show, whenever you create them, select the correct calendar
4. Duplicate calendar events: This can occur because of two reasons:
* You have accidentally synced your account in more than one email app. This causes the calendar events to appear multiple times in different colors. The resolution is simple, just sign out of one email app.
* Over quota account, disk space can also cause this error; bringing the disk space under quota resolves this issue.
5. Sync between devices takes longer than necessary: This error can occur if you have not enabled push notifications, as explained before. So, it is advisable to enable push notification even though it is optional.
## Conclusion
ActiveSync has made it much easier to sync calendar, contacts, and email from cPanel to your Android devices. Most hosting providers enable CCS and Z-Push - ActiveSync Support plugins, making the sync very simple. Some Android devices have certain limitations that prevent them from perfectly syncing the three; however, the sync process remains the same.
# Configuring Autoresponder for your Email Account
Source: https://kb.stablepoint.com/email/email-troubleshooting/configuring-autoresponder-for-your-email-account
Are you in need of an automated message, when they try to reach you over Email?
This can be achieved, if Autoresponder is set for your email address.
In order for this to be setup, you would have to login to your personal cPanel account, which can easily be done, if you login to your clients.stablepoint.com client area > Services.
Once you have logged in successfully into your cPanel, scroll down to the "Email" Tab and click on the "Autoresponders" tool. On the next page, you will find the button, that's responsible for adding new ones and also a list of any existing autoresponders.

For setting a new autoresponder for your email address, click on the button "Add Autoresponder" and a lot of settings will appear on the screen:

1. The **"Interval:"** box is responsible for the number of hours to wait between responses to the same email address or in other words, if someone tries to reach you over an email a few times, how often the autorespond message to be sent to the sender.
2. The **"Email:"** box is where you need to write down the name of your email address.
3. The **"From:"** box is asking you for either your name or from whom this Autorespond message is.
4. The **"Subject:"** box is self-explanatory, what would the Subject of the email, generated by the Autoresponder would be, example: *"On Holiday".*
5. The **"Body:"** box is what should the content of the message contain, such as when will you be available again over email or similar. The great thing about this is that you can create a custom HTML body, that can contain various links/images etc.
6. The last two options available on the page are responsible for when the Autoresponder should engage and when should disable itself, rather than you going back/forth through the panel to turn it off.

If you find yourself in a tight spot with setting this up, please feel free to get in touch with us and we'll be more than happy to assist you further with this and with any other questions.
# Email Migration
Source: https://kb.stablepoint.com/email/email-troubleshooting/email-migration-1
Traditionally, you can move your e-mails between providers using mail clients. Each mail client has specific instructions to how e-mails can be moved.
[Outlook](https://support.microsoft.com/en-us/office/export-or-backup-email-contacts-and-calendar-to-an-outlook-pst-file-14252b52-3075-4e9b-be4e-ff9ef1068f91)
[Thunderbird](https://www.mboxtooutlook.org/blog/thunderbird-import-export-tools-ng.html)
These are the most commonly used mail clients, if you are using other specific ones it would be best to research what options you have available in that specific client.
## Stablepoint Migration
In terms of Stablepoint we provide a client area based mail transfer tool as well. You can activate the tool when you place a free order from the client area. Then navigate to "Additional Services" and choose "Email Migration tool".
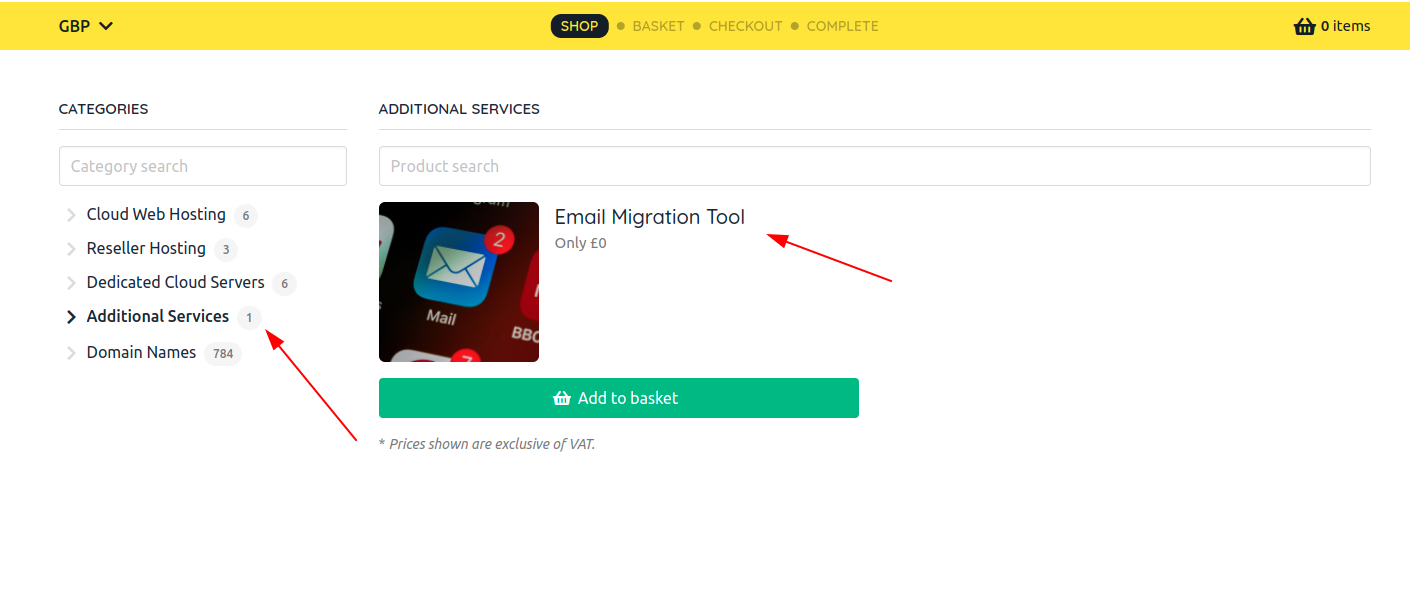
To use it, navigate to Products & Services -> Email Migration tool -> Login.
Next you will have two tabs, one to enter your mailbox details from the old provider, and another to enter your mailbox details to your account with us.
!! You will need to create the mailboxes on our servers as well prior to this action.
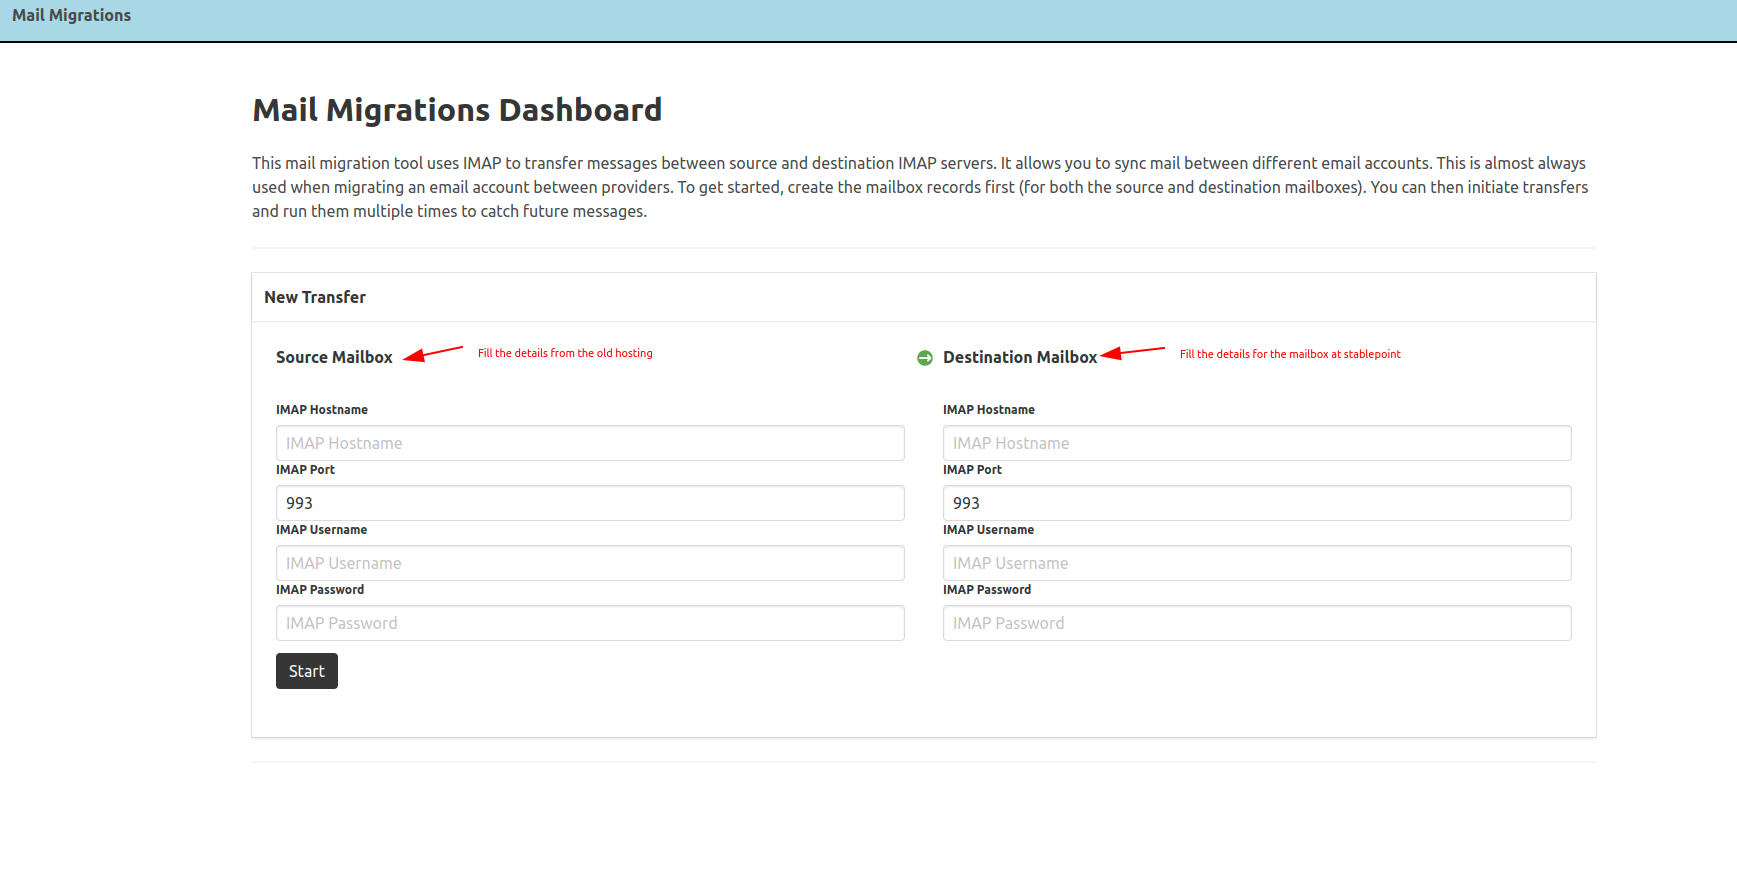
Once both mailboxes are added, you can start the imap transfer.
If you experience any issues with our custom tool feel free to contact us for assistance.
The third option would be to request a migration from us, since we offer free migrations we can perform this operation for you if you don't have the time to or need assistance in general.
You just need to open a new migration , and provide us with `Username ; Password ; and Imap server used for login via mail clients given by your provider`
# How to setup auto archive in outlook 365
Source: https://kb.stablepoint.com/email/email-troubleshooting/how-to-setup-auto-archive-in-outlook-365
In this tutorial, you will learn how to setup auto archiving within your outlook application. This tutorial uses Outlook 365 but should work with older versions.
Now, open outlook. Once open, follow the steps below.
First, right-click on a folder in outlook you wish to setup auto-archive. You have to set it based on a folder, but even your inbox folder can be used.\
At the bottom of the menu that pops up, click properties.
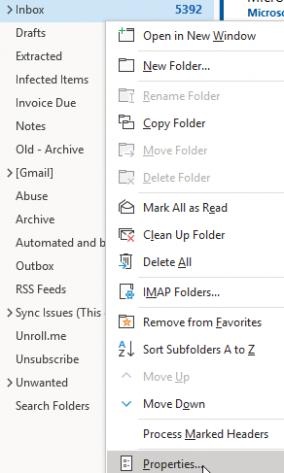
Click on the AutoArchive tab on InboxProperties.
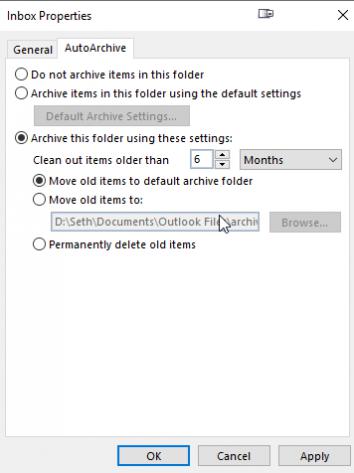
Here you will be able to archive your folder using time settings. You can choose to archive or permanently delete your email. You can choose an archive folder, a location for your archive on your local drive, or to just delete them.
You will need to set this up based on inbox folder, and may have to set it up a few times depending on how many folders you have.
# My Email Folders are Missing
Source: https://kb.stablepoint.com/email/email-troubleshooting/my-email-folders-are-missing
A mailbox can have many folders. These include INBOX, SENT, DRAFTS, JUNK, etc.
You can also create custom folders for example to archive email.
Sometimes after a mailbox transfer, or when setting up email on a new email device, the folders might appear missing.
This is almost always because the folders have not been synchronised.
In your mail client, you can find the option to synchronise your folders and then select the folders to add. They should then appear in your mail client.
## Synchronising Folders in Webmail
Roundcube allows you to subscribe or unsubscribe to folders.
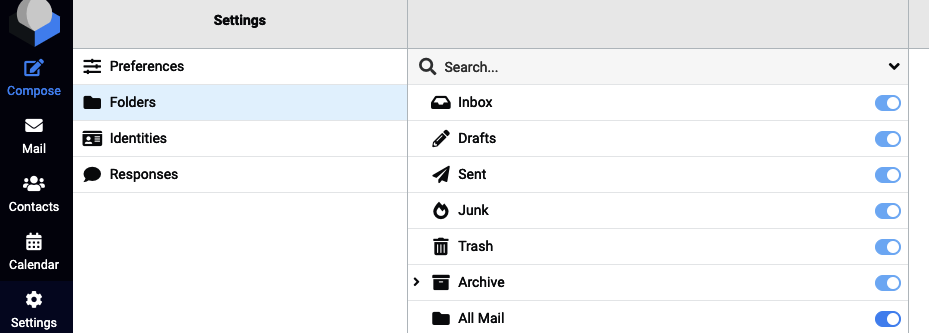
## On Mac Mail
On Mac Mail, you can right click the mailbox and click 'Get Account Info'
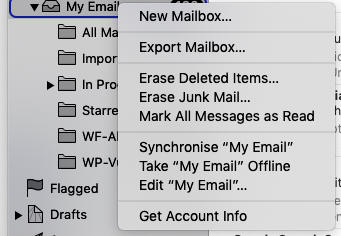
# Email troubleshooting
Source: https://kb.stablepoint.com/email/email-troubleshooting/overview
This section covers common email tasks and troubleshooting, including autoresponders, email migration, archiving, and mailbox issues.
# Why does my mailbox get full?
Source: https://kb.stablepoint.com/email/email-troubleshooting/why-does-my-mailbox-get-full
There are a few reasons your mailbox can reach huge sizes, here are a few and recommendations how to avoid them.
### Large Attachments
Sending files and photos via email attachments is very convenient, but e-mail is not suitable for sharing large files. There is no faster way to fill your e-mail account than to have your colleagues send you massive file attachments, or to save your files in your e-mail account!
For files larger than 3MB, we recommend using a file sharing service. There are many good ones that are freely available, such as Dropbox or Google Drive.
### Email Forwarding
It is possible to have an email account configured to forward all messages to a different email account on a different domain. However, using this arrangement you will receive two times the amount of e-mails - those destined for this account, and those forwarded to it from the other mailbox.
The best we can recommend is to regularly delete e-mails you consider you no longer need and empty spam/junk and trash folders regularly.
Alternatively you can also use a mail client such as Outlook or Thunderbird to export e-mails to your local device and store them in case you need them at a later time. (*You can do that with receipts of online payment, order confirmations, etc*)
# Changing your Email Password
Source: https://kb.stablepoint.com/email/email/changing-your-email-password
Have you forgotten your email address password or you're in need of a new one? This guide will help you so you can easily change an email password by following up the step by step guide below:
* Log into your Stablepoint's cPanel hosting account - you can access cPanel directly from your [https://clients.stablepoint.com](https://clients.stablepoint.com) client area > Services.
* Once you've logged in successfully, scroll down until you find the "Email" tab and within it, click on "Email Accounts" tool.
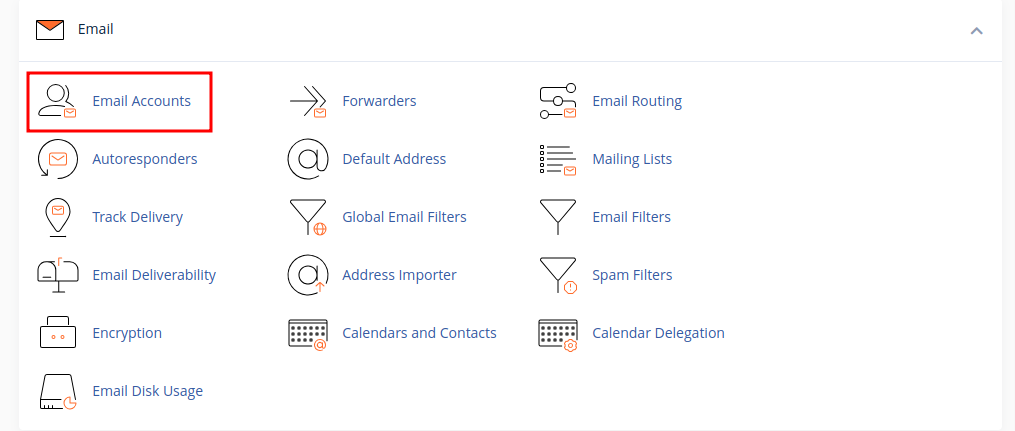
* Once you have loaded up the page, you will find all of your email addresses within and after each one, there will be a few tools, the one that you're after is "Manage", which has a tool icon in front.
* On the "Manage" page, under the "Security" tab, you will be provided with a box, which will ask you to set a new password. You also have the option to use the built-in Password Generator, this will create a password for you and going forward, make sure to copy it safely on your personal device.

* Finally, once you've set a new password, please scroll down to the end of the page, there will be a button named "Update Email Settings", please click on the button in order for the newly created password to be saved properly.
If you face any issues and you require further assistance, please feel free to contact us and we'll be happy to help you further along with any questions you may have.
# Creating an email account
Source: https://kb.stablepoint.com/email/email/creating-an-email-account
You can create as many email accounts as you like.
Creating an email account in cPanel is a very straightforward process. You'll need to do this so that you can begin using [you@yourdomain.com](mailto:you@yourdomain.com) for your emails and for people to communicate with you.
The first step is to log-in to your cPanel - go to the Stablepoint client area, click 'Hosting Accounts' and click your account in the list. On the next page, click 'Login to cPanel'.
Once logged in to cPanel, scroll down and click 'Email Accounts'.
Click the **Create** button on the right.
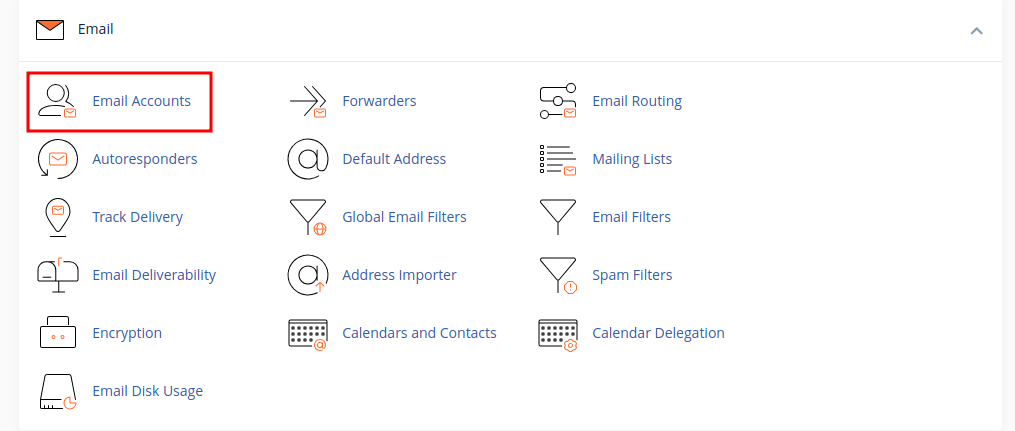
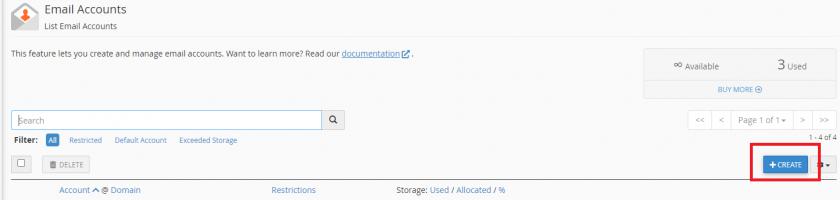
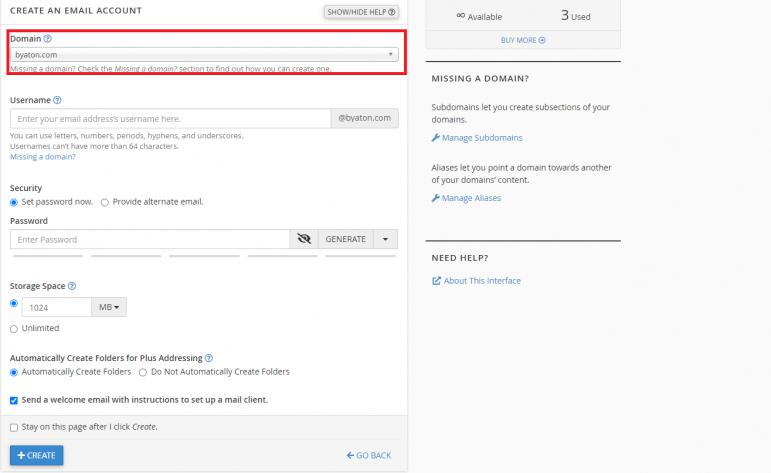
On the "Create" page you should choose the domain name for which your mailbox will be for, IF you have multiple domain names within the same cPanel account. If not leave it as is.
Continue with the configuration as you prefer, the button descriptions are pretty straightforward from here on, and your mailbox will be created.
# Managing Email Accounts
Source: https://kb.stablepoint.com/email/email/overview
This section covers creating and managing email accounts on your Stablepoint hosting, including forwarders, passwords, and MX records.
# Setting up an Email Forwarder
Source: https://kb.stablepoint.com/email/email/setting-up-an-email-forwarder
Email Forwarding is a way of forwarding or sending messages from one address, on to another. It can be useful if you want to have multiple contact addresses for different purposes but you only want to have to check one mailbox for all of the emails. So you could have support@, sales@, billing@ all going through to your email address [you@yourdomain.com](mailto:you@yourdomain.com) for example.
The first step to do this is to log in to your cPanel account, scroll down to the **"Email"** Tab and click on the **"Forwarders"** tool. This will open up the page which is responsible for setting up a forwarders or managing existing ones.
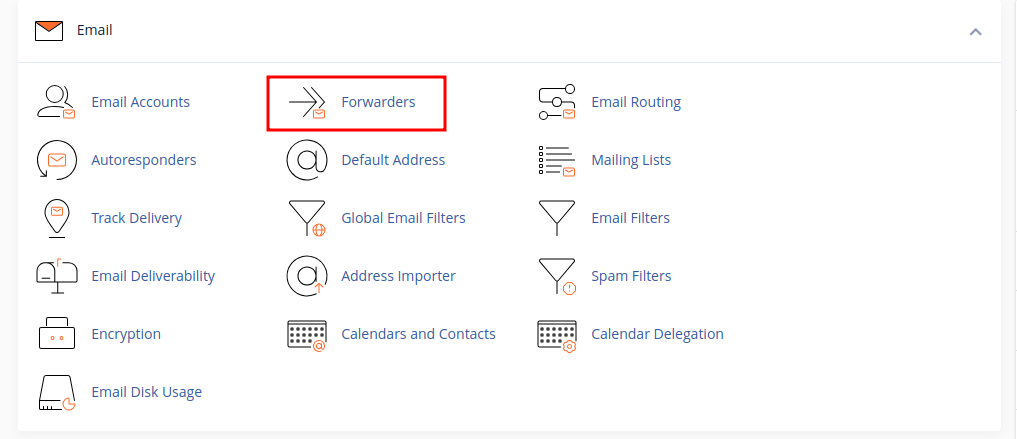
Now you need to click on the "Add Forwarder" button
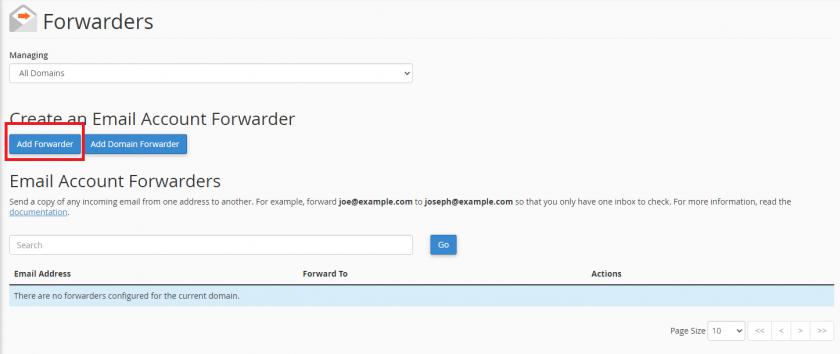
1. The first part is the email address that you'd like to forward messages, first field is for the username of the mailbox (what comes before @domainname.com) - second field is to choose the domain name this mailbox is under.
2. The next box **" Forward to Email Address: "** is the email address that you want to forward messages **to**. It is possible at this point to forward to another email address outside of your hosting with us, such as to a gmail.com or yahoo.com address. However, this is generally not recommended because it has been known for free webmail providers to be overzealous in their spam filtering of messages forwarded in this way.
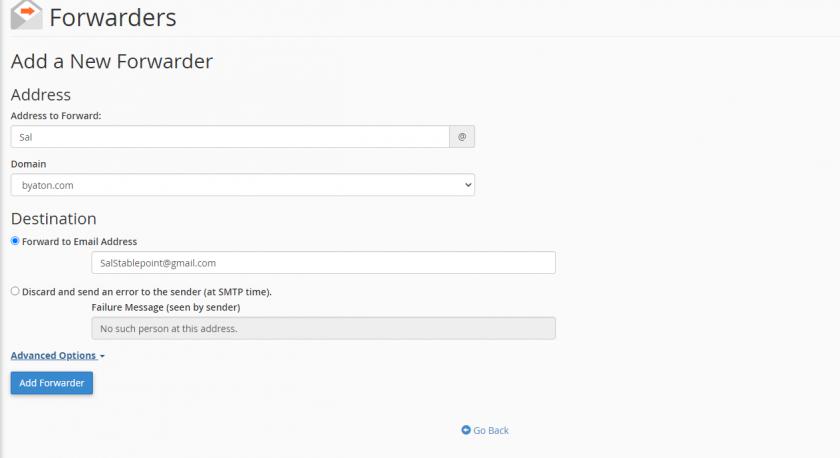
There are also other custom options, that you can use, such as piping an email address to a program or a script, which is available, if you click on the "Advanced Options". Most users will not need this option, however.
If you find any difficulties setting any of the above, please feel free to get in touch with us and we will be more than happy to assist you further with this and any other questions.
# Setting up MX Records
Source: https://kb.stablepoint.com/email/email/setting-up-mx-records
At Stablepoint, you can setup your own **MX Record**, if you are looking to use another mail provider, such as *G-Suite's Gmail* or *Microsoft Office365*.
Changing your MX Record:
Log into *your cPanel*, navigate to `Domains` section > `Zone Editor` menu.
Click `Manage` next to your domain.
Here you have two options, to edit the existing MX record , or delete it and create new ones. By default cPanel sets the record to point to your main domain name, so it resolves to our server IP.
If you have any uncertainties you can contact us via livechat/phone for quick advise on the matter.
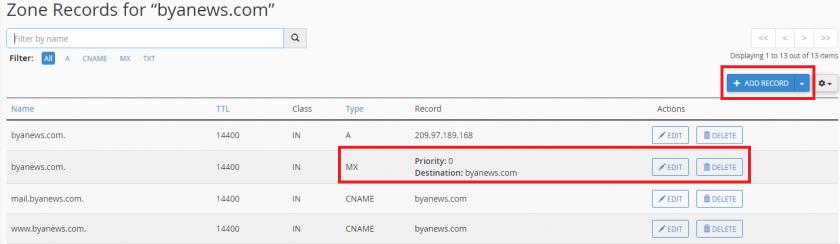
# How to blacklist/whistelist email account in Cpanel
Source: https://kb.stablepoint.com/email/how-to-blacklistwhistelist-email-account-in-cpanel
To blacklist/whistelist email account in Cpanel go to Spam filters -> Show additional configuration. Then depending on the preferred option, choose “Edit Spam Whitelist Settings” or “Edit Spam Blacklist Settings”. Click on “+ Add A New item”, put the email account there and then click on Update.
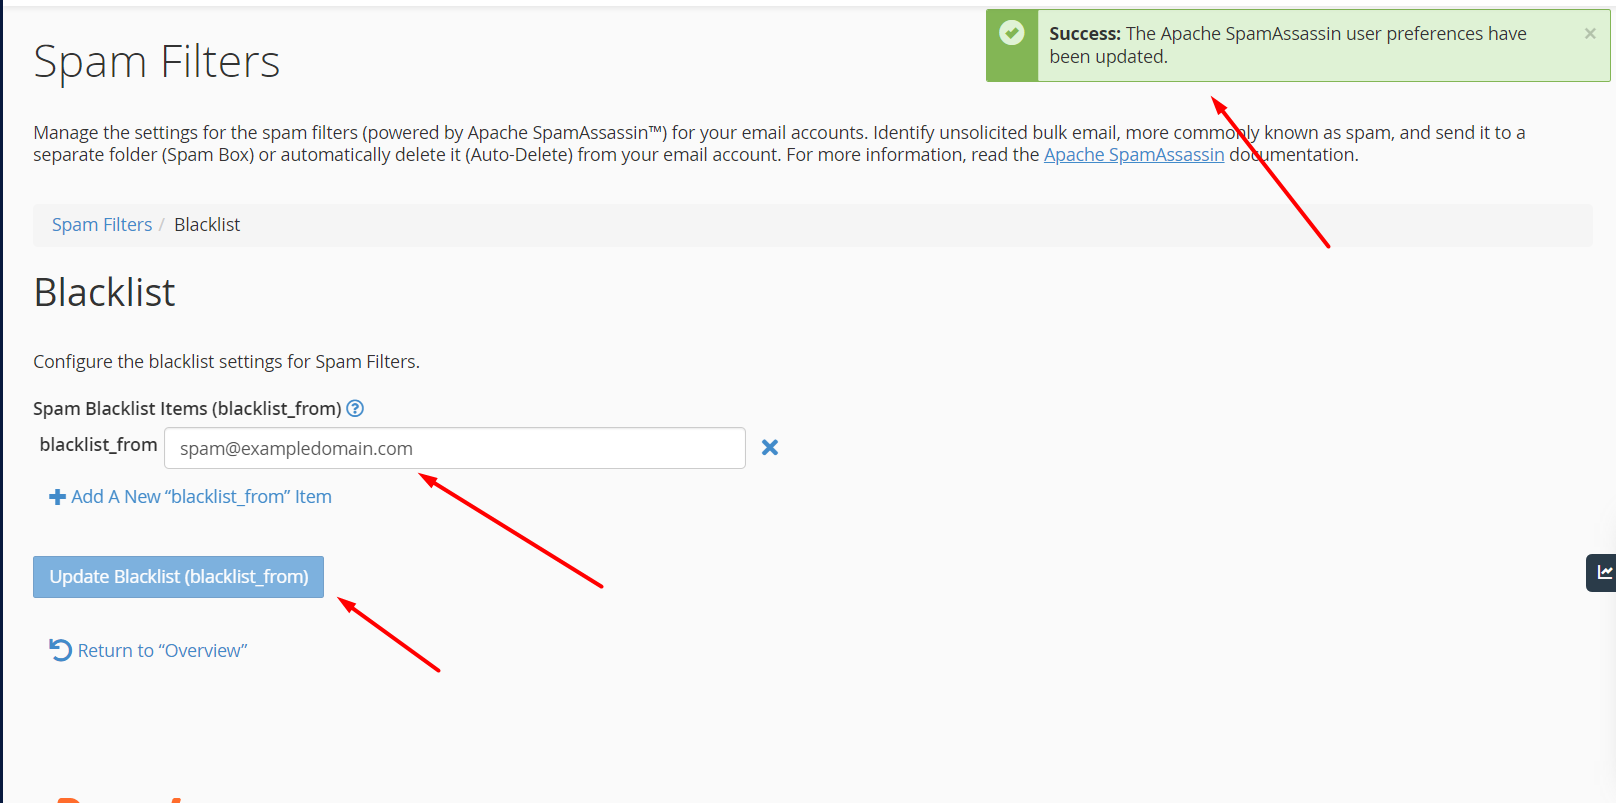
To blacklist/whitelist a wildcard email account, use such command, with replacing the relevant domain name.
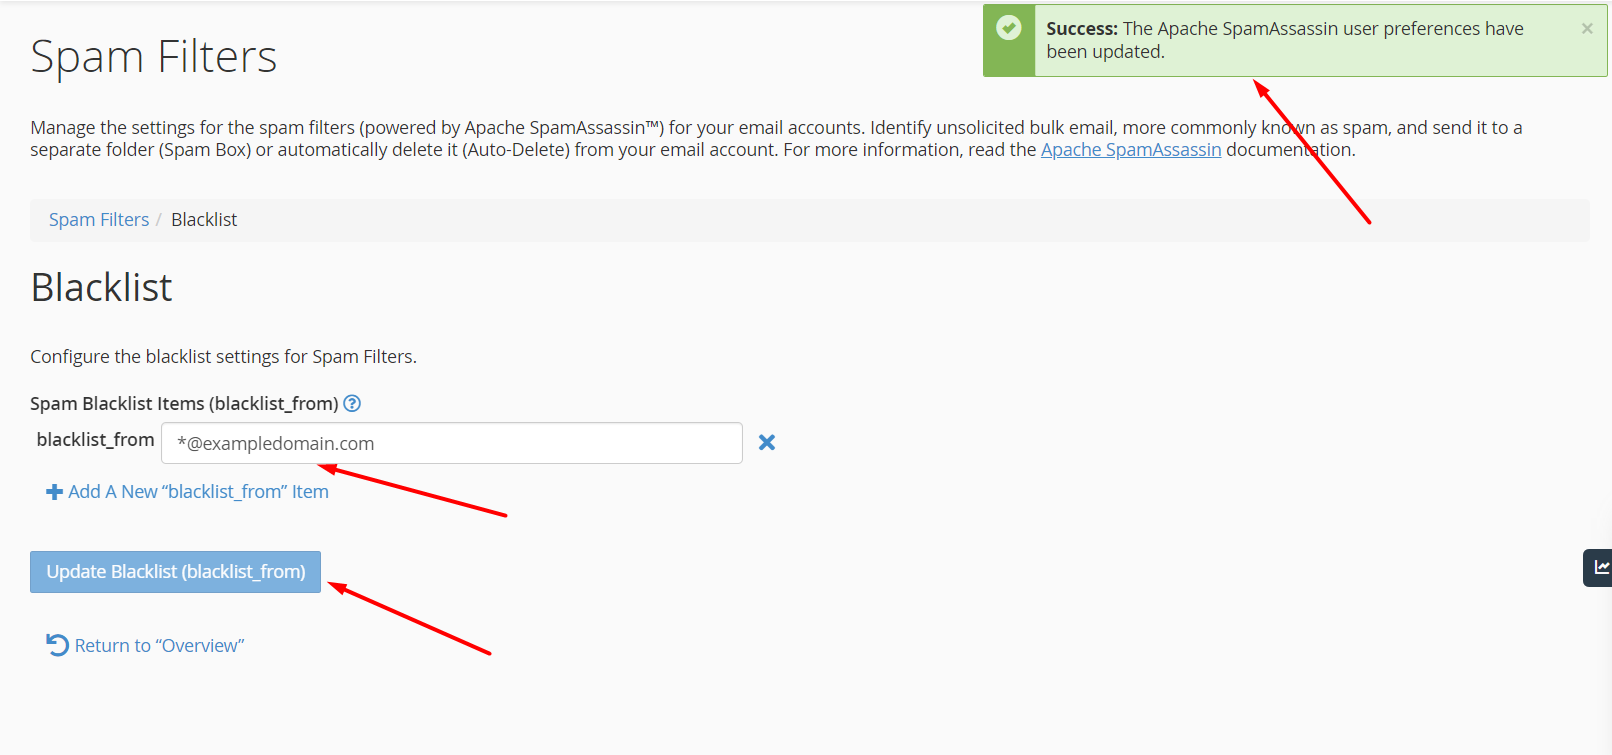
# How to use Global email filters in Cpanel
Source: https://kb.stablepoint.com/email/how-to-use-global-email-filters-in-cpanel
This interface allows you to configure how your account filters all the email that your domains’ email accounts receive.\
You can read more about this here:\
[**https://docs.cpanel.net/cpanel/email/global-email-filters/**](https://docs.cpanel.net/cpanel/email/global-email-filters/)
You can read more about the separate filter options here:\
[**https://docs.cpanel.net/knowledge-base/email/how-to-configure-email-filters/**](https://docs.cpanel.net/knowledge-base/email/how-to-configure-email-filters/)
# How to Set Up SMTP in cPanel
Source: https://kb.stablepoint.com/email/set-up-cpanel-smtp
## Introduction
There are many benefits and advantages to hosting an email on your domain using an SMTP server. The main and biggest perk is that you get to use an email that ends with your domain, instead of '@gmail.com' or '@yahoo.com'. Having a tailored and exclusive email address can give your brand a more defined identity. Such an email won’t look or sound generic, and it will be easier for customers and clients to remember.
For example, take Payoneer. Their support email address is [CustomerServiceManager@Payoneer.com](mailto:CustomerServiceManager@Payoneer.com).
Imagine if it was something like ‘[CustomerManagerPayoneer@gmail.com](mailto:CustomerManagerPayoneer@gmail.com)’ or ‘[Payoneersupport@hotmail.com](mailto:Payoneersupport@hotmail.com)’. Yep, it sounds terrible.
Furthermore, with email hosting, all the mails and the files that are related to them will be stored on a single server. This adds to the security of the files as well as the ease of accessing the same.
Looking at these benefits, one may wonder why a brand would not go with setting up SMTP. The truth is, it’s just not that easy. The process can be complicated and it can be a bit of an arduous hassle unless one works with a hosting agency that gives this service complimentarily or unless one hires/contracts some professionals.
However, with cPanel users, the deal is different. In cPanel, setting up an SMTP server just involves a couple of steps. In this post, that is what we are going to be looking at.
## Understanding SMTP
SMTP stands for Simple Mail Transfer Protocol. In essence, it is the protocol (which can be understood as a set of rules) that is followed by an application when it needs to send an email via the internet.
Take the system of office memos, for example. A person sitting in a department at one end of the building will first write the note out. Then, he will hand it to the secretary. The secretary will call the office clerk. The clerk will then take the memo to the person who has to receive it. That person could be in a meeting or a conference, hence the clerk will suffice with handing it to the PA instead. The PA will eventually give the message to the recipient.
Get it? That is the protocol of sending memos within a certain office. Similarly, SMTP is a protocol for sending and receiving emails over the internet.
In SMTP, there are three main phases in the whole email-sending process. In simple, non-geeky terms, we can enumerate them thus:
• Validation and verification of the sending system\
• Giving clearance for the process\
• Delivering the email (and confirming receipt)\
The bracketed part in the last step is important since if the mail fails to deliver, the sender must be notified.
For the execution of these processes, there are some commands that SMTP uses. For example, the HELO command triggers the beginning of the communication between the client and the server. Similarly, the DATA command defines the contents of the main body of the email.
There are other details that we could delve into, but if you are a cPanel user, you don’t have to trouble yourself with those.
With cPanel, the whole setup is, as we mentioned earlier, easy and straightforward. No need to make things complicated then, eh?
## How to Set Up SMTP in cPanel
Here is a stepwise guide on how to set up SMTP in cPanel.
## 1. Create a new email account
The first thing you need to do is create a new email account on the server. To do that, head over to the main page and navigate to the ‘Email’ section. From the list/grid, choose the first option at the top left corner titled ‘Email Accounts’.
You will see this screen. Click on the ‘+Create’ button:
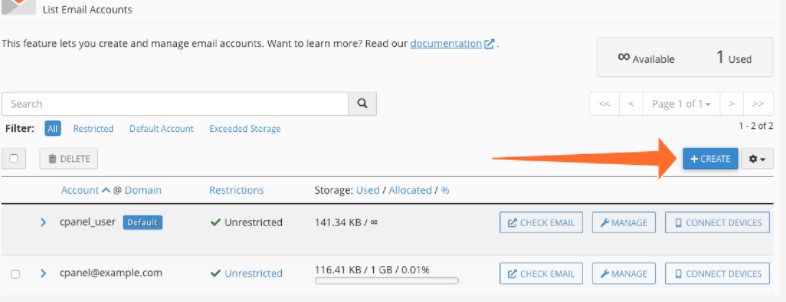
Follow the steps that you are prompted to in order to create the account. You will need to choose:
* `Username`
* `Password`
* `Domain`
## 2. Giving your email app the authentication and server connection details
Once you’re done with the above step, you have to set up your email application (or client) so that it knows which server to communicate with. You also need to give it the required clearance.
To do this, you will need the details of the outgoing server. Once you feed these details to your app, it will be configured with your new email address.
You can get those deets simply by clicking on the ‘Connect Devices’ button in front of your email address. Take a look:
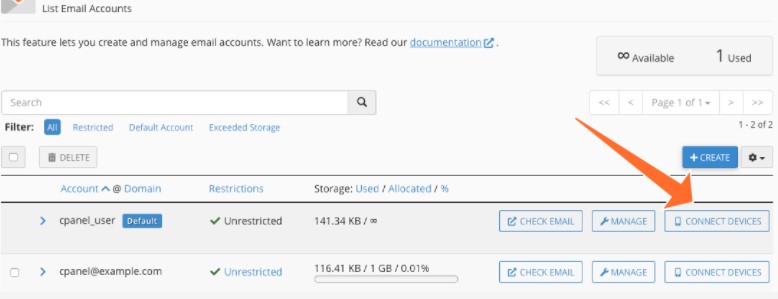
Once you click on the button, you will the info you need for configuring your mail client. You’re going to see two boxes. Use the one on the left viz. the one in the blue box titled ‘Secure SSL/TLS Settings (Recommended)’.
The third and last entry captioned 'Outgoing Server' is what you need to copy over to the client.
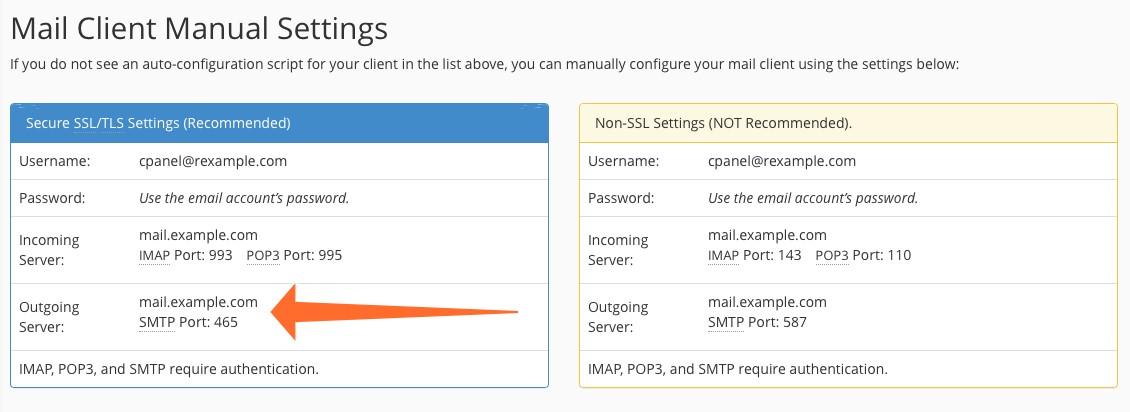
And that’s pretty much it. You’re all set up.
## Conclusion
Setting up SMTP comes with a lot of advantages and benefits. It can be very helpful for any business in the long run. Normally the process is difficult and complicated. However, with cPanel users, the whole thing is extremely simple. In this post, a stepwise tutorial was given on how you can create an email account and fetch the relevant details on cPanel.
# Adding a new customer to your Enhance Resellers account
Source: https://kb.stablepoint.com/enhance-control-panel/adding-a-new-customer-to-your-enhance-resellers-account
First, we need to make sure we have created a universal URL for our customers to log into their own accounts at. This is the URL you will give your customers when they ask you how they can log into their control panels
1. Log into your Enhance control panel, then click on "Settings > Platform and type in “cp.yourdomain.com”, replacing “yourdomain.com” with the name of your primary domain. We use “cp” by default but you can change that to anything you would like
2. Now we need to create a package. Click Settings > Packages > Add a Package If you have already done this, skip this step and go to step 3. There are tons of features you can enable for your packages. Click ‘Add’ at the bottom of the screen when you’re done customizing this package to your liking.
3. Now go to Customers > Add Customer" on the left hand pane. Fill in the details for your customer. No website data goes here yet
Click Add when done
That’s it! You have now created a customers account and websites can now be added by continuing these steps
4. Now that you have created the customers account, you can “impersonate” him by clicking the Impersonate button which will now take you to that customers dashboard and allow us to add websites:
4. To add websites, you can now do this while impersonating the client or logging into his control panel using the URL you specified earlier and the login credentials. Click Add Website
5. You can add an empty website space, or install/manage WordPress using the WordPress toolkit!
5. If you installed WordPress, you can go into the WordPress Toolkit by clicking “manage” down in the applications section
That’s it! You have now added a customer to your resellers account, assigned a package for him, and accessed the WordPress toolkit
# Changing PHP versions and settings in Enhance
Source: https://kb.stablepoint.com/enhance-control-panel/changing-php-versions-and-settings-in-enhance
Enhance lets you choose the PHP version and adjust PHP settings per website — useful when applications require specific versions or higher limits.
## Changing the PHP version
1. Log in to your Enhance control panel.
2. Select the website you want to manage.
3. In the left sidebar, click **Developer tools** (or **PHP**, depending on your panel version).
4. Select the PHP version from the dropdown.
5. Save.
The change takes effect immediately. Multiple PHP versions are available side by side, so different websites under the same account can run different versions.
> [!WARNING]
>
> Before switching a production site to a new major PHP version, check that your application and its plugins support it. For WordPress, you can use a staging site to test the new version safely first.
## Adjusting PHP settings
Common PHP settings can be adjusted per website, including:
* **memory\_limit** — the maximum memory a PHP script may use
* **upload\_max\_filesize** and **post\_max\_size** — control the maximum upload size
* **max\_execution\_time** — how long a script may run before being terminated
* **max\_input\_vars** — relevant for large forms and complex WordPress menus
To change these:
1. In the website's PHP settings section, locate the setting.
2. Enter the new value.
3. Save.
> [!TIP]
>
> If a plugin or theme installation fails with a memory or timeout error, raising memory\_limit and max\_execution\_time usually resolves it. Keep values reasonable — excessively high limits can mask real problems in the application.
## Checking your configuration
To verify the active PHP version and settings, create a file called info.php in your document root containing:
```php theme={null}
[!NOTE]
>
> Never share your private key. Only the public key (.pub file) goes on the server.
## What you can do over SSH
* Manage files with standard commands (ls, cp, mv, rm, nano/vim)
* Run **WP-CLI** for WordPress maintenance (wp plugin update --all, wp search-replace, etc.)
* Use **composer** and **git** for modern PHP deployments
* Import/export databases with mysql and mysqldump
* Transfer files with **scp** or **rsync**
> [!TIP]
>
> SFTP uses the same credentials as SSH — most FTP clients (like FileZilla) can connect over SFTP by selecting the SFTP protocol and using your SSH port.
# Enhance Reseller Hosting — Frequently Asked Questions
Source: https://kb.stablepoint.com/enhance-control-panel/enhance-reseller-hosting-frequently-asked-questions
## Migration
**If I switch to an Enhance Reseller plan, will you migrate my accounts for me?** Yes. Our team will transfer each cPanel account from your current plan to Enhance on your behalf.
**Can I migrate from cPanel to Enhance myself?** Yes. Enhance includes a built-in cPanel importer that transfers websites, emails, and passwords — either through the UI or via SCP. A Plesk importer is also available.
***
## Features & Functionality
**Will I lose any features by switching to Enhance?** No — on the contrary. Enhance plans include Monarx (an industry leader in server security) and a built-in WordPress Toolkit. You also get the ability to set a custom-branded control panel URL for your customers, among other additions.
**Is WordPress management included?** Yes. The WordPress Toolkit is bundled with Enhance at no extra cost. It includes one-click installs, staging, SSO, plugin management, and auto-update scheduling.
**Will my customers get access to their own control panels?** Yes. You will have a primary panel that manages all accounts, and each individual account will also have its own control panel.
**Does Enhance come with the same email settings?** Yes. Roundcube webmail is included. Settings for third-party email apps — including iPhone, Android, Outlook, and Thunderbird — remain the same.
**What about RAM and CPU? Will I get less?** No. Your plan will include the same or more RAM and CPU as the closest equivalent cPanel plan.
**Are backups included?** Yes. Enhance includes a built-in incremental backup system with granular restore options at no extra cost. S3-compatible third-party backup systems can also be configured alongside it.
**Is the Enhance control panel mobile-friendly?** Yes. Enhance is fully responsive and works on desktop, tablet, and mobile without any feature limitations.
**Does Enhance support PostgreSQL?** Yes. Enhance fully supports PostgreSQL
***
## Customization & Integrations
**How customizable is the Enhance control panel?** Enhance supports full white-label customization including logos, colors, fonts, and custom panel domains. You can also create custom hosting packages with specific feature sets and resource quotas.
**What billing platforms does Enhance integrate with?** Enhance integrates with WHMCS, Blesta, HostBill, and Upmind. A RESTful API is also available for custom integrations.
***
## Pricing
**What is the catch? The pricing seems too good to be true.** There is no catch. Because Enhance eliminates per-account cPanel licensing fees, we have significantly more flexibility on pricing — and we pass that savings on to you.
**Is this introductory pricing only?** No. These are the standard prices for our Enhance plans and are not limited to new signups or promotional periods.
***
## Support & Guarantees
**Will I still receive the same level of support on Enhance?** Yes. You will receive the same level of support we provide to all reseller customers, regardless of which control panel you are on.
**What if I don't like it?** All Enhance Reseller plans come with a 30-day money-back guarantee.
# From cPanel to Enhance. Everything you need to know.
Source: https://kb.stablepoint.com/enhance-control-panel/from-cpanel-to-enhance-everything-you-need-to-know
You've just been moved onto Enhance — our modern control panel platform. Everything you're used to doing in WHM and cPanel, you can still do here. Often faster. Usually cleaner. And with features cPanel simply doesn't have. This is your translation guide.
### ❓ FAQ
Common questions about Enhance reseller hosting.
[Read more →](/enhance-control-panel/enhance-reseller-hosting-frequently-asked-questions)
### 👤 Adding Customers
How to add a new customer to your Enhance account.
[Read more →](/enhance-control-panel/adding-a-new-customer-to-your-enhance-resellers-account)
### 🌐 WordPress Management
Managing your WordPress site in the Enhance control panel.
[Read more →](/enhance-control-panel/managing-your-wordpress-site-in-enhance)
Enhance is built for today's hosting professional. It's quicker, more intuitive, and gives you tools that cPanel doesn't — like self-service site imports, built-in Cloudflare syncing, one-click WordPress during site creation, and real-time Slack notifications for your business.
There's a short familiarization period, as with any new tool. Most resellers are running comfortably within a day. This guide walks you through the key differences so you can hit the ground running.
# Terminology
## The language has changed slightly.
| Old | New |
| :- | :- |
| ~~WHM~~ | *Primary Panel* Your reseller-level control panel |
| ~~cPanel accounts~~ | *Customers* The accounts that sit under your Primary Panel |
| ~~Packages~~ | *Packages* Same name, same concept — no change here |
| ~~"Log in as" a cPanel account~~ | *Impersonate* How you access a customer's control panel |
# Packages
## Create your packages first.
In both panels, you'll want to create your packages before onboarding customers, so you have something to assign when they arrive.
Packages in Enhance let you define disk space, bandwidth, number of websites, email accounts, databases, and a range of feature toggles — all in one cleanly laid-out screen.
# The Big One
## Adding a new customer is three steps, not one.
This is the day-to-day task you'll run most often, and it's the biggest structural difference between cPanel and Enhance — so pay close attention here.
In WHM, creating a new account was a single form: domain, password, package, Create, done. In Enhance, this is broken into three separate steps. It feels like more work at first, but it's actually more flexible — you can onboard a customer before they've picked a domain, change packages independently, and add additional websites under the same customer later without any extra setup.
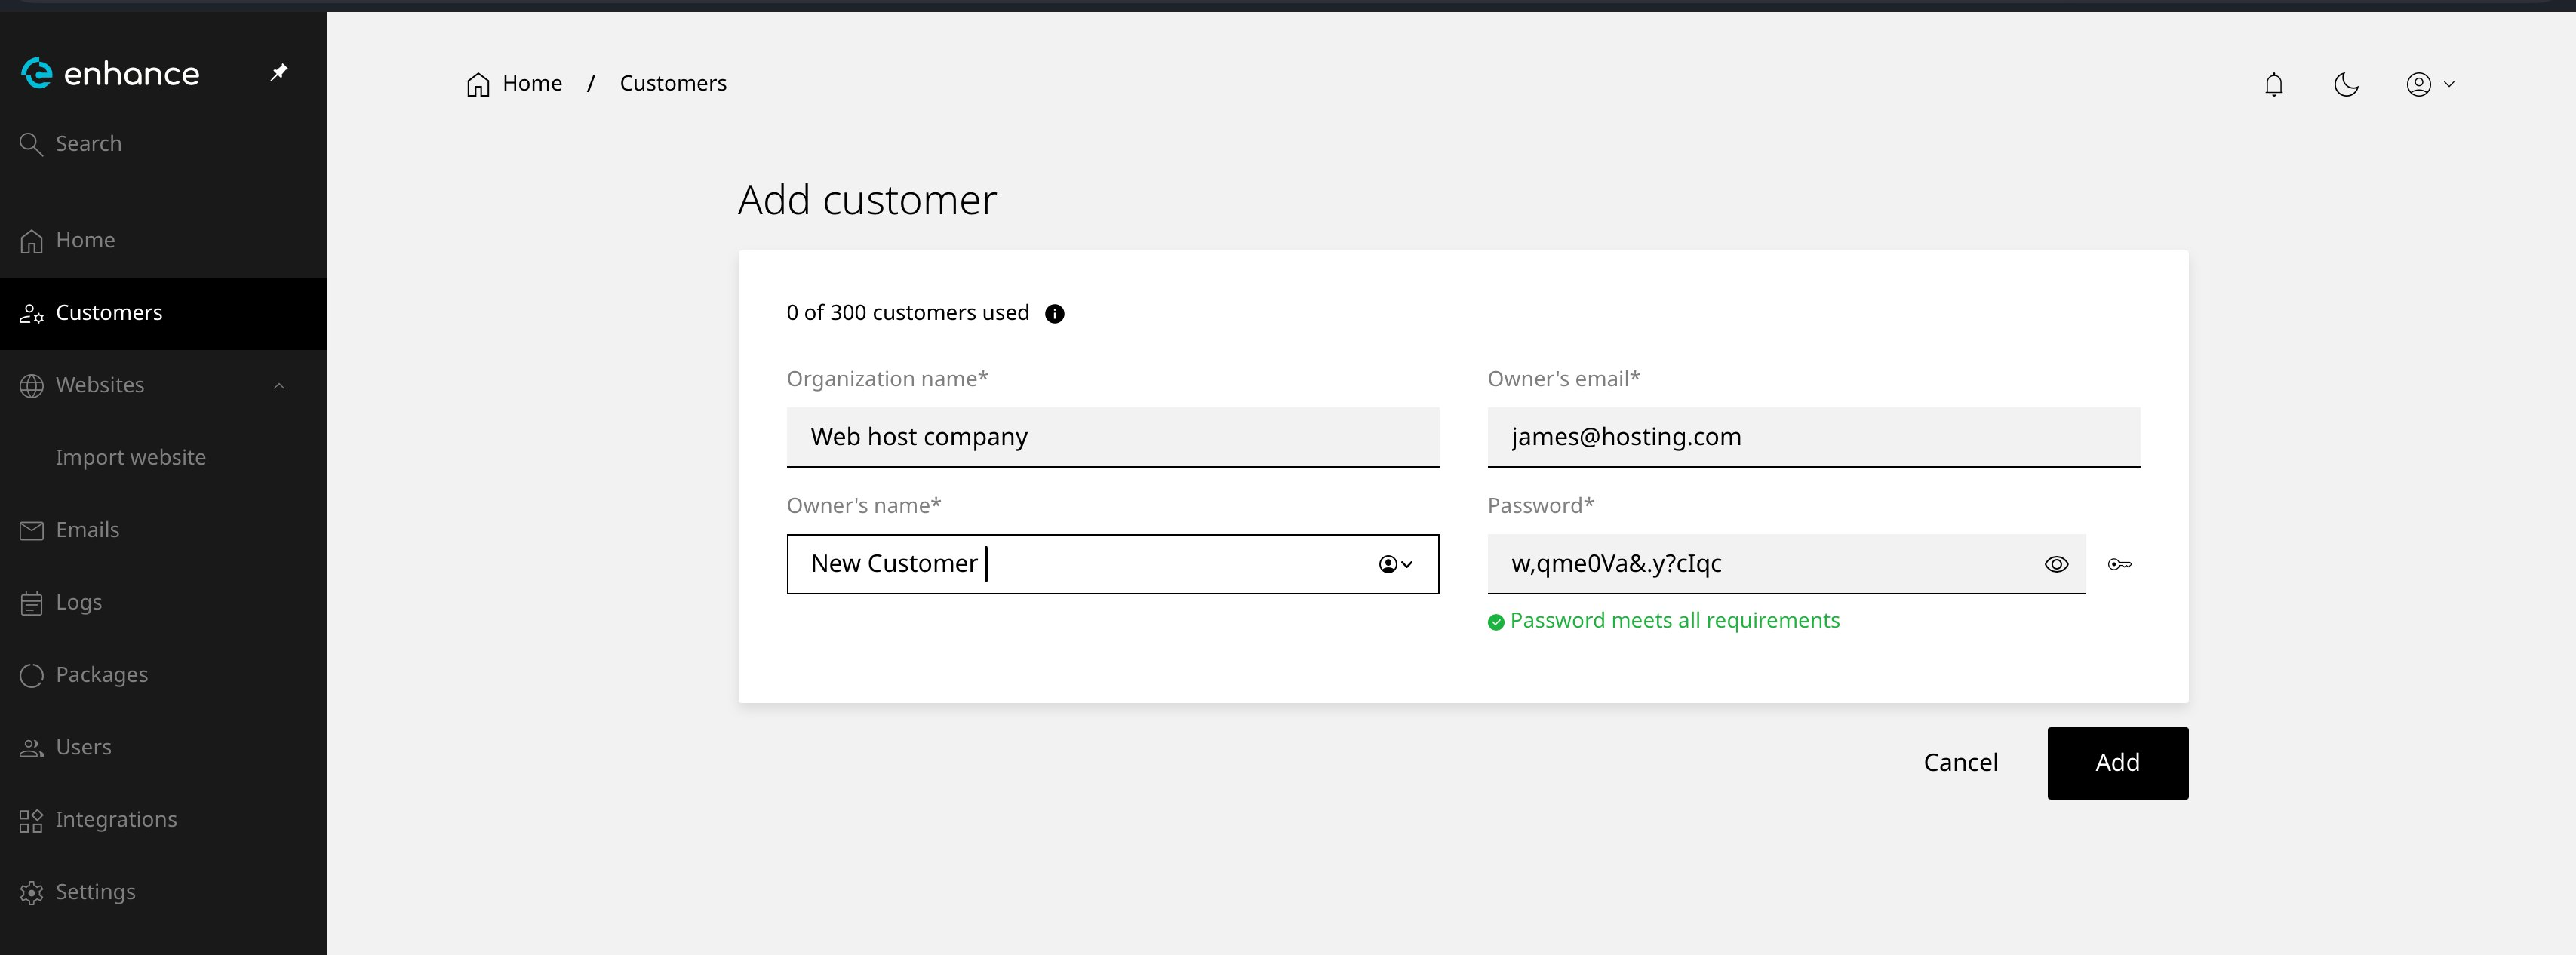
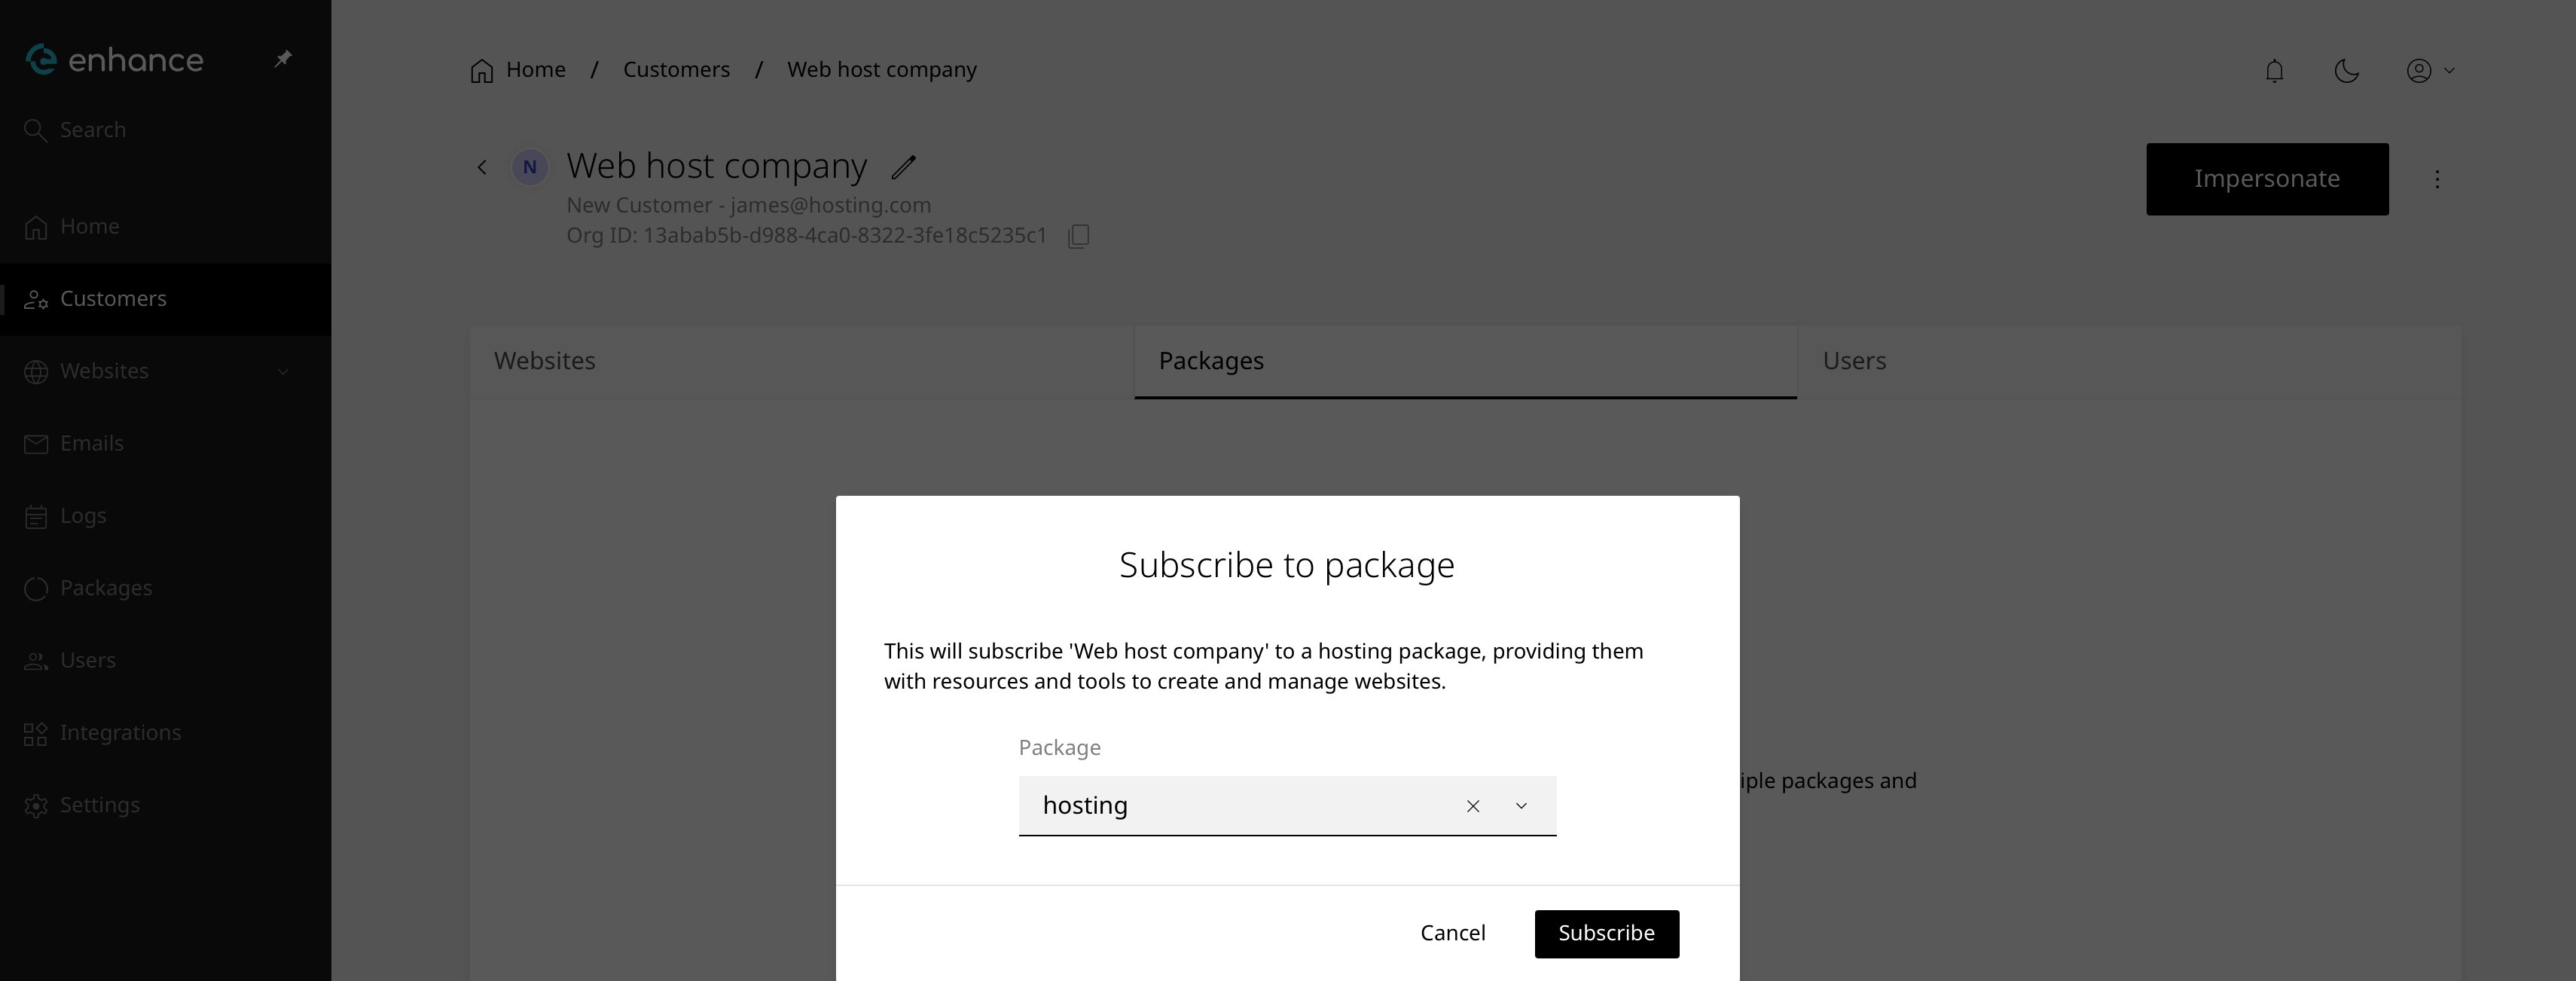
> [!TIP]
>
> If you're onboarding a client who doesn't have their domain registered yet, you can skip Step 3 entirely for now. The customer and package are ready, and you can come back and add the website whenever the domain is live. Or hand off login details to the client so they can add their own website.
# Impersonation
## Accessing a customer's control panel.
When you need to log into a customer's account to install WordPress, set up email, check files, or troubleshoot — this is the Enhance equivalent of clicking the little orange cPanel logo in WHM.
Once you impersonate, you'll see a yellow banner across the top of the screen confirming you're inside the customer's account. A Return to Admin button in the top-right takes you back to your Primary Panel whenever you're done.
# Client Access *Important*
## Setting up your customers' login URL.
In cPanel, your customers accessed their accounts via port 2083 (e.g. yourdomain.com:2083) or a redirect to /cpanel.
In Enhance, there are no port-based logins or redirects. Instead, you set a branded control panel URL that your customers use to log in — giving your hosting business a more professional appearance from day one.
**To set this up**:
Log into your Enhance Primary Panel → Settings → Platform → Control Panel Domain Here you'll specify the URL your customers will use to access their panel — **for example cp.yourdomain.com**. You'll need to point this domain's DNS to your server before it will work. Once set, your customers visit that URL and log in with the username and password you assigned when creating their customer account.
> [!TIP]
>
> If you haven't set a control panel domain yet, your customers won't have a URL to log into. Set this up before onboarding your first customer so the experience is seamless from the start.
# Daily Operations
## Files, email, databases & everything else.
Once you're impersonating a customer, the left-hand menu gives you everything the customer themselves would see — and it's where you'll do most of the day-to-day work a cPanel technician does.
1. **Websites** — Add websites, install WordPress, manage SSL, set PHP versions, and access the file manager for each site.
2. **Emails** — Create and manage email accounts, forwarders, and aliases.
3. **Logs** — Access server and website logs for debugging and audit.
4. **Packages** — View package resources and limits.
5. **Users** — Manage additional users with access to this customer's account.
6. **Integrations** — Connect Cloudflare, Slack, and other services.
> [!TIP]
>
> Everything you used to click through the cPanel icons for is here, just organised into clearer sections.
# Self-Service Imports
## Bring your old sites over yourself.
This is one of the biggest benefits in Enhance and something we want to highlight specifically.
The entire site — files, databases, emails, DNS — is brought over automatically. No ticket, no waiting, no back-and-forth. For larger or more complex migrations, our support team is still here and can handle the full white-glove migration for you if you prefer.
# When You Need Us
## We're here.
If something isn't behaving the way you expect, or you can't find the equivalent of a cPanel feature you rely on — don't struggle with it.
1. Open a support ticket from your client area. Our team is fluent in both panels and can walk you through the cPanel-to-Enhance equivalent of anything.
2. For migration help specifically, open a ticket and our migrations team will take it from there for you.

# How to deploy a Node.js application on Enhance
Source: https://kb.stablepoint.com/enhance-control-panel/how-to-deploy-a-nodejs-application-on-enhance
Enhance supports Node.js applications alongside PHP websites, letting you run Express, Next.js, and other Node.js apps on your hosting.
## Creating a Node.js application
1. Log in to your Enhance control panel.
2. Select the website where you want to run the app.
3. In the left sidebar, click **Developer tools** → **Node.js** (location may vary by panel version).
4. Enable Node.js for the website and select the Node.js version.
5. Set the **application entry point** (for example, app.js or server.js).
## Uploading your application
Upload your application files to the website's document root using the [File Manager](/enhance-control-panel/using-the-file-manager-in-enhance), [FTP](/enhance-control-panel/managing-ftp-accounts-in-enhance), or [SSH](/enhance-control-panel/configuring-ssh-access-in-enhance) with git.
A minimal Express.js example (app.js):
```javascript theme={null}
const express = require('express');
const app = express();
const port = process.env.PORT || 3000;
app.get('/', (req, res) => {
res.send('Hello from Node.js on Stablepoint!');
});
app.listen(port, () => {
console.log(`App listening on port ${port}`);
});
```
> [!NOTE]
>
> Your application must listen on the port provided by the environment (process.env.PORT). The platform routes web traffic to that port automatically.
## Installing dependencies
Connect via SSH, navigate to your application directory, and run:
```shell theme={null}
npm install
```
This installs the packages defined in your package.json.
## Starting and restarting the app
After uploading files or installing dependencies, start (or restart) the application from the Node.js section of the panel. Restart the app whenever you deploy new code.
## Troubleshooting
* **502/503 errors:** the app isn't running or crashed on startup — check the application logs in the panel.
* **Module not found:** run npm install again to ensure all dependencies are present.
* **Port errors:** make sure the app listens on process.env.PORT rather than a hard-coded port.
If you need help deploying a Node.js application, our support team is happy to assist.
# Installing an SSL certificate in Enhance
Source: https://kb.stablepoint.com/enhance-control-panel/installing-an-ssl-certificate-in-enhance
Enhance makes SSL certificate management simple with free automatic Let's Encrypt certificates for all websites.
## Automatic SSL (Let's Encrypt)
When you add a website to Enhance and its domain points to the server, a free Let's Encrypt SSL certificate is issued automatically. The certificate renews automatically before expiry — no action is needed on your part.
For the automatic certificate to be issued:
1. Your domain's DNS must point to the Stablepoint server (A record or nameservers).
2. Allow a few minutes after DNS propagation for the certificate to be issued.
To check the SSL status of a website:
1. Log in to your Enhance control panel.
2. Select the website.
3. In the left sidebar, click **SSL**.
The SSL page shows the current certificate, its issuer, and expiry date.
## Installing a custom SSL certificate
If you have purchased a certificate from a third-party provider, you can install it manually:
1. Log in to your Enhance control panel.
2. Select the website.
3. In the left sidebar, click **SSL**.
4. Choose the option to install a **custom certificate**.
5. Paste in:
* The **certificate** (CRT)
* The **private key**
* The **CA bundle / chain** (if provided by your certificate authority)
6. Save the certificate.
The certificate is applied to the website immediately.
## Forcing HTTPS
Once a valid certificate is in place, we recommend forcing all traffic to HTTPS. In the website's SSL settings, enable the **Force HTTPS** option. All HTTP requests will then redirect automatically to the secure version of your site.
> [!NOTE]
>
> If your site shows mixed-content warnings after enabling HTTPS, update any hard-coded http\:// links in your site content, or use a plugin such as Really Simple SSL for WordPress sites.
If you have any issues with SSL certificates on Stablepoint hosting, please contact our support team.
# Managing backups in Enhance
Source: https://kb.stablepoint.com/enhance-control-panel/managing-backups-in-enhance
Enhance includes a built-in incremental backup system that protects your websites, databases, and email automatically.
## How backups work
Backups on Enhance are **incremental** — after the first full snapshot, only changes are stored. This makes backups fast, frequent, and storage-efficient. Snapshots are taken automatically on a regular schedule.
## Viewing available backups
1. Log in to your Enhance control panel.
2. Select the website you want to manage.
3. In the left sidebar, click **Backups**.
You'll see a list of available snapshots with their dates.
## Restoring a full website
1. In the **Backups** section, find the snapshot you want.
2. Click **Restore**.
3. Confirm the restore.
> [!WARNING]
>
> A full restore replaces the website's current files and database with the versions in the snapshot. Any changes made after the snapshot date will be lost.
## Granular restore
One of Enhance's strongest features is granular restore — you can restore individual items instead of the whole site:
* **Individual files or folders** — browse the snapshot's file tree and restore just what you need.
* **A single database** — restore the database without touching files.
* **A single email account** — restore a mailbox without affecting the website.
This is ideal when you've accidentally deleted one file or a plugin update broke the database, but the rest of the site is fine.
## Best practices
* Check that a recent snapshot exists before major updates (WordPress core updates, theme changes, bulk imports).
* For business-critical sites, consider also keeping an off-server copy: download important files periodically or use an S3-compatible backup integration.
* Test a restore occasionally so you know the process before you need it urgently.
If you need a snapshot from a date no longer listed, contact support and we'll check whether it can be recovered.
# Managing FTP accounts in Enhance
Source: https://kb.stablepoint.com/enhance-control-panel/managing-ftp-accounts-in-enhance
FTP gives you direct file access to your website — useful for large uploads, automated deployments, and working with local development tools.
## Creating an FTP account
1. Log in to your Enhance control panel.
2. Select the website you want to manage.
3. In the left sidebar, click **FTP**.
4. Click **Add FTP account**.
5. Enter a username and a strong password.
6. Optionally set the directory the account should have access to (by default, the website's document root).
7. Click **Add**.
## Connecting with an FTP client
Use any FTP client such as FileZilla, Cyberduck, or WinSCP with these settings:
| Setting | Value |
| :- | :- |
| Host | Your website's domain or the server hostname |
| Username | The FTP username you created |
| Password | The FTP password you set |
| Port | 21 (FTP) |
| Encryption | Use explicit FTP over TLS if available |
> [!NOTE]
>
> Always prefer FTPS (FTP over TLS) or SFTP where available, so your credentials are not sent in plain text.
## Managing existing accounts
From the **FTP** section you can:
* Change an FTP account's password
* Restrict an account to a specific directory
* Delete FTP accounts you no longer use
> [!TIP]
>
> Create a separate FTP account per person or per tool that needs access, and delete accounts when they're no longer needed. Avoid sharing one set of credentials.
If you have trouble connecting, check that your firewall allows outbound connections on port 21, and try switching your client between active and passive transfer modes.
# Managing your domains in Enhance
Source: https://kb.stablepoint.com/enhance-control-panel/managing-your-domains-in-enhance
The Domains section in Enhance lets you manage all domains attached to your websites.
## Viewing your domains
1. Log in to your Enhance control panel.
2. Select the website you want to manage.
3. In the left sidebar, click **Domains**.
Here you can see the primary domain for the website and any additional domains or aliases.
## Adding a domain alias
A domain alias points an additional domain at the same website content:
1. In the **Domains** section, click **Add domain**.
2. Enter the domain name.
3. Choose whether it should be an **alias** of the primary domain (serves the same content) or redirect to the primary domain.
4. Save.
Once DNS for the new domain points to the server, an SSL certificate is issued for it automatically.
## Managing DNS
If your domain uses Stablepoint's nameservers, you can manage its DNS records in Enhance:
1. In the left sidebar, click **DNS**.
2. Add, edit, or delete records (A, AAAA, CNAME, MX, TXT, SRV, and more).
Changes to DNS records can take up to 24 hours to propagate globally, although in most cases they take effect much sooner.
## Cloudflare integration
Enhance includes built-in Cloudflare syncing. If your domain uses Cloudflare, you can connect your Cloudflare account under **Integrations** so DNS records created in Enhance are synced automatically to Cloudflare.
> [!TIP]
>
> If you change your primary domain or move a site between domains, remember to check any hard-coded URLs in your application (for example, the site URL setting in WordPress).
# Managing your email in Enhance
Source: https://kb.stablepoint.com/enhance-control-panel/managing-your-email-in-enhance
Enhance provides full email hosting with webmail access and support for all standard email clients.
## Creating an email account
1. Log in to your Enhance control panel.
2. In the left sidebar, click **Emails**.
3. Click **Add email account**.
4. Enter the mailbox name (the part before the @), select the domain, and set a password.
5. Click **Add**.
## Accessing webmail
Enhance includes Roundcube webmail. To access it:
* Click the **Webmail** link next to any email account in the Emails section, or
* Go to the webmail URL provided for your hosting and log in with the full email address and password.
## Connecting an email client
You can use your mailbox with any email client (Outlook, Apple Mail, Thunderbird, iPhone, Android). Use these settings:
| Setting | Value |
| :- | :- |
| Incoming server (IMAP) | mail.yourdomain.com, port 993, SSL |
| Incoming server (POP3) | mail.yourdomain.com, port 995, SSL |
| Outgoing server (SMTP) | mail.yourdomain.com, port 465, SSL |
| Username | Your full email address |
| Password | The mailbox password |
> [!NOTE]
>
> Replace yourdomain.com with your actual domain name. The mail. subdomain must point to the server — this is configured automatically when your domain uses our nameservers.
## Forwarders
To forward messages from one address to another:
1. In the **Emails** section, select the email account.
2. Open the **Forwarders** tab.
3. Add the destination address.
You can also create forward-only addresses that don't store mail locally.
## Troubleshooting
* **Can't send mail:** check the SMTP port is 465 with SSL enabled, and that SMTP authentication is turned on in your client.
* **Can't receive mail:** verify the domain's MX records point to your mail server.
* **Mailbox full:** delete old messages or empty the Trash and Junk folders.
If you need any assistance with email on Enhance, our support team is available 24/7.
# Managing your MySQL databases in Enhance
Source: https://kb.stablepoint.com/enhance-control-panel/managing-your-mysql-databases-in-enhance
Enhance provides full MySQL database management for your websites, including phpMyAdmin access.
## Creating a database
1. Log in to your Enhance control panel.
2. Select the website you want to manage.
3. In the left sidebar, click **Databases**.
4. Click **Add database**.
5. Enter a database name, and create a database user with a strong password.
6. Click **Add**.
Make a note of the database name, username, and password — applications like WordPress will ask for these during installation.
## Accessing phpMyAdmin
To manage a database's tables and data directly:
1. In the **Databases** section, find the database.
2. Click **phpMyAdmin**.
phpMyAdmin opens in a new tab, logged in automatically. From there you can browse tables, run SQL queries, and import or export data.
## Importing a database
To import an existing .sql file:
1. Open phpMyAdmin for the target database.
2. Click the **Import** tab.
3. Choose your .sql (or .sql.zip / .sql.gz) file.
4. Click **Go**.
For very large databases that exceed the upload limit, contact support and we can import it for you.
## Exporting a database
1. Open phpMyAdmin for the database.
2. Click the **Export** tab.
3. Choose the **Quick** method and SQL format.
4. Click **Go** to download the .sql file.
## Remote access
If you need to connect to your database from an external application or your local machine, contact support to discuss enabling remote MySQL access for your account.
> [!TIP]
>
> Use a separate database and database user per application, and never reuse the same password across databases. This limits the impact if any single application is compromised.
# Managing your website, databases and backups in Enhance
Source: https://kb.stablepoint.com/enhance-control-panel/managing-your-website-databases-and-backups-in-enhance
Enhance provides comprehensive tools for managing your website's databases and backups directly from the control panel.
## Databases
To manage databases for a website:
1. Log in to your Enhance control panel.
2. Select the website you want to manage.
3. In the left sidebar, click **Databases**.
From here you can:
* Create new MySQL databases
* Create database users and assign them to databases
* Launch phpMyAdmin to manage database content directly
* Delete databases you no longer need
When you create a database, Enhance automatically generates the database name with your website's prefix. Make note of the database name, username, and password — you will need these when configuring applications such as WordPress.
## Backups
Enhance includes a built-in incremental backup system. To manage backups:
1. Log in to your Enhance control panel.
2. Select the website you want to manage.
3. In the left sidebar, click **Backups**.
From here you can:
* View available backup snapshots
* Restore an entire website from a snapshot
* Restore individual files, databases, or email accounts (granular restore)
Backups run automatically on a schedule set by your hosting provider. Because the system is incremental, only changes since the last backup are stored, which makes backups fast and storage-efficient.
> [!TIP]
>
> Before making major changes to your website — such as updating WordPress core, changing themes, or modifying database structure — it's a good idea to check that a recent backup snapshot exists.
If you need a backup from a date that is no longer listed, contact our support team and we will check whether it can be retrieved.
# Managing your WordPress site in Enhance
Source: https://kb.stablepoint.com/enhance-control-panel/managing-your-wordpress-site-in-enhance
Enhance includes a built-in WordPress Toolkit that makes it easy to install and manage WordPress sites.
## Installing WordPress
You can install WordPress when creating a new website:
1. Log in to your Enhance control panel.
2. Click **Add Website**.
3. Enter your domain name.
4. Select the **Install WordPress** option.
5. Complete the WordPress details (site title, admin username, password, and email).
6. Click **Add**.
WordPress is installed automatically with your website. You can also install WordPress on an existing empty website from the website's **Applications** section.
## The WordPress Toolkit
To access the WordPress Toolkit for a site:
1. Select the website in your Enhance control panel.
2. Scroll to the **Applications** section.
3. Click **Manage** next to the WordPress installation.
From the toolkit you can:
* **Log in with one click (SSO)** — access wp-admin without entering credentials
* **Manage plugins and themes** — install, activate, deactivate, and remove
* **Configure automatic updates** — schedule updates for WordPress core, plugins, and themes
* **Create a staging site** — clone your site to test changes safely before pushing to production
* **Manage maintenance mode** — take your site offline temporarily while working on it
* **Change basic settings** — site URL, debug mode, search engine indexing
## Staging
Staging lets you clone your live WordPress site, test changes on the clone, and then push the changes back to production:
1. In the WordPress Toolkit, click **Create staging site**.
2. Make your changes on the staging copy.
3. When ready, use **Push to production** to apply the changes to your live site.
> [!WARNING]
>
> Pushing staging to production overwrites the live site's files and database. Make sure you have a recent backup before pushing.
If you run into any issues with WordPress on Enhance, our support team is available 24/7 to help.
# Using the File Manager in Enhance
Source: https://kb.stablepoint.com/enhance-control-panel/using-the-file-manager-in-enhance
The Enhance File Manager lets you manage your website's files directly from your browser — no FTP client needed.
## Accessing the File Manager
1. Log in to your Enhance control panel.
2. Select the website you want to manage.
3. In the left sidebar, click **File Manager**.
The File Manager opens showing your website's document root, where your site files live.
## What you can do
* **Upload files** — drag and drop files or use the upload button. You can upload archives (zip) and extract them on the server.
* **Create files and folders** — use the New button to create empty files or directories.
* **Edit files** — open text files (HTML, PHP, CSS, JS, .htaccess, etc.) in the built-in editor and save changes directly.
* **Move, copy, rename, and delete** — standard file operations on single files or selections.
* **Extract and compress** — unzip uploaded archives, or compress folders for download.
* **Change permissions** — set file and folder permissions when an application requires it.
> [!TIP]
>
> For a typical website, directories should have permissions 755 and files 644. Avoid setting anything to 777 — it's a security risk.
## Uploading a website
To upload an existing site:
1. Compress your site files into a .zip archive locally.
2. In the File Manager, navigate to the document root.
3. Upload the zip file.
4. Right-click the archive and choose **Extract**.
5. Ensure your site's index file (index.html or index.php) sits directly in the document root.
## When to use FTP instead
For very large uploads or automated deployments, an FTP/SFTP connection can be more reliable than browser uploads. See [Managing FTP accounts in Enhance](/enhance-control-panel/managing-ftp-accounts-in-enhance) for how to set this up.
# Importing and Restoring a cPanel Account into Enhance
Source: https://kb.stablepoint.com/importing-and-restoring-a-cPanel-account-into-enhance
*A step-by-step guide for resellers migrating customer accounts from cPanel to Enhance.*
Importing your cPanel account into Enhance is straightforward and gives you the ability to perform your own account restorations without needing to rely on support staff. This is especially useful for accounts that need to be restored on a tight timeline.
> [!WARNING]
>
> **Important:** Do not create the domain or website account for the account you are importing before starting this process — doing so will cause issues.
# **Step 1: Create the customer account**
Log into your Enhance account and create the customer's account

# **Step 2: Go to Import Website**
After the customer is created, head over to Websites > Import Website.

# **Step 3: Select your previous hosting provider**
Select your hosting provider. In this case, we are restoring the cPanel account of a cPanel customer, so select cPanel and click Next step.

# **Step 4: Select the import method**
"Upload website backup" should already be selected — simply click Next step.

# **Step 5: Choose your backup file**
Click Choose file to upload the cPanel backup file you have. If you need help generating a cPanel backup with your original cPanel provider, the steps are provided on this screen.

# **Step 6: Wait for the upload to complete**
After selecting the backup file, you'll see it uploading. Wait until the upload is complete, then click Next step.

# **Step 7: Review and import**
Once you see "Everything looks good. To import your website, click 'Import'," click Import!

# **Step 8: Wait for the import to finish**
After you click Import, your account will be imported and will show as completed once finished, so you can move on to your next import.

# **Step 9: Assign the website to the customer**
After importing the website, the last and most important step is assigning the website to the customer. Click Websites to see your list of websites, click the three dots on the far right of the imported site, select Transfer ownership, and then select your new customer as the owner of the account.

**That's it!** The cPanel account has now been fully imported and restored into Enhance under the correct customer.
# Stablepoint Knowledge Base
Source: https://kb.stablepoint.com/index
Guides, tutorials, and answers for every Stablepoint product and service.
Help center
# How can we help you today?
Search hundreds of guides, tutorials, and answers for every Stablepoint
product and service — or browse by topic below.
Search the Knowledge Base…
⌘K
Browse
## Browse by category
Everything you need, organized by topic.
> [card] [Getting started](/choosing-stablepoint/moving-to-stablepoint/overview)
>
> New to Stablepoint? Quick-start guides, hosting basics, and migration walkthroughs to get you up and running.
> [card] [Accounts & billing](/accounts-billing/billing-accounts/overview)
>
> Manage your Hosting Panel, payment methods, invoices, support PINs, and account settings.
> [card] [Domains](/domain-management/registering-domains/overview)
>
> Register, transfer, renew, and configure domains — including DNS, name servers, and privacy.
> [card] [Security](/security/choosing-a-strong-password)
>
> Strong passwords, SSL, spam protection, and hardening your sites and servers.
> [card] [Email](/email/email/overview)
>
> Set up email on any device or client, troubleshoot delivery, and manage webmail.
> [card] [Developer corner](/web-hosting/software-guides/overview)
>
> MySQL, PHP, Python, Node.js, Git, and everything else developers need.
Control panels
## Manage your control panel
Step-by-step guides for the control panel powering your account.
> [card] [cPanel](/web-hosting/cpanel-hosting-overview)
>
> Files, email, databases, domains, and security in cPanel.
> [card] [WebHost Manager](/reseller-hosting/using-web-host-manager-whm/overview)
>
> Reseller accounts, packages, and server branding with WHM.
> [card] [Enhance](/enhance-control-panel/from-cpanel-to-enhance-everything-you-need-to-know)
>
> The Enhance control panel — from cPanel migration to daily management.
Products
## Products & services
Dive into guides for specific Stablepoint products.
> [card] [Web hosting](/web-hosting/hosting-overview/overview)
>
> Shared cPanel hosting — running multiple sites, subdomains, PHP, and performance tuning.
> [card] [Reseller hosting](/reseller-hosting/reseller-hosting-server-specification)
>
> Sell hosting under your own brand with WHM, packages, and white-label nameservers.
> [card] [Domains](/domain-management/registering-domains/overview)
>
> Registering, transferring, and managing domains, DNS records, and WHOIS privacy.
> [card] [Backups](/web-hosting/backups/overview)
>
> Restore your site or database in minutes with JetBackup and Backuply.
> [card] [Installable applications](/web-hosting/software-guides/using-the-softacoulous-autoinstaller)
>
> One-click installs with Softaculous plus manual installation and optimization guides.
> [card] [SSL certificates](/web-hosting/ssl-certificates-1)
>
> Free SSL on every account — automatically provisioned and renewed.
Most read
## Popular articles
The guides our customers read most.
> [card] [Getting started with cPanel web hosting](/web-hosting/cpanel-hosting-overview)
>
> Your first steps after signing up.
> [card] [Accessing the Hosting Panel](/accounts-billing/billing-accounts/accessing-the-hosting-panel)
>
> Log in and find your way around.
> [card] [Migration process](/choosing-stablepoint/moving-to-stablepoint/migration-process)
>
> Move your site from another host.
> [card] [How to install WordPress](/web-hosting/software-guides/how-to-install-wordpress)
>
> Install WordPress in a few clicks.
> [card] [From cPanel to Enhance](/enhance-control-panel/from-cpanel-to-enhance-everything-you-need-to-know)
>
> Everything you need to know about the transition.
> [card] [Protecting yourself from phishing](/security/protecting-yourself-from-email-phishing-scam-attempts)
>
> Spot and avoid phishing and fraud.
## Still need a hand?
Our support team is here to help — reach out any time and we'll be happy to assist.
[Contact support](https://stablepoint.com/contact)
[Open a ticket](/accounts-billing/billing-accounts/working-with-tickets)
# Overview of .AC.KE and .SC.KE Domains
Source: https://kb.stablepoint.com/overview-of-ac-ke-and-sc-ke-domains
.AC.KE and .SC.KE are second-level domains under Kenya's .KE ccTLD, managed by KENIC.
## Eligibility
.AC.KE and .SC.KE domains are **reserved for learning institutions**:
* **.AC.KE** – academic institutions (e.g. universities and colleges)
* **.SC.KE** – schools
## Required Documents
* The school's **registration certificate issued by the Ministry of Education**.
The domain will be submitted for approval once this document is received.
# Overview of .AERO Domain
Source: https://kb.stablepoint.com/overview-of-aero-domain
.AERO is a sponsored top-level domain reserved for the aviation and aerospace community.
## Information Required
To register a .AERO domain, please provide your **Eligibility and Name Selection (ENS) ID and password**, issued via [information.aero](http://www.information.aero/).
If you don't have an ENS ID yet, you can request one here: [Request a .aero ID](https://information.aero/node/add/request-aero-id)
# Overview of .AU Domain
Source: https://kb.stablepoint.com/overview-of-au-domain
The .AU domain is the country code top-level domain (ccTLD) for Australia, managed by the Australian Domain Name Administrator (auDA). It signals to visitors that your business or organisation is based in, or serves, the Australian market.
## Eligibility Requirements
To register a .AU domain, the registrant must have an **Australian presence**. Eligible registrants include:
* An Australian registered business or organisation
* A sole trader or partnership operating in Australia
* A foreign business licensed to trade in Australia
* An Australian registered non-profit organisation or political party
* An Australian registered charity, club or association
* An Australian citizen or permanent resident
## Information Required
* Registrant name exactly as it appears on the relevant registration or identity record
* Australian Business Number (ABN) or Australian Company Number (ACN), where applicable. An ABN is recommended, as it helps the registry confirm the legitimacy of the registrant.
* If eligibility is based on an Australian trademark, the trademark number. The domain name must be an exact match of the trademark.
## Additional Information
All .AU registrations must comply with the rules and policies set by auDA. Please make sure the registrant details you provide are accurate and kept up to date, as auDA may verify eligibility at any time.
> **Note for .com.au and .net.au:** auDA has approved in principle a change to the eligibility rules for .com.au and .net.au. Under the proposed change, the domain name would need to match the registrant's legal or business name (or its acronym). No effective date has been confirmed yet.
## Useful Links
* [Who can register an Australian .au domain name?](https://webcentral.au/blog/who-can-register-an-australian-au-domain-name)
* [auDA – .au Domain Administration](https://www.auda.org.au/)
# Overview of .BR Domain
Source: https://kb.stablepoint.com/overview-of-br-domain
The .BR domain is the country code top-level domain (ccTLD) for Brazil, managed by [Registro.br](https://Registro.br).
## Information Required
To complete your .BR domain registration, the Brazilian registry requires:
1. **CPF or CNPJ number** of the domain holder
* **CPF** – for individuals
* **CNPJ** – for companies and organisations
2. **A valid Brazilian address** – street address, city, state and postal code (CEP).
## Nameserver Requirements
Valid, working nameservers are required by Registro.br before the domain can be registered. Please provide the nameservers you wish to use when placing your order.
If you don't have a hosting service to manage your DNS, we recommend pointing the domain to Cloudflare nameservers. You can follow Cloudflare's guide here: [Add a site to Cloudflare](https://developers.cloudflare.com/dns/zone-setups/full-setup/setup/#add-site-to-cloudflare)
You can validate that your nameservers are correctly configured using the registry's checker: [Registro.br DNS Verification Tool](https://registro.br/tecnologia/ferramentas/verificacao-de-dns/)
# Overview of .CA Domain
Source: https://kb.stablepoint.com/overview-of-ca-domain
The .CA domain is the country code top-level domain (ccTLD) for Canada, managed by the Canadian Internet Registration Authority (CIRA). Registrants must meet CIRA's Canadian Presence Requirements.
## Information Required
To complete your .CA domain registration or transfer, please provide the following.
### 1. Legal Type / Citizenship
Select the option that best describes the registrant's legal or citizenship status:
* Corporation
* Canadian Citizen
* Canadian Resident (Permanent Resident)
* Government Entity
* Educational Institution
* Unincorporated Association
* Hospital
* Partnership
* Trademark (registered in Canada)
* Trade Union
* Political Party
* Library, Archive or Museum
* Trust
* Aboriginal Peoples
* Indian Band
* Legal Representative
* Official Mark
* The King (His Majesty the King)
### 2. Contract Language for the Admin Contact
* English
* French
# Overview of .CN Domain
Source: https://kb.stablepoint.com/overview-of-cn-domain
The .CN domain is the country code top-level domain (ccTLD) for the People's Republic of China, managed by CNNIC.
## Eligibility
> **Please note:** We do not provide .CN domains to individuals, organisations or legal entities located in mainland China (with a Chinese country code).
## Required Documents
### Individuals Outside China
* A scan or photocopy of an official document proving the registrant's identity. A driver's licence is **not** accepted.
### Companies and Organisations Outside China
* A scan or photocopy of the business licence, business certificate, or an extract from the commercial register.
* The name of a responsible contact person within the company/organisation, along with a copy of their passport or ID in **JPEG** format. A driver's licence is **not** accepted.
### Registrants from Hong Kong, Macau and Taiwan
The following documents are accepted:
* Mainland Travel Permit for Hong Kong and Macao Residents
* Mainland Travel Permit for Taiwan Residents
* Residence Permit for Hong Kong and Macao Residents\*
* Residence Permit for Taiwan Residents\*
* Permanent Residence Identity Card for Foreigners\*
\* For these documents, both the **front and back** must be provided.
# Overview of .COM.BD and .NET.BD Domains
Source: https://kb.stablepoint.com/overview-of-com-bd-and-net-bd-domains
.COM.BD and .NET.BD are second-level domains under Bangladesh's .BD ccTLD, managed by the Bangladesh Telecommunications Company Limited (BTCL). BTCL requires document verification before these domains can be activated.
## Eligibility
* The registrant must be a **company or business registered in Bangladesh**.
* A valid Bangladeshi NID of the company owner and a reachable Bangladeshi mobile number are required.
* The domain must be registered by the actual eligible registrant, not by a third party on someone else's behalf.
* All information in the customer profile and supporting documents must be accurate and consistent.
## Required Documents
* Valid Trade License or Certificate of Incorporation of the company
* Valid Bangladeshi NID of the company owner
* Active and reachable Bangladeshi mobile number
* Official request letter on the company's letterhead
The request letter must clearly state the **purpose of the domain** and the **exact domain name** requested. If the domain represents a brand name that differs from the company's legal name on the Trade License, the letter must explain and justify the relationship between the brand and the company.
### Trademark Documentation (Optional, Recommended)
Where applicable, please provide a Bangladesh trademark registration certificate or trademark filing receipt to help establish the domain's legitimate association with the company or brand.
## Domain Name Requirements
* Domain names are registered on a first-come, first-served basis, subject to registry approval.
* The requested domain must match, or have a legitimate relationship with, the applicant's legal name, business name or trademark.
* Regular-priced domains must contain **at least three characters**. Two-character domains may be subject to premium pricing and registry classification.
* Reserved, government-related, misleading, offensive, unethical or illegal names may be restricted or rejected.
## Document Consistency and Additional Verification
Please make sure that your customer profile, Trade License, company owner's NID, request letter and any trademark documentation are consistent. BTCL may request additional documents or verification depending on the domain name and circumstances of the application.
## How to Submit Your Documents
Please submit the applicable documents via a support ticket. Once received and verified, we will proceed with activation, subject to BTCL's approval.
# Overview of .COM.MY Domain
Source: https://kb.stablepoint.com/overview-of-com-my-domain
The .COM.MY domain is a second-level domain under Malaysia's .MY ccTLD, managed by MYNIC and intended for commercial entities.
## Eligibility
The registrant must be a **company locally incorporated in Malaysia**.
## Requirements
To complete your .COM.MY domain registration or transfer, please confirm that you can provide:
1. **Company registration** – a copy of the Malaysian company registration document and the registration number.
2. **Proof of physical presence** – a valid Malaysian address and phone number.
3. **A live and active email address** – all communications from MYNIC are sent by email.
# Overview of .COM.SG Domain
Source: https://kb.stablepoint.com/overview-of-com-sg-domain
The .COM.SG domain is a second-level domain under Singapore's .SG ccTLD, intended for commercial entities.
## Eligibility
.COM.SG domains can **only be registered by companies**.
## Information Required
1. **Singapore-based organisations** – a valid company registration number (UEN) must be provided.
2. **Individual admin contact from Singapore** – if the administrative contact is an individual based in Singapore, their **Singpass ID** must be provided.
# Overview of .COM.TW Domain
Source: https://kb.stablepoint.com/overview-of-com-tw-domain
The .COM.TW domain is a second-level domain under Taiwan's .TW ccTLD, intended for commercial entities.
## Information Required
To complete your .COM.TW domain registration, please provide:
* **Business VAT number**
# Overview of .DE Domain
Source: https://kb.stablepoint.com/overview-of-de-domain
The .DE domain is the country code top-level domain (ccTLD) for Germany, managed by DENIC.
## Requirements
There are no special eligibility requirements for the registrant, but DENIC requires **valid nameservers** at the time of registration.
## Nameserver Requirements
Valid, working nameservers are required by DENIC before the domain can be registered. Please provide the nameservers you wish to use when placing your order.
If you don't have a hosting service to manage your DNS, we recommend pointing the domain to Cloudflare nameservers. You can follow Cloudflare's guide here: [Add a site to Cloudflare](https://developers.cloudflare.com/dns/zone-setups/full-setup/setup/#add-site-to-cloudflare)
You can validate that your nameservers are correctly configured using the registry's checker: [DENIC Nameserver Check (NAST)](https://nast.denic.de/)
# Overview of .DK Domain
Source: https://kb.stablepoint.com/overview-of-dk-domain-the-dk-domain-is-the-country-code-top-level-domain-cc-tld-for-denmark-managed-by-punktum-dk-information-required-to-complete-your-dk-domain-registration-please-provide-vat-id
The .DK domain is the country code top-level domain (ccTLD) for Denmark, managed by Punktum dk.
## Information Required
To complete your .DK domain registration, please provide:
* **VAT ID (Tax ID/Number)** of the organisation.
# Overview of .EDU.NG Domain
Source: https://kb.stablepoint.com/overview-of-edu-ng-domain
The .EDU.NG domain is a second-level domain under Nigeria's .NG ccTLD, reserved for Nigerian tertiary institutions. Registration is approved by the Nigeria Internet Registration Association (NiRA).
## Required Documents
### 1. Certificate of Accreditation
A scanned copy of the certificate of accreditation issued by a relevant authority – such as the National Universities Commission (NUC), the National Board for Technical Education (NBTE), the National Commission for Colleges of Education (NCCE), or any other body recognised by the Constitution of the Federal Republic of Nigeria – proving that the tertiary institution is registered.
### 2. Authorisation Letter
A scanned copy of a letter on the institution's letterhead, authorising a member of staff to register the domain on behalf of the institution.
* The letter must include the staff member's full name, email address, designation, phone number and contact address.
* It must be **signed by the head of the institution** or the next officer in the hierarchy.
* It must include the following contact details:
| Technical Contact | Admin Contact |
| - | - |
| Full name | Full name |
| Telephone number | Telephone number |
| Email address | Email address |
| Official position | Official position |
The letter should be addressed to:
> Nigeria Internet Registration Association 8 Funsho Williams Avenue Iponri, Surulere Lagos
## Approval Process
Once all documents are received, we will submit them to NiRA, the .NG registry, for approval. After the registry verifies your documents, the domain will be activated. Verification usually takes **one week or more**.
## Useful Links
* [Overview of .NG Domain](https://kb.verpex.com/domains/overview-of-ng-domain)
* [Criteria for registering a .edu.ng domain name](https://kb.verpex.com/docs/criteria-for-registering-edung-domain-name)
# Overview of .ES Domain
Source: https://kb.stablepoint.com/overview-of-es-domain
The .ES domain is the country code top-level domain (ccTLD) for Spain, managed by [Red.es](https://Red.es).
## Information Required
To register your .ES domain, please provide the following.
### 1. Identification Document Type (TIPO IDENTIFICACIÓN)
* **DNI/NIF** – Spanish National Identification Number
* **NIE** – Foreigner Identification Number in Spain
* **Other** – for contacts outside Spain or those using a passport
If you are using a passport, please provide the passport number.
### 2. Identification Number (IDENTIFICACIÓN)
The identification number that corresponds to the document type selected above.
### 3. Legal Form (LEGALFORM)
Select **Individual**, or the appropriate legal entity type:
* Economic Interest Group
* Association
* Sports Association
* Professional Association
* Savings Bank
* Community Property
* Community of Owners
* Order or Religious Institution
* Consulate
* Public Law Association
* Embassy
* Local Authority
* Sports Federation
* Foundation
* Mutual Insurance Company
* Regional Government Body
* Central Government Body
* Political Party
* Trade Union
* Farm Partnership
* Public Limited Company
* Civil Society
* General Partnership
* General and Limited Partnership
* Cooperative
* Worker-Owned Company
* Limited Company
* Spanish Office
* Temporary Alliance of Enterprises
* Worker-Owned Limited Company
* Regional Public Entity
* National Public Entity
* Local Public Entity
* Designation of Origin Supervisory Council (outside Spain only)
* Entity Managing Natural Areas
* Others
# Overview of .EU Domain
Source: https://kb.stablepoint.com/overview-of-eu-domain
The .EU domain is the top-level domain for the European Union, managed by EURid.
## Eligibility
The registrant must be one of the following:
* An **individual** who is a citizen of an EU member state (regardless of place of residence) or resides in an EU/EEA country
* A **legal entity** (company or organisation) established in an EU member state or a European Economic Area (EEA) country
A valid physical address or legal presence in the EU/EEA must be provided in the registrant details.
# Overview of .FI Domain
Source: https://kb.stablepoint.com/overview-of-fi-domain
The .FI domain is the country code top-level domain (ccTLD) for Finland, managed by Traficom.
## Information Required
### Finnish Registrants
* **Individuals** – Finnish personal identity number in the format `DDMMYYCZZZQ`.
* **Organisations** – register number of the Finnish organisation.
### Non-Finnish Registrants
* **Individuals** – date of birth.
* **Organisations** – the organisation's register number.
# Overview of .FR Domain
Source: https://kb.stablepoint.com/overview-of-fr-domain
The .FR domain is the country code top-level domain (ccTLD) for France, managed by AFNIC.
## Eligibility
The registrant must be located within the European Union or French territory. The registrant's address must be in one of the countries listed below.
## Information Required
### Individuals
* Place of birth
* Date of birth
### Organisations
Provide **one** of the following:
* **VAT number** – the organisation's Value Added Tax number
* **Trademark number** – the organisation's trademark registration number
* **SIREN/SIRET number** – the 9-digit SIREN or 14-digit SIRET code used to identify French businesses. Organisations based in France should include this number to avoid validation issues with the registry.
## Accepted Address Countries
| Country | Code |
| - | - |
| Austria | AT |
| Åland Islands | AX |
| Belgium | BE |
| Bulgaria | BG |
| Saint Barthélemy | BL |
| Caribbean Netherlands – Bonaire, Sint Eustatius and Saba | BQ |
| Switzerland | CH |
| Curaçao | CW |
| Cyprus | CY |
| Czech Republic | CZ |
| Germany | DE |
| Denmark | DK |
| Estonia | EE |
| Spain | ES |
| Finland | FI |
| France | FR |
| French Guiana | GF |
| Gibraltar | GI |
| Guadeloupe | GP |
| Greece | GR |
| Croatia | HR |
| Hungary | HU |
| Ireland | IE |
| Iceland | IS |
| Italy | IT |
| Liechtenstein | LI |
| Lithuania | LT |
| Luxembourg | LU |
| Latvia | LV |
| Saint Martin – French part | MF |
| Martinique | MQ |
| Malta | MT |
| New Caledonia | NC |
| Netherlands | NL |
| Norway | NO |
| French Polynesia | PF |
| Poland | PL |
| Saint Pierre and Miquelon | PM |
| Portugal | PT |
| Réunion | RE |
| Romania | RO |
| Sweden | SE |
| Slovenia | SI |
| Slovakia | SK |
| South Sudan | SS |
| Sint Maarten – Dutch part | SX |
| French Southern Territories | TF |
| Wallis and Futuna | WF |
| Mayotte | YT |
# Overview of .GOV.NG Domain
Source: https://kb.stablepoint.com/overview-of-gov-ng-domain
The .GOV.NG domain is a second-level domain under Nigeria's .NG ccTLD, reserved for Nigerian government bodies. Applications are vetted by NITDA (National Information Technology Development Agency), and the domain is registered through the Nigeria Internet Registration Association (NiRA).
## Eligibility
.GOV.NG is **restricted to the tiers of government in Nigeria** and their institutions, including:
* The Federal Government
* State governments
* Local governments
* Federal ministries, departments, parastatals and institutions
## Domain Name Guidelines
* **State government parastatals** must register under the official abbreviation of the state, as a third-level domain within .gov.ng (e.g. `ikeja.lg.gov.ng`).
* **Cities and townships** are encouraged to register a fourth-level domain under their state's third-level domain (e.g. under `kd.gov.ng` for Kaduna State). The abbreviation must come from the entity's name, placed after the city or township name and separated by a hyphen.
## Required Documents
Please provide a **scanned letter of authorisation** on the letterhead of the ministry or government parastatal that is registering the domain. The letter must:
* State the domain name to be registered
* Name the person authorised to register the domain. This person must work at the ministry or parastatal.
* Include the following contact details:
| Technical Contact | Admin Contact |
| :- | :- |
| Name of authorising personnel | Name of authorising personnel |
| Telephone number | Telephone number |
| Email address | Email address |
| Official position | Official position |
* Be signed, dated and stamped
* Be addressed to:
> Nigeria Internet Registration Association 8 Funsho Williams Avenue Iponri, Surulere Lagos
## Sample Letter of Authorisation
> Ministry of Testing 2 Giwa, Okearo Lagos 2nd December 2022
>
> Nigeria Internet Registration Association 8 Funsho Williams Avenue Iponri, Surulere Lagos
>
> Dear Sir,
>
> **Application for testing.gov.ng domain name**
>
> The Ministry of Testing wishes to apply for the domain name testing.gov.ng for our website.
>
> As required, please find the authorising personnel for the domain name below.
>
> **Technical Contact Details** Full name: Tuni Beverley Telephone number: 0802373744444 Email address: [director@testing.com](mailto:director@testing.com) Official position: Director for ICT
>
> **Admin Contact Details** Full name: Binta Shey Telephone number: 091283756858 Email address: [it@testing.com](mailto:it@testing.com) Official position: IT Officer
>
> Regards, \[Signature, date and stamp]
# Overview of .HK Domain
Source: https://kb.stablepoint.com/overview-of-hk-domain
The .HK domain is the country code top-level domain (ccTLD) for Hong Kong, managed by HKIRC.
## Required Documents
To register a .HK domain, please provide **one** of the following:
* A copy of the **Business Registration Certificate (BR)** issued by the Inland Revenue Department (IRD) of the HKSAR Government. The business must not be registered as a branch – the organisation name must be that of the head office.
* A copy of the **Certificate of Registration of Overseas Company** issued by the Companies Registry (CR) of the HKSAR Government.
* A copy of the **Certificate of Registration of Non-Hong Kong Company** issued by the Companies Registry (CR) of the HKSAR Government.
# Overview of .HU Domain
Source: https://kb.stablepoint.com/overview-of-hu-domain
The .HU domain is the country code top-level domain (ccTLD) for Hungary.
## Eligibility Requirements
.HU domains are **only available to organisations and companies**. Registration by individuals is not supported.
## Information Required
To complete your .HU domain registration, please provide:
1. **Organisation/company VAT number**
2. **Proof of local presence in Hungary** – a copy of a document confirming the organisation's presence in Hungary.
# Overview of .IE Domain
Source: https://kb.stablepoint.com/overview-of-ie-domain
The .IE domain is the country code top-level domain (ccTLD) for Ireland, managed by the .IE Domain Registry.
## Information Required
The registry requires additional identity details to complete your .IE domain registration:
1. **Company registration number (CRO number)** issued by the Companies Registration Office, together with a copy of the registration document in **PDF** format.
2. **Complete Irish address** – street address, city, county and postal code (Eircode).
# Overview of .IL Domain
Source: https://kb.stablepoint.com/overview-of-il-domain
The .IL domain is the country code top-level domain (ccTLD) for Israel, managed by the Israel Internet Association (ISOC-IL).
## Information Required
To complete your .IL domain registration, please provide:
1. **Entity Type**
* Individual
* Organisation
2. **Company registration number** – required if the entity type is *Organisation*.
# Overview of .INFO.BD Domain
Source: https://kb.stablepoint.com/overview-of-info-bd-domain
.INFO.BD is a second-level domain under Bangladesh's .BD ccTLD, managed by the Bangladesh Telecommunications Company Limited (BTCL). It is intended for informational or general-purpose websites. BTCL requires document verification for all .BD registrations; this is a registry-level requirement.
## Eligibility
* The registrant must be a **Bangladeshi national**.
* The domain name must be **at least 3 characters** long (2-character names are not allowed).
* The name on the NID must match the name in your account profile.
* All submitted information must be consistent across all documents.
* The domain must be registered by the actual registrant only. No individual or third party may register a .BD domain on behalf of someone else.
## Required Documents
### 1. National ID (Mandatory)
* Valid Bangladeshi National ID (NID) of the registrant.
### 2. Mobile Number (Mandatory)
* An active, reachable Bangladeshi mobile number.
### 3. Request Letter (Mandatory)
A request letter that clearly states:
* The **purpose** of registering the domain
* The **exact domain name** being requested
## Additional Verification
BTCL may request additional documents or verification depending on the domain name and circumstances of the application.
## How to Submit Your Documents
Please submit the documents via a support ticket. Once received and verified, we will proceed with activation, subject to BTCL's approval.
# Overview of .IT Domain
Source: https://kb.stablepoint.com/overview-of-it-domain
The .IT domain is the country code top-level domain (ccTLD) for Italy, managed by Registro .it.
## Eligibility
The registrant must be an adult with citizenship, residence or commercial headquarters in one of the following:
* A European Economic Area (EEA) country
* Vatican City State
* Republic of San Marino
* Swiss Confederation
* United Kingdom
## Information Required
### 1. Entity Type
* Italian Companies
* Italian Individual Firms, Freelance Workers/Professionals
* Italian Non-profit Organisations
* Italian Other Subjects
* Italian Public Organisations
* Non-Italian, Non-Persons (foreign organisations)
* Persons, Foreign and Italian (individuals)
### 2. Nationality
### 3. Identification Number
* **Codice Fiscale** – if the registrant is located in Italy
* **VAT number** – if the registrant is an organisation
* **Personal ID number** – if the registrant is located elsewhere
## Nameserver Requirements
Valid, working nameservers are required by Registro .it before the domain can be registered. Please provide the nameservers you wish to use when placing your order.
If you don't have a hosting service to manage your DNS, we recommend pointing the domain to Cloudflare nameservers. You can follow Cloudflare's guide here: [Add a site to Cloudflare](https://developers.cloudflare.com/dns/zone-setups/full-setup/setup/#add-site-to-cloudflare)
## Useful Links
* [How to register a .it domain – Registro .it](https://www.nic.it/en/find-your-it/how-register)
# Overview of .JP Domain
Source: https://kb.stablepoint.com/overview-of-jp-domain
The .JP domain is the country code top-level domain (ccTLD) for Japan, managed by JPRS.
## Eligibility
The domain owner and/or the administrative contact **must be located in Japan**. This is a requirement set by the .JP registry.
## Information Required
If you or your organisation meet this requirement, please provide the local contact details:
* Name
* Full Japanese address
* Phone number
If you don't have a local presence in Japan, you may consider using a trustee service or choosing an alternative domain extension.
# Overview of .LT Domain
Source: https://kb.stablepoint.com/overview-of-lt-domain
The .LT domain is the country code top-level domain (ccTLD) for Lithuania.
## Information Required
To register a .LT domain, please provide:
* **Companies** – registrant legal entity identification code
* **Individuals** – registrant personal ID number
# Overview of .LU Domain
Source: https://kb.stablepoint.com/overview-of-lu-domain
The .LU domain is the country code top-level domain (ccTLD) for Luxembourg, managed by DNS-LU.
## Requirements
There are no special eligibility requirements for the registrant, but the registry requires **valid nameservers** at the time of registration.
## Nameserver Requirements
Valid, working nameservers are required by DNS-LU before the domain can be registered. Please provide the nameservers you wish to use when placing your order.
If you don't have a hosting service to manage your DNS, we recommend pointing the domain to Cloudflare nameservers. You can follow Cloudflare's guide here: [Add a site to Cloudflare](https://developers.cloudflare.com/dns/zone-setups/full-setup/setup/#add-site-to-cloudflare)
You can validate that your nameservers are correctly configured using the registry's checker: [DNS-LU Name Server Test](https://dns.lu/en/domains/name-server-test)
# Overview of .NET.NG Domain
Source: https://kb.stablepoint.com/overview-of-net-ng-domain
The .[NET.NG](http://NET.NG) domain is a closed second-level domain under Nigeria's .NG ccTLD. It is used for activities related to the Internet and networks. Registration is approved by the Nigeria Internet Registration Association (NiRA).
## Eligibility
.[NET.NG](http://NET.NG) is **restricted to licensed Nigerian Internet Service Providers (ISPs) and telecommunications infrastructure providers**.
## Required Documents
To register a .[NET.NG](http://NET.NG) domain, please provide:
1. **NCC licence:** a copy of the licence from the Nigerian Communications Commission (NCC) for providing Internet and telecoms services.
2. **Authorisation letter:** a scanned copy of a letter on the company's letterhead, including the company details and requesting registration of the domain.
## Approval Process
Once we receive and check the documents, we will contact the relevant authorities and register the domain.
# Overview of .NET.SG Domain
Source: https://kb.stablepoint.com/overview-of-net-sg-domain
The .NET.SG domain is a second-level domain under Singapore's .SG ccTLD, reserved for network and hosting service providers.
## Eligibility
Applicants for .NET.SG domains must be one of the following:
1. **Infocomm Media Development Authority (IMDA) licensees** – e.g. SBO individual licensees, FBO licensees, or other licensees providing connectivity or value-added network services.
2. **Providers of network-based data hosting services** – such as email hosting. DNS hosting providers, web hosting providers and data centres may also apply under this category.
## Domain Name Requirements
* The applied name must reflect and be substantially linked to the applicant's principal business and/or company name.
* The domain must be used mainly for conducting the applicant's said business.
# Overview of .NG Domain
Source: https://kb.stablepoint.com/overview-of-ng-domain
The .NG domain is the country code top-level domain (ccTLD) for Nigeria, managed by the Nigeria Internet Registration Association (NiRA). It is a good fit for local and international businesses looking to build their brand in Nigeria.
## Eligibility
.NG is an **open** extension: anyone, anywhere can register it, and no supporting documents are required.
Other second-level extensions under .NG have their own rules:
| Extension | Intended for | Restricted? |
| :- | :- | :- |
| .[com.ng](http://com.ng) | Nigerian businesses (commercial use) | Open to anyone |
| .[org.ng](http://org.ng) | Non-commercial Nigerian organisations (non-profits) | Open to anyone |
| .[name.ng](http://name.ng) | Personal websites | Open to anyone |
| .[mobi.ng](http://mobi.ng) | Mobile-friendly websites | Open to anyone |
| .[net.ng](http://net.ng) | Licensed Nigerian ISPs and telecoms infrastructure providers | Restricted, documents required |
| .[sch.ng](http://sch.ng) | Nigerian schools (non-degree-issuing institutions) | Restricted, documents required |
| .[edu.ng](http://edu.ng) | Nigerian tertiary institutions | Restricted, documents required |
| .[gov.ng](http://gov.ng) | Nigerian government bodies and institutions | Restricted, documents required |
## Key Information
* **Registration period:** .NG domains can be registered for up to 5 years.
* **Activation time:** Open extensions such as .NG are activated within minutes. Restricted extensions need document vetting, which can take a week or more.
* **WHOIS privacy:** Not available. All or part of the registrant's contact information is shown in WHOIS.
* **Restricted names:** Some .NG domain names are restricted by the registry.
## Expiry and Renewal Lifecycle
1. **Expired:** 60 days after the expiry date. The domain can be renewed normally.
2. **Redemption:** 28 days. The domain can be restored for an extra fee (in addition to the renewal fee).
3. **Pending delete:** 14 days. The domain can't be restored.
4. **Deleted:** The domain becomes available for anyone to register.
## Useful Links
* [NiRA – Nigeria Internet Registration Association](https://www.nira.org.ng/)
# Overview of .NO Domain
Source: https://kb.stablepoint.com/overview-of-no-domain-the-no-domain-is-the-country-code-top-level-domain-cc-tld-for-norway-managed-by-norid-information-required-to-complete-your-no-domain-registration-please-provide-the-details
The .NO domain is the country code top-level domain (ccTLD) for Norway, managed by Norid.
## Information Required
To complete your .NO domain registration, please provide the details that apply to you:
1. **Individuals** – a valid Norwegian address and Norid ID. The registrant name must exactly match the details registered with Norid.
2. **Organisations** – the organisation number registered in the Norwegian Register of Business Enterprises (*Enhetsregisteret*).
## Nameserver Requirements
Valid, working nameservers are required by Norid before the domain can be registered. Please provide the nameservers you wish to use when placing your order.
If you don't have a hosting service to manage your DNS, we recommend pointing the domain to Cloudflare nameservers. You can follow Cloudflare's guide here: [Add a site to Cloudflare](https://developers.cloudflare.com/dns/zone-setups/full-setup/setup/#add-site-to-cloudflare)
You can validate that your nameservers are correctly configured using the registry's checker: [Norid DNS Check](https://dnscheck.norid.no/)
# Overview of .NYC Domain
Source: https://kb.stablepoint.com/overview-of-nyc-domain
.NYC is the city top-level domain for New York City.
## Eligibility
The registrant must have a **physical presence in one of New York City's five boroughs**: the Bronx, Brooklyn, Manhattan, Queens or Staten Island.
## Information Required
Please specify which of the following categories applies to the registrant:
1. **Organisation or entity** with a physical address in New York City, or
2. **Individual** whose primary residence is in New York City.
Please note that P.O. boxes are not accepted as proof of physical presence.
# Overview of .ORG.SG Domain
Source: https://kb.stablepoint.com/overview-of-org-sg-domain
The .ORG.SG domain is a second-level domain under Singapore's .SG ccTLD, intended for non-commercial organisations.
## Eligibility
.ORG.SG domains are available to:
* Organisations registered, or in the process of registering, with the **Registry of Societies (ROS)**
* Town councils
* Community centres
* Places of worship
* Embassies
* Other organisations not registrable under the Societies Act, the Companies Act or with professional bodies
# Overview of .PT Domain
Source: https://kb.stablepoint.com/overview-of-pt-domain
The .PT domain is the country code top-level domain (ccTLD) for Portugal, managed by .PT (Associação [DNS.PT](https://DNS.PT)).
## Information Required
### Individuals
* A valid **VAT or tax number** that matches the country of residence in the registrant's address
* A valid **ID card number**
### Companies
* The registered **organisation name**
* A valid **company VAT number** that matches the country declared in the registrant's address
## Review Process
After you submit your registration, the registry will review the application, which may take **up to 10 days**. If additional validation is needed, the registry will contact you at the email address provided during registration.
## Useful Links
* [.PT Registration Rules](https://documentos.pt.pt/Registration_rules/PT_registration_rules.html)
# Overview of .RO Domain
Source: https://kb.stablepoint.com/overview-of-ro-domain
The .RO domain is the country code top-level domain (ccTLD) for Romania, managed by ROTLD.
## Information Required
To complete your .RO domain registration, please provide the details that apply to you:
1. **Individuals** – ID card number. For residents of Romania this is the 13-digit personal numeric code (CNP).
2. **Businesses** – business registration number **and** VAT or tax number.
# Overview of .RU Domain
Source: https://kb.stablepoint.com/overview-of-ru-domain
The .RU domain is the country code top-level domain (ccTLD) for the Russian Federation.
## Information Required
To complete your .RU domain registration, please provide the details that apply to you.
### Individuals
* Date of birth
* ID card number
* ID card issue date
* ID card issuing authority
### Companies / Organisations
* Company/organisation registration number
* Company/organisation VAT number
# Overview of .SCH.NG Domain
Source: https://kb.stablepoint.com/overview-of-sch-ng-domain
The .SCH.NG domain is a second-level domain under Nigeria's .NG ccTLD, reserved for primary and secondary schools in Nigeria. Registration is approved by the Nigeria Internet Registration Association (NiRA).
## Required Documents
To register a .SCH.NG domain, please provide:
1. **Authorisation letter** – a scanned copy of a letter from the school, on the school's official letterhead, including the contact details of the institution requesting the domain.
2. **Certificate of accreditation** – a scanned copy of the school's certificate of accreditation from the government.
## Useful Links
* [Overview of .NG Domain](https://kb.verpex.com/domains/overview-of-ng-domain)
* [Criteria for registering a .sch.ng domain name](https://kb.verpex.com/docs/criteria-for-registering-a-schng-domain-name)
# Overview of .SE Domain
Source: https://kb.stablepoint.com/overview-of-se-domain
The .SE domain is the country code top-level domain (ccTLD) for Sweden, managed by the Swedish Internet Foundation.
## Information Required
To complete your .SE domain registration, please provide the details that apply to you:
1. **Individuals** – ID card number (personal identity number).
2. **Organisations** – business registration number.
3. **Organisations based outside Sweden** – business registration number **and** VAT ID.
# Overview of .SG Domain
Source: https://kb.stablepoint.com/overview-of-sg-domain
The .SG domain is the country code top-level domain (ccTLD) for Singapore, managed by the Singapore Network Information Centre (SGNIC).
## Eligibility
.SG domains are available to **all persons** – individuals and organisations, local or foreign.
## Requirements
1. **Local administrative contact** – foreign applicants must appoint and duly authorise a local agent in Singapore as the administrative contact.
2. **Singapore postal address** – the administrative contact must provide a valid Singapore postal address for SGNIC's records.
# Overview of .TF Domain
Source: https://kb.stablepoint.com/overview-of-tf-domain
The .TF domain is the country code top-level domain (ccTLD) for the French Southern and Antarctic Lands, managed by AFNIC.
## Eligibility
The domain owner's address must be located in one of the countries listed below.
## Information Required
* A valid address (street, city, state/region, postal code) in one of the accepted countries.
## Accepted Address Countries
| Country | Code |
| - | - |
| Austria | AT |
| Åland Islands | AX |
| Belgium | BE |
| Bulgaria | BG |
| Saint Barthélemy | BL |
| Caribbean Netherlands – Bonaire, Sint Eustatius and Saba | BQ |
| Switzerland | CH |
| Curaçao | CW |
| Cyprus | CY |
| Czech Republic | CZ |
| Germany | DE |
| Denmark | DK |
| Estonia | EE |
| Spain | ES |
| Finland | FI |
| France | FR |
| French Guiana | GF |
| Gibraltar | GI |
| Guadeloupe | GP |
| Greece | GR |
| Croatia | HR |
| Hungary | HU |
| Ireland | IE |
| Iceland | IS |
| Italy | IT |
| Liechtenstein | LI |
| Lithuania | LT |
| Luxembourg | LU |
| Latvia | LV |
| Saint Martin – French part | MF |
| Martinique | MQ |
| Malta | MT |
| New Caledonia | NC |
| Netherlands | NL |
| Norway | NO |
| French Polynesia | PF |
| Poland | PL |
| Saint Pierre and Miquelon | PM |
| Portugal | PT |
| Réunion | RE |
| Romania | RO |
| Sweden | SE |
| Slovenia | SI |
| Slovakia | SK |
| South Sudan | SS |
| Sint Maarten – Dutch part | SX |
| French Southern Territories | TF |
| Wallis and Futuna | WF |
| Mayotte | YT |
# Overview of .US Domain
Source: https://kb.stablepoint.com/overview-of-us-domain
The .US domain is the country code top-level domain (ccTLD) for the United States. All .US registrants must meet the usTLD Nexus Requirements.
## Information Required
To complete your .US domain registration, please select one option from each of the categories below.
### 1. Application Purpose
* Business use for profit
* Educational purposes
* Government purposes
* Non-profit businesses, clubs, associations, religious organisations, etc.
* Personal use
### 2. Category of Applicant
You will need to confirm whether you are a US citizen/resident or have a business registered or present in the US:
* **Natural Person – U.S. Citizen**
* **Natural Person – Permanent Resident**
* **U.S. Corporation** – an organisation incorporated in the United States
* **Bona Fide U.S. Presence** – an entity that regularly engages in lawful activities in the United States
## Useful Links
* [usTLD Nexus Requirements Policy (PDF)](https://www.about.us/doc/resources/ebooks/usTLD_Nexus_Requirements_Policy.pdf)
# Overview of .VN Domain
Source: https://kb.stablepoint.com/overview-of-vn-domain
The .VN domain is the country code top-level domain (ccTLD) for Vietnam, managed by VNNIC.
## Information Required
To complete your .VN domain registration, please provide:
1. Scanned copy of your passport
2. Registrant's identification or passport number
3. Date of birth
4. Gender
# How to set up custom nameservers
Source: https://kb.stablepoint.com/reseller-hosting/how-to-set-up-custom-nameservers
You can set up custom nameservers to use on our reseller hosting. One set of nameservers can be used on multiple reseller accounts and dedicated servers with Stablepoint.
> [!NOTE]
>
> All Stablepoint hosting is whitelabel and we provide whitelabel nameservers in your welcome email which you can use. We don't provide them in this guide as they might be search engine indexed. Custom nameservers allow you to 'brand' your nameservers beyond this.
1. With your domain name registrar, you will need to set up glue records to point to our IPs. If we are your domain name registrar, we can do this for you.
| Glue Record | Nameserver IP |
| :- | :- |
| ns1 | 13.248.158.180 |
| ns2 | 75.2.118.134 |
| ns3 | 76.223.26.245 |
| ns4 | 99.83.147.209 |
2. Once you've set up the glue records, step 2 is to set them up on our end. You need to add A records for the above IPs.
You can go to cPanel > Zone Editor and you will need to add:
ns1.yourdomainname.com A 13.248.158.180\
ns2.yourdomainname.com A 75.2.118.134\
ns3.yourdomainname.com A 76.223.26.245\
ns4.yourdomainname.com A 99.83.147.209
3. Then can make the change to use those custom Nameservers by default for the DNS zone here, under the WHM (in the search field go to Basic WebHost Manager Setup -> Choose Explicitly Set the Nameservers -> Save).
# Is Reseller Hosting Whitelabel
Source: https://kb.stablepoint.com/reseller-hosting/is-reseller-hosting-whitelabel
All Stablepoint hosting is whitelabel, and we provide whitelabel nameservers in your welcome email which you can use.
You have the option to create custom Nameservers. You can check how on this article:\
[**How to set up custom nameservers**](/reseller-hosting/how-to-set-up-custom-nameservers)
# Reseller Hosting Server Specification
Source: https://kb.stablepoint.com/reseller-hosting/reseller-hosting-server-specification
Stablepoint uses a range of different server specifications, primarily based on demand in a specific location or region. Our typical reseller hosting server has at least 32 cores (AMD Epyc 32 Core Processor, typically 3GHz+), at least 32GB of RAM and 1TB+ of SSD (usually NVMe) disk space. We manage capacity to ensure that servers are well matched to the work loads they are handling, but if you're ever seeing slow performance or other issues with your server, please get in contact to discuss further.
# How to bill my customers
Source: https://kb.stablepoint.com/reseller-hosting/using-upmind-to-bill-my-customers/how-to-bill-my-customers
At Stablepoint we provide a WHM reseller account which gives you a way to manage cPanel accounts for your customers.
Most resellers also need to use software to manage their clients. This software lets clients place orders and also lets you automatically provision their hosting.
At Stablepoint we recommend [Upmind](https://upmind.com) which is the software we use ourselves.
Here are some software examples you can use
* [Upmind](https://upmind.com)
* [Blesta](https://blesta.com)
* [WHMCS](https://whmcs.com)
* [HostBill](https://hostbill.com)
With this software you enter your WHM credentials as a server, and then you can create packages that are then sold to your customers.
# Linking my WHM account to Upmind
Source: https://kb.stablepoint.com/reseller-hosting/using-upmind-to-bill-my-customers/linking-my-whm-account-to-upmind
This article shows resellers how to link a WHM account to an Upmind account. After linking accounts, the next step is to create a hosting package on Upmind. That is where you name the package, configure details, and set billing terms.
You need to have an [Upmind](https://upmind.com) account and a WHM reseller account with us.
## Add the server to Upmind
The first step is to configure a new provision configuration. This is how you add web servers and domain providers via APIs.
1. Log in to your Upmind account.
2. Click Settings.
3. On the next page, click Provision configurations.
4. Click the Add new configuration button to add a WHM server account. A new panel displays.
* The screenshot below shows two active services (domain hosting and web hosting).
On the new panel:
1. Enter a unique name for the service.
2. Click the PROVISION CATEGORY field and select Web Hosting. A new field displays.
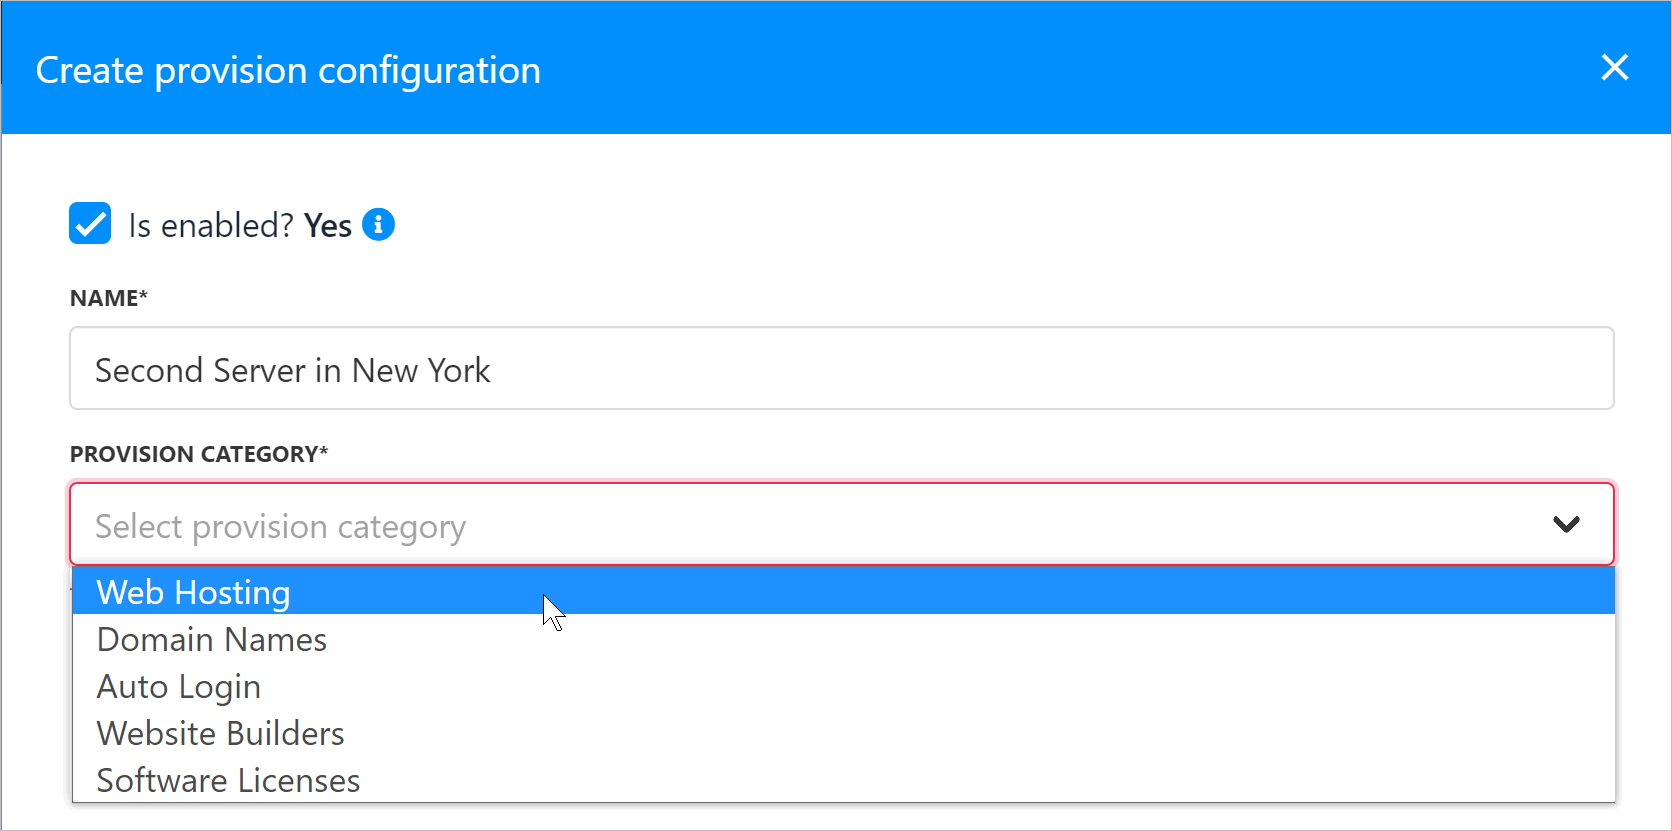
3. Select cPanel
4. Set the protocol (e.g. HTTPS).
5. Enter the hostname. (see below)
6. Enter 2087 for the port.
7. Enter the WHM username. (see below)
8. Enter the WHM API key. (see below)
9. Enter the server location.
10. Enter Stablepoint for hosting provider. Your clients will not see this.
11. Check the box to accept new accounts.
12. Click Create.
## Copying WHM Information
To complete all the fields in the panel described above, you need to find and copy three pieces of information on your WHM account.
* Hostname
* WHM Username
* API key
To quickly locate the correct information:
1. Log in to your WHM
2. The hostname is the server hostname
3. The username is displayed on the top right
4. The API key is accessed through WHM -> Manage API Tokens
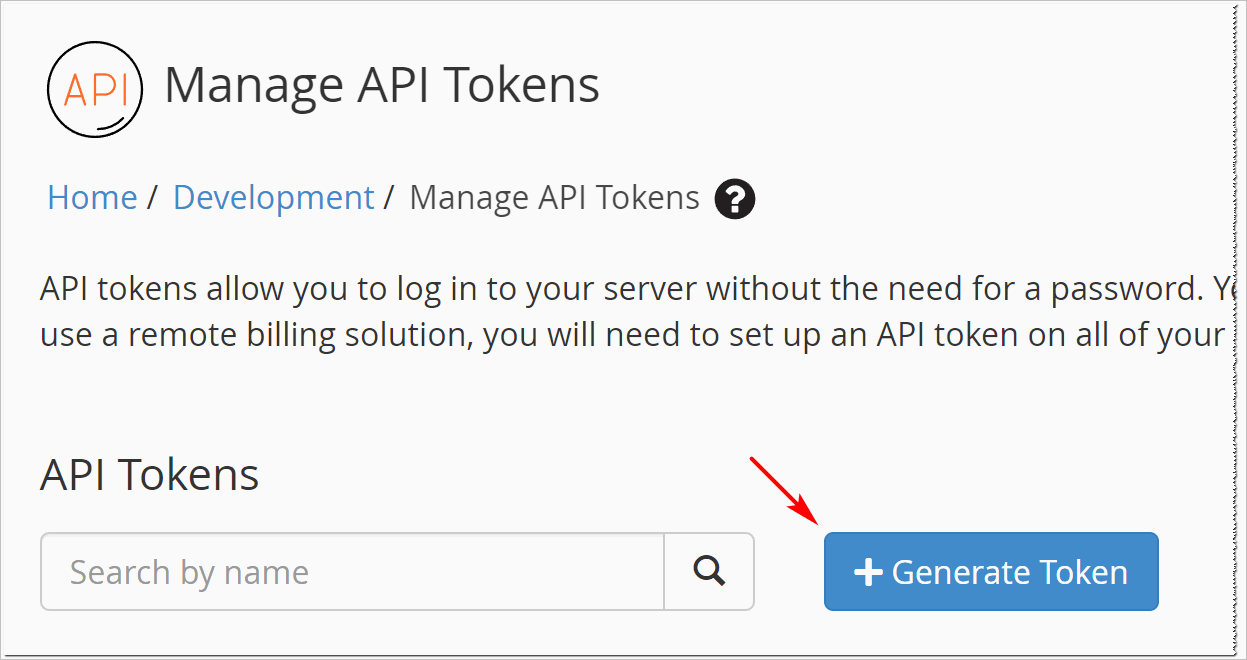
4. On the next page, enter a token name.
5. Click Save.
6. Go back to the Upmind page and paste the value into the API Key field.
## Linking multiple reseller accounts to Upmind
You can repeat the above as many times as you want and add multiple reseller accounts to your Upmind account.
# Managing Clients and Orders
Source: https://kb.stablepoint.com/reseller-hosting/using-upmind-to-bill-my-customers/overview
This section covers managing your reseller clients and orders, including billing software and linking your WHM account to Upmind.
# Can resellers set their own LVE Limits?
Source: https://kb.stablepoint.com/reseller-hosting/using-web-host-manager-whm/can-resellers-set-their-own-lve-limits
[LVE Limits](/web-hosting/hosting-overview/lve-limits-explained-1) are CloudLinux limits that define how many resources each cPanel account can use. On our Reseller hosting we offer different tiers of the LVE limits per reseller account as follows:
| | Go Reseller | Unlimited Reseller | Premium Unlimited Reseller |
| :- | :- | :- | :- |
| RAM per cPanel | 2GB | 2GB | 4GB |
| CPU per cPanel | 2 vCPU | 2 vCPU | 2 vCPU |
| Entry Processes | 30 | 30 | 30 |
| Inodes | Unlimited | Unlimited | Unlimited |
| Iops | 1024 | 1024 | 5120 |
| IO | 10MB/S | 10MB/S | 10MB/S |
| LVE Manager | Disabled | Disabled | Enabled |
These limits are set for **every cpanel account** in your reseller unless you modify the settings in your LVE Manager account.
## LVE Manager
LVE Manager allows you to set limits per cPanel account within your reseller. This is a facility we allow on our Premium Reseller only.
Please note that the maximum you can set per cPanel is 4GB (your package limit). If you set the limit higher it will be automatically reverted.
# How to change a cPanel password in WHM
Source: https://kb.stablepoint.com/reseller-hosting/using-web-host-manager-whm/how-to-change-a-cpanel-password-in-whm
The cPanel is a famous control panel among hosting companies and web developers. Normally, it is paired with a web host manager (WHM). The WHM offers administrative control over the server and creates several accounts on a website. The cPanel dashboard offers different features of data tracking, SEO, statistics, MySQL, and web files. These features are among the famous control panels among hosting companies and web developers.
The hosting provider manages a server with a web host manager and creates a cPanel account for each customer. The cPanel dashboard can be complicated for a newbie considering the several features. This article will explore everything about the cPanel in WHM and how you can change passwords. You can read what web hosting is and how it works to understand the cPanel better.
## Introduction to cPanel
The cPanel is a unique feature that hosts providers offer to customers, although it is not free. When you purchase a hosting plan, you get a free cPanel subscription for the first year, but subsequently, you have to pay a fee. The cPanel is private to the website owner, which is accessible using your username and password. You need to keep your login details safe; else, you can lose your website to intruders.
## How to Change a cPanel Password?
For security measures, it is advisable to change your cPanel password from time to time. Your cPanel gives you access to your website. To change your password, you need to log in to your web host manager as the root user. Here is a step-by-step process to change your cPanel password.
## Step 1: Accessing your account
Log into your WHM as the root user. Remember to use your username (email in most situations) and password. Once you log in, go to "Home" and click on "Account Functions." You will see "Password Modification."
## Step 2 – Selecting an account
Assuming you have several accounts attached to different websites, you can choose the particular account you want to change your password. Ensure you select the main account to avoid any password error in the future.
## Step 3 – changing password
In the "New Password" box, enter the password of choice to override your previous password. To ensure you don't make a mistake, you have to enter the new password again in the "Confirm Password" box. However, if you want to use an auto-generated password, you can click the "Generate" button to provide a random password. The downside to using the auto-generated password is that you might not remember it. However, it is highly secured as it comprises different characters and special characters.
## Step 4 – confirm the change
Depending on what option is suitable for you, the next step is to confirm your password change. To complete the process, click the "Change Password" button, which automatically creates a new password that gives you access to your cPanel.
## Understanding the Functionality of the cPanel Interface
There are several things you can do on the cPanel. It's an interface that comes with many functionalities that helps build a website. This section will explore some things you can do on your cPanel.
## Install software
After signing to your host and purchasing a hosting plan, one key thing to do is to install a content management system. Nowadays, most website owners use WordPress to build their websites. The cPanel allows you to do this effortlessly as it comes with auto-installers that provide a simple method for installing different software packages. The image below shows that the cPanel contains several auto-installers located in the Autoinstallers section.
## Add domains and subdomains
Once you register with a hosting provider, you can configure a domain during the process. It serves as the primary domain that houses your business. Adding a new domain is relatively easy, as you can see from the image below.
Assuming you have a primary domain, you can add two different types of domain names depending on the host. These include addon domains and subdomains. The Addon domain is a separate domain name different from your main domain. For instance, if your primary domain is "abcd.com," your addon domain can be "mysite.com."
On the other hand, the subdomain is an addition to your primary domain name. Using our previous primary domain, if you were to add a subdomain, it would be "mysite.abcd.com."
## Upload files
The cPanel allows you to upload files to your web server through FTP accounts and File manager. The file manager option lets you upload the files directly into the server through your web browser. However, you need an FTP program to upload your website on the cPanel.
Overall, the File Manager offers a more convenient option to upload files as it doesn't require any third-party program. You can use your web browser to upload these files if the file size is not large. Nevertheless, the File Manager option isn't as effective as the FTP program once you have large files to upload.
## Security
Interestingly, you can increase your website security through the cPanel. It offers different helpful tools such as IP Address deny manager and password-protect directories. The IP address denies manager allows you to block traffic from specific IP addresses that might cause trouble to your website. On the other hand, the password protects directories enables you to add a password to some folders on your server.
## View Error logs
Most website owners neglect the "view error logs" functionality because they don't know how it works. It allows you to view different errors your website might have encountered. It's an invaluable tool to diagnose what is happening to our website. You can view the error on the server in the visitor stats section, where you will see "Error Log."
## Wrapping up
The cPanel offers a lot of functionality that can help improve the overall performance of your website. It is your server management buddy to keep your website running. Whether you are using a shared or dedicated hosting plan, the place of cPanel cannot be taken for granted.
You need to change your cPanel password as a security measure, and we have shown you the easiest way to get that sorted out. Remember, your username and password are essential and must be kept to avoid anyone accessing your website.
# How to create and manage cPanel accounts in WHM
Source: https://kb.stablepoint.com/reseller-hosting/using-web-host-manager-whm/how-to-create-and-manage-cpanel-accounts-in-whm
cPanel is the access door to your website as it allows you to manage applications and files associated with your hosting provider. It is an important feature that web hosting companies provide to customers to access several features.
Your cPanel is like the key to your castle as once you misplace the key, someone else can gain access to it and do whatever they feel. Note that web hosting is different from WordPress hosting because most people confuse the two.
Nowadays, the choice of cPanel host is very critical as choosing a domain name for your business. Therefore, you need to be careful when selecting a web host as customer support, pricing, performance, features, and reliability can affect your website functionality. The cPanel is an integral aspect of a web host as it allows you to manage different aspects of a web server. You can manage email accounts, files, databases, and SSL certificates.
## How to create and manage cPanel Account in WHM?
The first step to creating and managing your cPanel account is accessing your cPanel. We assume you have already purchased a host's domain name and hosting plan. To log in to your cPanel to create and manage a cPanel account, you have to access your web host manager.
## Step 1 - Login to cPanel
The easiest way to log in to your cPanel is to type your website address, followed by a colon and 2083. For instance, if your website is [www.domain123.com](http://www.domain123.com/), to access your cPanel, you have to type the following [www.domain123.com:2083](http://www.domain123.com:2083/).
This will automatically take you to the login page, where you need to input your username and password sent to your email. If you successfully log in, it will redirect you to your website's control panel, containing all the settings you need.
## Step 2 – Creating an account
Once you have access to your website setting, you can click the "Account Functions." The next process is to click on the "Create a New Account."
## Step 3 – Fill in the necessary information
After clicking the "Create a New Account," a new window will open, requesting information such as domain, username, password, and email. Ensure you fill the information in the fields accurately.
The domain name represents the primary name for your cPanel account, whereas the username is the name you want to use when logging into the cPanel. Every username is followed by a password, which you can provide to access the cPanel. However, the email address is where you will receive cPanel notifications.
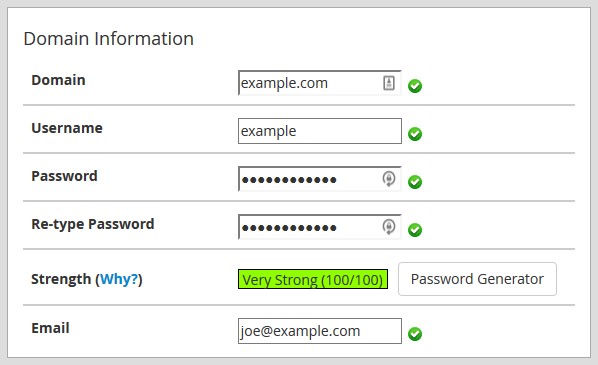
## Step 4 – Select Package
Here, you have to select the desired package of your choice.
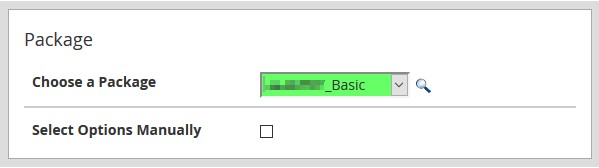
## Step 5 – select theme
This section allows you to select your preferred language and theme.
## Step 6 – Optional setting
The DNS and Mail Routing settings can be left as default, especially if you don't have technical knowledge about web hosting. After this, you can click on the "Click" button. If there were no errors, you would see a message "Account Creation Completed!!!... Account Creation OK…Done"
With these steps, you have completely created a new cPanel account in the web host manager. Now you can manage your account and perform several functions in it.
## Advantages of cPanel for website Owners
The cPanel offers website owners several unique features, making it an invaluable tool for business owners looking to promote their products and services online. Here are some benefits of using the cPanel.
## User-friendly interface
The carefully designed interface uniquely categorizes different features, enabling users to locate these modules easily. Interestingly, the cPanel interface has an intuitive dashboard with great graphics and menus for seamless navigation throughout the platform. Remarkably, installing and uploading your files to a web host is easy from the cPanel.
## Highly compatible
One prominent reason for its popularity is the compatibility with different web browsers, including Mozilla Firefox, Safari, and Google Chrome. In addition, it supports different third-party applications such as SEO tools and site builders.
## Extensive features
You don't need advanced technical knowledge to navigate through the dashboard as users can perform complicated tasks, including managing MySQL databases, creating FTP accounts subdomains, and generating website backups.
## Reliable support system
The cPanel blogs and forums give you access to several dedicated manuals for WHM and cPanel. These manuals provide in-depth analysis and solutions to several cPanel products.
## Application installer
The cPanel grants access to install over 400 applications on your website. It also comes with an integrated Softaculous apps installer that makes the installation process easy.
## Wrapping up
The cPanel interface offers many opportunities for web users to manage applications and files on your website. You can install software using Softaculous, create FTP accounts, create email accounts, set up Free AutoSSL, view web traffic data, and create databases and usernames.
Creating and managing a cPanel account involves a straightforward process that is as easy as starting a web hosting business. If you follow our guide on creating a cPanel account, you are now an expert in creating and managing an account in cPanel.
# How to create packages and feature lists in WHM
Source: https://kb.stablepoint.com/reseller-hosting/using-web-host-manager-whm/how-to-create-packages-and-feature-lists-in-whm
Web Host Manager is a unique tool host providers offer to customers to manage their websites. It enables users to have administrative access to cPanel and perform several activities. The cPanel is a Linux-based control panel that web owners can use to manage all services a host provider offers. With the cPanel, you can create email IDs, install software, and create subdomains and FTP users.
When you hear about WHM, people often confuse it with cPanel. The WHM, despite providing administrative control over VPS or a dedicated server, also enables a host to manage your account. It is a reseller control panel that customers receive, containing all the reseller hosting plans to manage their hosting account. One important thing you can do in WHM is creating packages and feature lists.
This article will explore how you can easily create packages and feature lists, what WHM does, and why you should consider having one. Without further ado, let's get started.
## How to create Packages in WHM?
To create packages on WHM, here is a step-by-step process to achieve that. Interestingly, it doesn’t require advanced technical knowledge to create a package in WHM. All you need is to follow the steps below.
## Step one – Log in to WHM
Without gaining access to the administrative section of the WHM, you cannot create any package. Therefore, you need to login into the admin. In most situations, your host provider will provide the login details.
## Step two – Use the Search box
You can directly go to the "Add a Package" section, but the best way is to use the search box on the upper left side of the screen. On the search box, type "Package" and select "Add Package" once the result appears.
## Step three – Add a Package
A new dialog box will appear if you complete the previous step correctly. Here, you can type the package name (Premium, basic, etc.) provided in the package text box. Hint – look at the image below. On the "Resource" area, you can configure the limits and quotas, depending on the package you want.
## Step Four – Go to Setting
Below the "Resource" section, you will see the "Setting" section. Ensure you scroll down because it can be hidden, depending on the size of your screen. Tick the checkboxes for the resources you want to enable the new package on the setting tab. You can also select the cPanel theme using the cPanel theme options.
Select the feature list you want for the package. There are several options available; you can set the default value if you don't know about it. The last setting is the "Locale," which allows you to select the language of choice. The default language is English, which is changeable to what suits you.
## Step Five – Complete the process
Once everything looks good, you can click the "Add" button, which will create a new package. This ends the process of creating a package in WHM. Remember, you can create as many packages as possible.
## How to create feature lists in WHM?
Once you create new packages within WHM for your cPanel accounts, you can also assign a particular feature list to the page. A feature list is a list of features each cPanel account has on WHM. For instance, you can disable or enable a list of features such as IP Deny Manager, Awstats, phpMyAdmin, and File Manager for your users. Let’s explore how to create a feature list in WHM.
## Step one
Log into your Web Host Manager
## Step two
In the left menu, you will see packages. Click on it, and under it, you will see "Feature Manager."
## Step three
Once you click on the "Feature Manager," you will see a new feature list under "Add a New Feature List." Click "Add" to enter the new list.
## Step Four
The next page will display a list of features. Select or deselect the features you want to disable or enable. Once you are done, you can click “Save.” This means you have created a new feature list in WHM.
## Functions of WHM
It's necessary to look at what a product does before you decide if it's suitable for your need or not. WHM offers a suite of tools that allows website owners to do several things. These include:
* Monitor and manage websites
* Create, suspend, and delete cPanel accounts
* Create default pages when creating a new account
* Configure customers’ support requests
* Permission to check and change domains DNS zones
* Change client usernames and domain names
## Why do you need WHM?
The Web Host Manager gives you flexibility and control when managing a popular website or several large sites. Besides this, it allows you to sell hosting services to create and manage several cPanels. There are several reasons why you need WHM, especially if you have popular websites and want to place them on different cPanels.
* Peradventure one of your websites get attacked or hacked, the tendency of the hacker having access to other websites is highly reduced.
* It’s hard for someone to know if the different cPanels are connected to the same web host manager account.
* Assuming you have several websites requiring credit cards, using a web host manager saves you money and stress.
* It is frustrating to manage different domains in a single cPanel, especially when updating files frequently. WHM makes the process easy as you can use a shared cPanel account.
## Conclusion
Web Host Manager is an essential tool that allows users to manage and control their websites. It allows users to create packages and feature lists on cPanel. In this write-up, we've shown you how you can create these packages and feature lists and get complete control over the features of WHM.
# How to upgrade and downgrade packages in WHM
Source: https://kb.stablepoint.com/reseller-hosting/using-web-host-manager-whm/how-to-upgrade-and-downgrade-packages-in-whm
Web Host Manager, commonly known as WHM, is essentially a dashboard through which you can manage your websites based on cPanel. Before understanding how to change your cPanel account plan through WHM, it is essential to know how WHM and cPanel interact with each other.
## How does WHM interact with cPanel?
Suppose you have several domains to host, it is always better that each has its own cPanel account. This way, you ensure that if one domain is infected with malware, others are not affected at all. However, managing multiple cPanel accounts can get complicated. This is where the need for WHM arises.
Using WHM, you can isolate each domain, create its separate cPanel account, and allocate the plan’s resources among them in the way you consider the best.
## Who can use WHM?
WHM is available to VPS hosting, Reseller Hosting, and Dedicated Hosting users but not to shared hosting users. So, if you use any of the qualifying hosting services, you can use WHM.
## Why using WHM is beneficial?
As WHM integrates all your cPanel accounts, the obvious benefit is that it saves you time and provides security.
Also, it makes your cPanels compliant with regulatory standards.
## Upgrading the cPanel package through WHM
As you can control your cPanel accounts through WHM, you can also upgrade or downgrade your account plans through it.
One of the most common instances when you might need to upgrade or downgrade is your website's popularity changes. In such a case, you would require hosting resources that accommodate the changing popularity.
WHM simplifies changing the package from the dashboard itself, and therefore, it is critical to know how to do it.
## How WHM simplifies the process
Suppose your current package offers only 1 add-on domain, but you want to upgrade to the package with 10 add-on domains. Increasing add-on domains can require you to add more MySQL databases or disk space. Adjusting the add-on domains manually will not make all the corresponding changes in your plan, and you might even make errors in doing so.
Therefore, it is best to upgrade the plan using WHM so that all the related changes are done in an error-free manner.
## How to upgrade or downgrade the package from WHM?
Follow the below steps to change your cPanel plan from WHM:
## Step 1: Log in to WHM
## Step 2: Go to Account Functions
## Step 3: Select Upgrade/Downgrade Account from the menu on the left
## Step 4: Select the cPanel account you want to upgrade or downgrade
## Step 5: Click “Modify”
## Step 6: Choose whether you need to upgrade or downgrade the package
Note: If you want to see what the impact of upgrade and downgrade will be, you can click on the magnifying glass.
Your plan will be upgraded or downgraded as per your need. You will find the below details once it is complete showing the changes made to your account.
Note: The above steps will only upgrade or downgrade your cPanel account and not change its IP address.
## Conclusion
WHM is a really helpful tool for managing all your cPanel accounts. Therefore, upgrading or downgrading the account plan through it is a good idea if you need a quick and straightforward solution. However, if you use shared hosting, you don't have access to WHM, and in that case, you would need to follow a different upgrade or downgrade procedure.
# Using Web Host Manager (WHM)
Source: https://kb.stablepoint.com/reseller-hosting/using-web-host-manager-whm/overview
This section covers using Web Host Manager (WHM) to run your reseller hosting, from creating and managing cPanel accounts to packages, branding, and limits.
# Choosing a strong password
Source: https://kb.stablepoint.com/security/choosing-a-strong-password
Here are some techniques for creating a strong password:
* Choose a password that is at **least** ten characters long, but preferably longer. The longer the password, the less susceptible it is to brute force attacks.
* Use a mixture of lowercase and uppercase characters, numbers, and punctuation marks.
* Place one or more punctuation mark in the middle of a word (for example, *vege#%tarian*).
* Use some unusual way of contracting a word. You do not have to use an apostrophe.
* Think of an uncommon phrase, and then take the first, second or last letter of each word. *You can't always get what you want* could become *ycagwyw*. Throw in a capital letter, a punctuation mark, and a number or two, and you might have *yCag5wyw*.
* You can deliberately misspell one or more words to make the password harder to crack.
* Combine several of the above techniques.
* Use something that no one but you would think of. The best password is one that is totally random to everyone else but you. Since this is highly dependent on the individual, it is difficult to tell you how to come up with these, but use your imagination!
## How not to choose a strong password
Here are some guidelines for what *not* to do when choosing a password. You should **avoid** these techniques when you create a password:
* Using words in a dictionary.
* Using your username or real name.
* Using anyone else's name.
* Using any word in a *cracking dictionary*. A cracking dictionary contains lists of words that attackers use to try to crack passwords (this is also known as a *dictionary attack*). These lists include abbreviations, cartoons, character patterns, machine names, famous names, female names, male names, Bible citations, movies, myths, numeric patterns, short phrases, places, science fiction, Shakespeare, songs, surnames, and just about anything else you can think of.
* Using any of the above techniques with a single character before or after it (for example, *happy1*).
* Using any of the above techniques with capitalization (for example, *Penguin* or *Walrus*).
* Using any of the above reversed (for example, reversing *cat* to *tac*), doubled (*cat* to *catcat*), or mirrored (*cat* to *cattac*).
* Selecting a word and substituting some characters (for example, changing *password* into *p\@ssw0rd*, or *supersecret* into *sup3rs3cr3t*). Attackers are well aware of these substitutions, and can crack them.
* Using keyboard patterns (for example, *qwerty* or *nbvcx*). Cracking programs look for these types of patterns in passwords.
## Safeguarding your password
You should never share your password with anyone else. You should also never write it down. The strongest password in the world doesn't do much good if you write it down and someone else sees it, or if you share it with someone else (who shares it with someone else, and so on).
Lastly, if you receive an e-mail message from someone who claims to be an administrator, security specialist, or some other important-sounding position who asks you to change your password, don't do it. This is a popular scam to trick the unsuspecting.
# Email spoofing
Source: https://kb.stablepoint.com/security/email-spoofing
Email spoofing is a technique used by hackers to gain access and plant malware into your system by altering the email header to impersonate a legitimate or trusted organization or person. The trick here is get the recipient to open and respond to the email when they see the sender is apparently someone they know and trust.
## Why is email spoofing dangerous?
Although email spoofing can be easily resolved by simply deleting the emails, many people fall into the trap because the source of the email, as shown in the email headers, appears to be from a legitimate and trustworthy source.
Additionally, the contents of the emails are typically well crafted, making it difficult for users to identify a fraudulent email. Many people follow the instructions in the email, disclosing personal information, banking information, or clicking links in the email. This then allows hackers to gain access into the user's system.
## How to identify email spoofing
Here are some suggestions to help identify email spoofing:
1. **Check the display name and the email address:** In your email client, hover over the display name and verify that the email address matches what you are expecting.
2. **Check the reply path:** When you click **Reply**, the email address should match the sender in the original email.
3. **Check the overall tone of the message content:** Does it sound legitimate?
### What is the difference between email spoofing and email phishing?
Phishing emails typically request personal information such as credit card numbers or PIN numbers, or they collect user information through a pop-up notification requesting the user to click and fill out the details. Spoofing emails use false email headers and IP addresses to entice users to provide requested information or click on a link, allowing hackers to easily obtain user information.
> [!NOTE]
>
> For more information about how to protect yourself from email phishing attempts, please see [this article](/security/protecting-yourself-from-email-phishing-scam-attempts).
## How to avoid or stop email spoofing
Here are some effective ways to help stop email spoofing:
* Enable spam filtering: You can enable an automated spam filtering system in cPanel that filters incoming messages using a variety of techniques. For more information, please see [this article](/email/how-to-use-global-email-filters-in-cpanel).
* To protect your own email accounts, consider implementing Sender Policy Framework (SPF), Domainkeys Identified Mail (DKIM), and Domain-based Message Authentication, Reporting and Conformance (DMARC):
* **Sender Policy Framework (SPF)** is an authentication protocol that lists IP addresses in a DNS TXT record that are permitted to send email on behalf of domains.
* **Domainkeys identified mail (DKIM)** is a method of assigning a private key to an email message so the receiving server can use the key for verification.
* **Domain-based Message Authentication, Reporting & Conformance (DMARC)** is a protocol that helps determine the authenticity of an email message using both SPF and DKIM.
# How to generate Google reCAPTCHA keys for site security
Source: https://kb.stablepoint.com/security/how-to-generate-google-recaptcha-keys-for-site-security
This article guides you through the process of generating reCAPTCHA (site and secret) keys from Google. By adding reCAPTCHA capability, you can help improve your site's security.
## About Google reCAPTCHA
[Google reCAPTCHA](https://cloud.google.com/security/products/recaptcha) is a popular service providing anti-abuse security to help protect your web site. To integrate Google reCAPTCHA in an application, you register the app or web domain with Google’s reCAPTCHA service. After the domain is registered, Google provides reCAPTCHA keys.
There are two keys, the **Site Key** and the **Secret Key**. The Site Key and the Secret Key are also sometimes called the public and private key, respectively.
The Site Key is used to render the reCAPTCHA within a page, and the Secret Key is used for server-side validation. The keys are unique to the domain for which they are registered.
## How to generate Google reCAPTCHA keys
To generate the reCAPTCHA keys, follow these steps:
1. If you are not already signed in to your Google account, do so now.
2. Use your web browser to go to [Google’s reCAPTCHA site](https://cloud.google.com/security/products/recaptcha).
3. Click **Get Started**:
4. On the **Register a new site** page, specify the following information:
1. **Label:** Create a label for the site keys.
2. **reCAPTCHA type:** Choose to verify requests with a score or a challenge.
3. **Domains:** Specify the domain where you will use these keys, such as *example.com*.
5. Click **SUBMIT**. After a few seconds, the Site Key and Secret Key appear:
# How to secure an unmanaged server
Source: https://kb.stablepoint.com/security/how-to-secure-an-unmanaged-server
On unmanaged hosting packages, you are responsible for server administration. One of the most important things to do is secure your server, and this article provides the information you need.
> [!WARNING]
>
> You must have root access to the server to follow the procedures described below.
## Securing an unmanaged server
An unmanaged server provides you with total flexibility. Because you have root access to the server, you can install whatever you want, configure it however you want, and run it however you want.
With this freedom comes additional administration tasks, however, and one of the most important of these is security. If you do not take steps to secure your server, you leave it open to attack by malicious actors. A minor attack could be just an annoyance, while a major attack could result in the loss of your entire server configuration and data.
Therefore, it is very important that you try to secure your server as much as possible. The following recommendations can help you do this.
### Use strong passwords
Weak passwords can undermine the most carefully configured server. Good security practices start with using strong passwords. For information about how to choose strong passwords, please see [this article](/security/choosing-a-strong-password).
### Disable root SSH access
The root account is all-powerful, so one of the first things you should do on a new unmanaged server is create a normal user account and disable root SSH access.
For more information about how to configure an SSH server, please visit [https://man.openbsd.org/sshd\_config](https://man.openbsd.org/sshd_config).
### Update the server regularly
Security vulnerabilities are constantly being discovered and patched. (One well-publicized example is the “Heartbleed” OpenSSL vulnerability that was disclosed in April 2014.) Maintaining an up-to-date server with the latest patches and fixes is crucial to maintaining a more secure server.
For information about how to install updates, check the documentation for the Linux distribution you are running.
### Set up a firewall
A firewall enables you to control incoming and outgoing network packets. For example, you can specify rules that block all incoming packets on port 25, or all outgoing packets to a certain port or host.
Previously, iptables was commonly used to configure server firewalls. Its replacement is [nftables](https://netfilter.org/projects/nftables/).
### Set up fail2ban
The fail2ban program helps secure your server against unauthorized access attempts by monitoring log files for suspicious activity. After a predefined number of failed access attempts from an IP address, fail2ban automatically blocks it.
For more information about fail2ban, please visit [https://github.com/fail2ban/fail2ban](https://github.com/fail2ban/fail2ban).
# Preventing outgoing e-mail from being marked as spam
Source: https://kb.stablepoint.com/security/preventing-outgoing-e-mail-from-being-marked-as-spam
> [!NOTE]
>
> This article is intended for users who have legitimate e-mail messages that are being marked as spam.
## How to help prevent outgoing e-mail from being marked as spam
Mail servers use many different techniques to filter spam. Spammers constantly adapt to these anti-spam measures, so administrators have to continually modify server configurations to help reduce spam. As a result, there is no single thing you can do to ensure that all of your outgoing messages are delivered successfully.
Nevertheless, there are still some things you can do to help improve the odds of successful delivery. Try the following techniques:
* If possible, do not send HTML-only messages (send plain-text messages instead, or multi-part MIME messages with a text/plain component).
* If you do send HTML-only messages, make sure they use valid HTML markup. You can use the [W3C Markup Validation Service](http://validator.w3.org) to test content (you can test a URL, upload a file, or paste HTML into a text box).
* Avoid using lots of exclamation marks (**!**), dollar signs (**\$**), or other common currency symbols in the message subject.
* Create SPF (Sender Policy Framework) records and enable DKIM (DomainKeys Identified Mail).
### Sending e-mail to free e-mail providers
Free e-mail providers such as Yahoo and Hotmail reject messages based on spam reports or a poor IP address reputation. So the more engaged your recipients are with your messages, the better. For example, when your recipients open and read your messages, or pull them out of the spam folder into their inboxes, these are positive indications to the provider that the messages are legitimate.
There are several additional steps you can take to improve the chances that your e-mail messages are delivered successfully to recipients who use free e-mail providers:
> [!NOTE]
>
> Please note that it may take several days for any changes to have an effect.
#### Yahoo
* Create SPF (Sender Policy Framework) records and enable DKIM (DomainKeys Identified Mail).
* Set up reverse DNS (also known as rDNS) for your domain.
#### Gmail
* Create SPF (Sender Policy Framework) records and enable DKIM (DomainKeys Identified Mail).
* Set up reverse DNS (also known as rDNS) for your domain.
* For information about Google's e-mail policies, please visit [https://support.google.com/mail/answer/81126](https://support.google.com/mail/answer/81126).
#### MSN and Hotmail
* Create SPF (Sender Policy Framework) records and enable DKIM (DomainKeys Identified Mail).
* Set up reverse DNS (also known as rDNS) for your domain.
* Sign up for the Junk Email Reporting Partner (JMRP) program. To do this, please visit [https://postmaster.live.com/snds/JMRP.aspx](https://postmaster.live.com/snds/JMRP.aspx).
> [!NOTE]
>
> Make sure you save the verification number. You will need this number for any future correspondence with Microsoft.
* Sign up for Smart Network Data Services (SNDS). To do this, please visit [https://postmaster.live.com/snds/addnetwork.aspx](https://postmaster.live.com/snds/addnetwork.aspx).
#### EarthLink
* Create SPF (Sender Policy Framework) records and enable DKIM (DomainKeys Identified Mail).
* Set up reverse DNS (also known as rDNS) for your domain.
* Send a request to EarthLink asking them to unblock your IP address. To do this, send the request to [**blockedbyearthlink@abuse.earthlink.net**](mailto:blockedbyearthlink@abuse.earthlink.net) with the subject line **Blocked\_IP\_ADDRESS\_**. Replace *IP\_ADDRESS* with your own IP address.
## What to do if your e-mail is blocked by a real-time blacklist
Organizations such as [SpamCop](http://www.spamcop.net/) and [Spamhaus](http://www.spamhaus.org/) may block your outgoing messages.
If you are using a dynamic IP address, this may happen because a previous user of your IP address had a compromised computer that was sending spam. As a result, the IP address has been blacklisted. You can try contacting your ISP and have them issue you a new IP address, or you can just use your ISP's SMTP servers to send e-mail. (You would continue to use Stablepoint's servers for incoming mail.)
If you have a static IP address, and absolutely must use Stablepoint servers for outgoing SMTP mail, you must follow the instructions from the blocking organization to remove yourself from their blacklist. Before you do this, you should make sure that none of your computers are infected with a virus or other malware.
> [!NOTE]
>
> We are not affiliated with any blacklist organizations, and we do not have any control over their blacklists or policies.
# Protecting yourself from email phishing scam attempts
Source: https://kb.stablepoint.com/security/protecting-yourself-from-email-phishing-scam-attempts
Phishing emails are sent from criminals in an attempt to obtain your identifying information to commit identity fraud, gather your financial information, and a whole host of other unsavory business. These criminals attempt to fool you by disguising themselves as a trusted source such as Stablepoint.
Phishing emails often encourage you to take some sort of action on your hosting account, like updating your address or credit card number. The following phishing scam protection tips can help keep your information safe.
## How to tell if an email is legitimate
Phishing emails typically have links to sophisticated pages posing as legitimate site pages. These pages often pose as portals where you would supply sensitive information, such as the official Stablepoint login page. However, these pages will instead send any and all information you have supplied on the page (such as your username and password) to those perpetrating the scam.
As frustrating as dealing with phishing attempts may be, it’s relatively easy to distinguish legitimate attempts from those made with nefarious intentions. If you’re wondering whether or not you have received a legitimate email from Stablepoint, consider the following tips:
* Any email requesting that you take action on an account or update user information will be accompanied by a request that you submit a ticket or call us if you have any questions.
* If you receive an email requesting that you log in to your account, do not click any login links included in the email. Instead, visit [stablepoint.com](https://stablepoint.com/) directly and log in to your account from there. This tip can be used to protect yourself from any online phishing scam, not just those targeting Stablepoint.
* Never submit confidential information in a form embedded within an email message.
* Before clicking any link within an email, hover your mouse pointer over the link to verify that the destination URL correlates to the destination you are expecting. The page that will open if you click on the link should appear near the mouse pointer or at the bottom of the browser window. The link should match the description provided. If the link does not match, you may very well be dealing with a phishing email.
* Stablepoint will never ask you to provide your password, credit card number, or any other personal information directly through email.
* Stablepoint will only ever email the address that you have provided in your customer account. Check at which address you have previously received correspondence.
* If we ever do request information or action from you, we will do so within our support ticket system. The most secure way to reply to us is to go directly to [stablepoint.com](https://stablepoint.com/) , log in, and submit your reply directly on our website.
## How to keep login information secure
You can double-check that you are logging into the correct Stablepoint site by ensuring that you see the locked padlock validation icon in your browser bar when visiting [stablepoint.com](https://stablepoint.com/). You can click **Connection is secure** to see more information about the connection:

If the connection is not secure, do **not** submit your login credentials on the page!
## What should I do if I am still unsure of an email?
If you’re ever in doubt, contact us! Stablepoint support is available day or night to answer your questions, and this certainly includes account security questions as well as phishing scam protection. By following the tips above, you can help keep your account safe. However, if you are still unsure about the legitimacy of an email that you have received, please contact us for verification.
# Securing a hacked site
Source: https://kb.stablepoint.com/security/securing-a-hacked-site
## Determining the cause
The first step to securing your web site and getting back to normal operation is determining how it was hacked. In general, most hacks occur for one of the following reasons:
* Your FTP/SSH password has been compromised.
* File permissions for files or directories in the **public\_html** directory are too permissive.
* There is a software application installed on your web site that contains a vulnerability. The vulnerability is being exploited to run arbitrary code on the server.
Software vulnerability hacks are more common than FTP/SSH password hacks, primarily because of the huge growth in pre-bundled software applications. Users often set up an application and then forget to apply security updates, leaving their sites vulnerable to attack.
Similarly, if a file or directory in the **public\_html** directory has permissions set to 777 (full read-write access), code or data can be exposed and potentially exploited by an attacker.
### Looking for FTP/SSH password compromises
You should first try to determine if someone has compromised your password and logged in to your account. To do this, follow these steps:
1. Log in to your account [using SSH](/web-hosting/files-and-access/secure-shell-ssh-overview).
2. At the command prompt, type the following command:
```shell theme={null}
history
```
This command displays the last 1000 commands run on the account, as well as when. Review recent entries in the list for any commands that seem suspicious or that you did not type.
> [!NOTE]
>
> This method is not 100% fool-proof, because the command history can be altered or forged by a malicious actor.
3. At the command prompt, type the following command:
```text theme={null}
cat ~/.lastlogin
```
This command displays the IP address of the last user who logged in to your cPanel account. This information is also available from the cPanel home page.
To see what your own IP address is, visit [http://ipfinder.us](http://ipfinder.us).
If you suspect or determine that an unauthorized user is accessing your account, do the following:
* Change your account password in cPanel immediately. For information about how to do this, please see [this article](/web-hosting/hosting-overview/how-to-change-your-cpanel-password).
* Stop using FTP. Regular FTP transmits your password over the Internet in unencrypted plaintext and is easily intercepted. Use SFTP or SSH instead.
* Verify that you are running up-to-date virus and malware protection on any computers you have used to access your account.
After you have followed these steps, go to the **Cleaning up after a hack** section below. Otherwise, if you did not find any suspicious behavior, go to the next section.
### Looking for software vulnerabilities
Out-of-date software applications often contain well-known security vulnerabilities that malicious actors can exploit using automated scripts. Software applications include anything you have installed using Softaculous, as well as any packages that you have installed manually. Usually these are applications such as blogs, image galleries, forums, shopping carts, content management systems, etc.
You should review all of the software applications that are installed on your web site. Make sure you have installed the most recent version and all updates. When you update software applications, make sure you check the plugins as well. If you have any non-standard plugins installed with your applications, do a web search for the plugin name and the term "vulnerability" to see if there are any known issues with your version. If you discover any known vulnerabilities, either update the plugin or disable it.
You should also check for recent errors on your web site by using cPanel's Error Log feature. Error messages can help you determine which software applications or files are vulnerable.
After you have updated your software applications and plugins, go to the **Cleaning up after a hack** section below.
## Cleaning up after a hack
After you have secured your web site, the next step is to clean up the mess left behind by the perpetrators and restore normal operation.
### Stopping malicious processes
The first step in the cleanup process is to ensure there are no malicious processes still running on your account. Otherwise, you may go through all of the following cleanup steps, and these processes will wreak havoc in your account all over again.
To view the user processes running on your account, follow these steps:
1. Log in to your account [using SSH](/web-hosting/files-and-access/secure-shell-ssh-overview).
2. At the command prompt, type the following command:
```text theme={null}
ps faux
```
3. Examine the list of running processes and look for anything suspicious. If you do see a suspicious process, note the process ID (PID) number.
Because you ran the **ps** command in step 2 yourself, it is **not** a malicious process and should not be terminated! For example:
```text theme={null}
USER PID %CPU %MEM VSZ RSS TTY STAT START TIME COMMAND
username 2847697 0.0 0.0 108504 1900 pts/2 Ss 16:37 0:00 -bash
username 2885143 0.0 0.0 109960 1016 pts/2 R+ 16:44 0:00 \_ ps faux
```
These two processes are normal.
4. To kill any suspicious processes that you found, type the following command for each process. Replace *process\_id* with the process ID (PID) that you noted in step 3:
```text theme={null}
kill process_id
```
If you are uncomfortable using the command line to look for suspicious processes, please open a support ticket and our support team can assist you further.
### Removing hacked files
You should go through all of the files in your account and delete anything that you did not put there. If you are using an FTP client, make sure it is set to show hidden files. Similarly, if you are using the command line in SSH, make sure you use the **-a** option with the **ls** command so it shows all files. (Many malicious files try to "hide" from casual observation by making themselves hidden.)
Although we recommend going through all of your files, you can prioritize your search. Look first for file modification timestamps that have changed since you last modified your site, or that occurred around the time the hack took place. If you identify a file that was modified during the hack (such as a defaced index page), you may be able to locate other affected files by searching for similar timestamps.
For example, to find all of the files that have been modified in your **public\_html** directory within the last three days, follow these steps:
1. Log in to your account [using SSH](/web-hosting/files-and-access/secure-shell-ssh-overview).
2. At the command prompt, type the following commands:
```text theme={null}
cd ~/public_html
find . -mtime -3
```
You can modify the **-3** option to control how many days in the past the find command searches for modified files. For example, to search back five days instead of three, use **-5**.
### Setting correct file permissions
By default, every directory beneath the **public\_html** directory should have its file permissions set to **755** (full access for the owner, and read and execute access for everyone else). Additionally, every file should have its permissions set to **644** (read and write access for the owner, and read access for everyone else). To set these permissions for your account, follow these steps:
1. Log in to your account [using SSH](/web-hosting/files-and-access/secure-shell-ssh-overview).
2. At the command prompt, type the following commands:
```text theme={null}
cd ~/public_html
find . -type d -exec chmod 755 {} \;
find . -type f -exec chmod 644 {} \;
```
After you make these changes, you may need to adjust permissions for a few individual files, depending on the applications you have installed. Nevertheless, it is a good security practice to set secure permissions initially, and then make any individual adjustments as necessary.
### Restoring databases
Some hacks, particularly SQL injection attacks against vulnerable Joomla installations, may alter the database with malicious code. These modifications can grant an attacker access to your account even after you update applications and remove altered files.
Therefore, you should review your databases to see if there are any suspicious changes. You may also want to restore the database from a backup that was completed before the attack occurred.
### Restoring lost and modified files
You can use a backup to restore files in your home directory that have been lost or modified.
### Reconfiguring WordPress
If you use WordPress, there are additional steps you must take to secure your site after an attack. For example, you must reset the WordPress security keys. For more information about WordPress security, please see [this article](/security/wordpress-security).
### Requesting a site review from Google
A hacked site can lead to online reputation damage and lower search engine rankings. Or visitors may even see "Deceptive site ahead" warnings in web browsers. When you are confident that you have secured your site, you may want to request a review from Google. If Google determines your site is no longer dangerous or deceptive, it will unflag it and no longer penalize it in search engine rankings.
For information about how to request a site review from Google, please visit [https://web.dev/articles/request-a-review](https://web.dev/articles/request-a-review).
### Using Cloudflare to enhance security
To help prevent future attacks, you should consider enabling Cloudflare for your account.
Cloudflare is a content delivery network (CDN) service. Cloudflare's network blocks threats and limits abusive bots before they reach the web server. This increases security and reduces wasted bandwidth.
You can sign up directly on Cloudflare's site at [http://www.cloudflare.com](http://www.cloudflare.com).
# WordPress security
Source: https://kb.stablepoint.com/security/wordpress-security
## Essential WordPress security measures
There are several essential steps you should take to enhance the security of a WordPress site:
### Use strong WordPress passwords
Use a strong password for all administrator accounts, and change passwords periodically. Strong passwords are not easily guessed. To break into an account with strong passwords, hackers use brute force attacks. Stopping brute force attacks is covered below.
> [!WARNING]
>
> If your site has been compromised (or you even suspect that it has been compromised), you must also change the security keys in the *wp-config.php* file that are used to encrypt cookies. Simply changing passwords is not enough, because an attacker may still have a valid cookie and be able to access your site.
>
> For more information about how to configure security keys in the *wp-config.php* file, please visit [http://codex.wordpress.org/Editing\_wp-config.php#Security\_Keys](http://codex.wordpress.org/Editing_wp-config.php#Security_Keys).
### Use a unique WordPress username
Do not use the default *admin* username for the administrator. Instead, create a user with a different username, assign the administrative role to it, and then delete the default *admin* administrator.
### Update WordPress plugins and themes
WordPress is updated regularly to address known vulnerabilities. Running old versions of WordPress makes it easy for hackers to gain access to your site. Run updates regularly to make sure WordPress and all related plugins are up to date.
### Delete unused WordPress plugins and themes
Even though unused plugins and themes are disabled, that code is still visible on the Internet and can be a target for hackers. Be sure to delete any unused themes or plugins in order to reduce the opportunity for hackers to gain access to your site.
### Make regular backups
Make regular backups of your WordPress site. Backups will not prevent a site from being compromised, but they do help get a site back online quickly. You can use [Softaculous](/web-hosting/software-guides/using-the-softacoulous-autoinstaller) to back up, restore, and update your WordPress site from one convenient interface.
## Defending against WordPress brute force attacks
A brute force attack is a simplistic type of attack where a user or script tries to gain access to a site by repeatedly guessing different username and password combinations. Unfortunately, many people have username and password combinations that are easily guessed, so brute force attacks are often effective.
If your WordPress site experiences a brute force attack, you may notice that the site responds slowly, or not at all. Additionally, you may be unable to log in. This is because the flood of login attempts during a brute force attack causes numerous PHP and MySQL calls. These calls increase server load and negatively affect website performance.
There are several measures you can take to defend against brute force attacks on your site.
### Method #1: Password-protect the WordPress login page
WordPress uses the *wp-login.php* file for logins. By adding password protection to this file, you add another layer of security to your site. Users must enter a username and password before they can even access the *wp-login.php* file to log in to WordPress.
To set up password protection for the WordPress login page, follow these steps:
1. Use your web browser to go to [http://www.htaccesstools.com/htpasswd-generator](http://www.htaccesstools.com/htpasswd-generator).
2. In the **Username** text box, type a username.
3. In the **Password** text box, type a password for the user.
4. Click **Create .htpasswd file**, and then copy the line of text. The line of text should contain the username you specified, followed by a colon (**:**), and then the encrypted password. For example:
```text theme={null}
username:$apr1$IUQgDA6U$qbXb9wEnjirNCqxezpjoe5
```
5. Create a file named *.wp-password* in your account's home directory. Paste the line of text from the previous step into the file. There are two ways you can create and edit this file:
* Log in to your account [using SSH](/web-hosting/files-and-access/secure-shell-ssh-overview), and use a text editor from the command line.
* Log in to your account using cPanel, and use an editor in the [File Manager](/web-hosting/files-and-access/managing-files-in-cpanel).
> [!NOTE]
>
> Make sure that the *.wp-password* filename begins with a period (**.**).
6. Save the *.wp-password* file and exit the text editor.
7. Create an *.htaccess* file in the directory where you installed WordPress:
* If you installed WordPress in the domain's document root, then this directory is */home/username/public\_html*, where *username* represents your account username.
* If you installed WordPress in a subdirectory or subdomain, then this directory is */home/username/public\_html/directory*, where *directory* represents the WordPress location.
8. Copy and paste the following text into the *.htaccess* file:
```text theme={null}
# Prevent Apache from serving .ht* files:
Order allow,deny
Deny from all
ErrorDocument 401 "401 Unauthorized"
ErrorDocument 403 "403 Forbidden"
# Protect wp-login.php:
AuthUserFile /home/USERNAME/.wp-password
AuthName "Please log in"
AuthType Basic
require user WP-USERNAME
```
9. In the *.htaccess* file, make the following changes:
* Replace *USERNAME* with your Stablepoint account (cPanel) username.
* Replace *WP-USERNAME* with the username that you specified in step 2.
> [!NOTE]
>
> If you want to display a login message different from "Please log in", you can change the **AuthName** directive's value to whatever text you want.
10. Save the *.htaccess* file and exit the text editor.
11. Use your web browser to go to the WordPress login page (for example, [*http://www.example.com/wp-admin*](http://www.example.com/wp-admin), where *example.com* represents your domain name).
12. You should be prompted to type a username and password. Type the username and password combination that you specified in steps 2 and 3. The WordPress login page should appear, and you can now log in to WordPress as you normally do.
### Method #2: Block IP addresses from accessing the WordPress login page
Another way to counter brute force attacks is by blocking IP addresses. With this configuration, you can allow one (or several) IP addresses to access the WordPress login page, and block everything else.
> [!WARNING]
>
> If you enable IP address blocking and also use Cloudflare, make sure you test site logins thoroughly. On some server configurations, the combination of Cloudflare and IP address blocking may prevent *all* logins from working correctly.
To prevent IP addresses from accessing the login page, follow these steps:
1. Create an *.htaccess* file in the directory where you installed WordPress:
* If you installed WordPress in the domain's document root, then this directory is */home/username/public\_html*, where *username* represents your account username.
* If you installed WordPress in a subdirectory or subdomain, then this directory is */home/username/public\_html/directory*, where *directory* represents the WordPress location.
> [!NOTE]
>
> If you already followed the steps to set up password protection for the login page, use the same *.htaccess* file that you created in that procedure.
2. Copy and paste the following text into the *.htaccess* file:
```text theme={null}
order deny,allow
allow from xxx.xxx.xxx.xxx
deny from all
```
3. In the *.htaccess* file, replace *xxx.xxx.xxx.xxx* with the IP address that you want to allow for WordPress logins. All other IP addresses will be blocked from accessing the *wp-login.php* page.
* To grant access to multiple IP addresses, you can add multiple **allow from** lines.
* To determine your current IP address, you can visit [http://ipfinder.us](http://ipfinder.us).
4. Save the *.htaccess* file and exit the text editor.
5. Test your WordPress site to make sure that it still functions correctly, and that you can access the administration login page.
### Method #3: Change the WordPress login URL
The default WordPress login page is *wp-login.php*, and a basic WordPress installation does not allow you to change this location. However, the [WPS Hide Login](https://wordpress.org/plugins/wps-hide-login/) allows you to change the WordPress login URL. Doing so can reduce the impact of brute force attacks, which are usually scripts that are programmed to hit the *wp-login.php* page over and over again with login attempts.
When you change the WordPress login URL, anyone who tries to access the *wp-login.php* page or *wp-admin* directory receives a "404 Not Found" error message.
To change the WordPress login URL using a plugin, follow these steps:
1. Log in to your WordPress site.
2. Click **Plugins**, and then click **Add New Plugin**.
3. In the **Search Plugins** text box, type `wps hide login`, and then click **Search Plugins**.
4. The **WPS Hide Login** plugin appears in the list of search results.
5. Under **WPS Hide Login**, click **Install Now** to start the installation.
6. After the plugin installation finishes, click **Activate**. The **Plugins** page appears.
7. Under **WPS Hide Login**, click **Settings**.
8. In the **Login url** text box, type a URL for the login page, or accept the default value of **login**.
9. Click **Save Changes**.
10. Test your WordPress site to make sure that it still functions correctly, and that you can access the login page using the new URL. Additionally, if you try to access *wp-login.php* or *wp-admin*, you should receive a "Page Not Found" error message.
### Method #4: Enable Cloudflare for your site
Cloudflare is a content delivery network (CDN) that can block malicious requests before they reach your site. For example, Cloudflare-enabled sites were significantly protected during a large-scale WordPress brute force attack that occurred in April 2013.
Cloudflare works by routing traffic to your website through its own network. As a result, Cloudflare is able to block certain types of malicious requests. Cloudflare also increases website performance by leveraging its worldwide server network to deliver content to users more efficiently.
If you enable Cloudflare and also use the IP address blocking method described in this article, make sure you test site logins thoroughly. On some server configurations, the combination of Cloudflare and IP address blocking may prevent logins from working correctly.
# Backuply
Source: https://kb.stablepoint.com/web-hosting/backups/backuply
Backuply is a WordPress backup plugin available through Softaculous that lets you create and manage backups of your WordPress site from within WordPress itself.
## Why use Backuply
While we take server-level backups with JetBackup, having your own application-level backups gives you extra control:
* Back up before making risky changes (plugin updates, theme changes)
* Store copies off-server (Google Drive, Dropbox, FTP, and other destinations)
* Restore your site yourself without waiting
## Installing Backuply
1. Log in to your WordPress admin dashboard.
2. Go to **Plugins** → **Add New**.
3. Search for **Backuply**.
4. Click **Install Now**, and then **Activate**.
Alternatively, if you installed WordPress through Softaculous, Backuply may already be available.
## Creating a backup
1. In your WordPress dashboard, go to **Backuply**.
2. Click **Backup Now**.
3. Choose what to include (files, database, or both).
4. Choose the backup destination (local storage or a configured remote destination).
5. Start the backup.
## Restoring a backup
1. Go to **Backuply** in your WordPress dashboard.
2. Find the backup in the list.
3. Click **Restore**.
4. Confirm the restore.
> [!WARNING]
>
> Restoring replaces your current site files and/or database with the backup contents. Any changes made after the backup date will be lost.
## Scheduling automatic backups
Backuply supports scheduled backups so you always have a recent copy:
1. In Backuply, open the **Settings** or **Schedule** section.
2. Choose the backup frequency (daily, weekly, etc.).
3. Set a retention count so old backups are rotated out automatically.
4. Save.
> [!TIP]
>
> Store scheduled backups on a remote destination rather than local server storage — this protects you even in a worst-case scenario and doesn't consume your hosting disk space.
# How to restore your database or files using JetBackup
Source: https://kb.stablepoint.com/web-hosting/backups/how-to-restore-your-database-or-files-using-jetbackup
In your cPanel account we have the JetBackup tool which can help you restore your files or databases to an earlier date/state.
Once you login to your cPanel account with us you can type in the search field "backup" and the whole array of JetBackup tools will be displayed.

To restore your files you can use the "File Backups" menu. In it you will see a list of dates of the currently available backups on our sytem.

By clicking on the "File Manager" button you will be able to navigate within the file/folder structure of the backup and choose which files/folders to be restored. With the checkboxes you can select multiple items, and with the buttons above you can either download them, or restore them directly to your hosting plan.

Similarly the "Database Backups" menu will display a list of the databases on your account and the dates on which they were backed up. You can choose to download or directly restore the database to your account.

If you have any difficulties with the restoration of your data you can always contact us via the livechat or ticket system and we will gladly assist.
# JetBackup 5
Source: https://kb.stablepoint.com/web-hosting/backups/jetbackup-5
JetBackup 5 is the latest version of the backup software we use on our shared and reseller hosting platform. It provides self-service backup restores directly from your cPanel account.
## Accessing JetBackup 5
1. Log in to your cPanel account.
2. In the search field, type **JetBackup** or scroll to the **JetBackup** section.
3. The JetBackup 5 tools appear.
## Available restore points
We keep multiple restore points for your account. The number of available snapshots depends on your hosting plan, but typically daily backups are retained for a rolling window.
## What you can restore
JetBackup 5 lets you restore:
* **Full account backups** — restore everything at once
* **Home directory / files** — browse the backup and restore individual files or folders
* **Databases** — restore individual MySQL databases
* **Email accounts** — restore individual mailboxes
* **DNS zones** — restore your DNS zone files
* **SSL certificates** — restore certificates
## Performing a restore
1. Open the relevant JetBackup section (for example, **File Backups** or **Database Backups**).
2. Select the backup date you want to restore from.
3. Select the items to restore.
4. Click **Restore** (or **Download** if you want a local copy instead).
5. The restore is added to the queue. You can monitor progress in the **Queue** section.
> [!NOTE]
>
> Restores overwrite the current version of the restored items. If you're unsure, use the Download option first to keep a copy of the current state.
If you need a backup from a date that is no longer listed, please contact our support team and we will check the archives for you.
# Backups
Source: https://kb.stablepoint.com/web-hosting/backups/overview
This section covers backing up and restoring your website data, including JetBackup and Backuply.
# Can I enable cPanel's 2FA feature?
Source: https://kb.stablepoint.com/web-hosting/can-i-enable-cpanels-2fa-feature
Yes — cPanel's two-factor authentication (2FA) feature is available on our hosting and we recommend enabling it. With 2FA on, logging in to cPanel requires both your password and a time-based code from an authenticator app, so a stolen password alone isn't enough to access your account.
## Enabling 2FA in cPanel
1. Log in to cPanel.
2. In the **Security** section, click **Two-Factor Authentication**.

3. Click **Set Up Two-Factor Authentication**.
4. Scan the QR code with an authenticator app on your phone, such as:
* Google Authenticator
* Microsoft Authenticator
* Authy
* 1Password or Bitwarden (built-in TOTP)
5. Enter the 6-digit code the app shows to confirm.
6. Click **Configure Two-Factor Authentication**.
From now on, cPanel logins ask for a current 6-digit code after your password.
## Important notes
* **2FA covers cPanel logins.** FTP, SSH, and email clients authenticate separately and are not affected by this setting.
* **Logging in from the Hosting Panel:** if you use the **Login to Control Panel** button in your Stablepoint client area, that single-sign-on route continues to work — protect your client-area login with its own 2FA too (see [Managing your profile in the Hosting Panel](/accounts-billing/billing-accounts/managing-your-profile-in-the-hosting-panel)).
## If you lose your 2FA device
If you lose access to your authenticator app, contact our support team. After we verify your identity, we can remove the 2FA configuration so you can log in and set it up again on a new device.
## Disabling 2FA
Go back to **Two-Factor Authentication** in cPanel and click **Remove Two-Factor Authentication**. We recommend keeping it enabled unless you have a specific reason not to.
# Changing your main domain
Source: https://kb.stablepoint.com/web-hosting/changing-your-main-domain
Your hosting account has a main (primary) domain — the domain the cPanel account was created with. If you've rebranded or moved to a new domain name, we can change the main domain for you.
## How to request the change
Changing the primary domain on a cPanel account is done by our team to make sure everything is updated cleanly. To request it:
1. Log in to the Hosting Panel at [https://clients.stablepoint.com](https://clients.stablepoint.com).
2. Open a support ticket.
3. Include:
* The current main domain
* The new main domain
* Whether the new domain should keep the existing website content
We'll make the change and confirm once done — usually very quickly.
## What to check after the change
* **DNS:** point the new domain to our nameservers (or set its A record to your server IP).
* **SSL:** a certificate for the new domain is issued automatically once DNS resolves; check **SSL/TLS Status** in cPanel.
* **Application URLs:** update your application's site URL. For WordPress: **Settings → General**, update both WordPress Address and Site Address, and run a search-replace for old URLs in content (WP-CLI: `wp search-replace 'olddomain.com' 'newdomain.com'`).
* **Email accounts:** mailboxes exist per domain. Create the mailboxes on the new domain, and set up forwarders from the old addresses if you're keeping the old domain during a transition.
* **Old domain redirect:** if you keep the old domain pointed at us, add a 301 redirect from old to new so visitors and search engines follow.
> [!NOTE]
>
> Changing the main domain does not affect your billing, plan, or files — only the domain the account is addressed by.
# Getting Started with cPanel Web Hosting
Source: https://kb.stablepoint.com/web-hosting/cpanel-hosting-overview
We provide the cPanel control panel to let you administer your website hosting with us. cPanel is a graphical interface that lets you carry out many common hosting tasks in a couple of clicks. It is by far the world's most popular hosting control panel, and you may already be familiar with it if you have had website hosting before.
### Logging into cPanel
After ordering hosting with us, you can log into your cPanel control panel in two ways:
1. By logging into [your client area](https://clients.stablepoint.com/) and navigating to **Products & Services** > click **Manage** on your web hosting > **Login to Control Panel**. You can find an overview of the hosting details next to the login button as well, if you need it.
2. By logging directly into cPanel using `yourdomain.com/cpanel`. You will need your cPanel username and password, which can be viewed in the "Hosting Accounts" section. If you need to reset your password for any reason, please contact us for assistance.
If you have a reseller account with Stablepoint, this gives you the ability to control multiple cPanel accounts using the WHM interface. If you have a server with Stablepoint, you have the ability to create multiple cPanel accounts using the WHM interface, all on your own dedicated machine.
## Getting started with cPanel
cPanel offers an easy-to-use interface, so if you're not so technically advanced you don't have to worry about the complexity — but it also provides advanced options for more experienced users. Here are some articles to get you started with the basics.
### Installing software
There are two main ways to install software: use our auto-installers (recommended for most common open-source software such as WordPress, Joomla & Magento), or install your software manually following the relevant install guides.
* [Using the Softaculous Autoinstaller](/web-hosting/software-guides/using-the-softacoulous-autoinstaller)
* [Manually installing software](/web-hosting/software-guides/manually-installing-software)
* [How to install WordPress](/web-hosting/software-guides/how-to-install-wordpress)
### Uploading and managing files
Web hosting has a folder structure much like on a computer. By default your website files run out of a folder called `public_html`. You can use the built-in File Manager, FTP or SFTP through an application such as FileZilla, or (for advanced users) SSH.
* [Managing files in cPanel](/web-hosting/files-and-access/managing-files-in-cpanel)
* [Using FTP](/web-hosting/files-and-access/using-ftp)
* [Secure Shell (SSH) Overview](/web-hosting/files-and-access/secure-shell-ssh-overview)
* [Managing Disk Usage](/web-hosting/files-and-access/managing-disk-usage)
### Databases
Databases store the data for most applications. WordPress, for instance, uses both files and a database. Stablepoint hosting lets you create unlimited databases. These are automatically created when you auto-install software, but you can also add them manually.
* [Creating MySQL Databases and Users](/web-hosting/databases/creating-mysql-databases-and-users)
* [Using phpMyAdmin](/web-hosting/databases/using-phpmyadmin)
* [Importing and Exporting as SQL](/web-hosting/databases/importing-and-exporting-as-sql)
* [Remote database connections](/web-hosting/databases/remote-database-connections)
### Email accounts
Every Stablepoint hosting account lets you create unlimited email accounts. These can be full mailboxes, or set up to forward elsewhere. Alternatively, you can set up MX records to point email to an external provider such as Google Workspace or Office 365.
* [Creating an email account](/email/email/creating-an-email-account)
* [Setting up an Email Forwarder](/email/email/setting-up-an-email-forwarder)
* [How to access Webmail](/email/accessing-email/how-to-access-webmail)
* [Configuring an email client](/email/accessing-email/configuring-an-email-client)
* [Setting up MX Records](/email/email/setting-up-mx-records)
### SSL certificates
At Stablepoint we provide free SSL certificates with every hosting account. In most cases you do not need to do anything — provisioning and renewal are entirely automated.
* [SSL Certificates](/web-hosting/ssl-certificates-1)
### Performance and optimisation
Stablepoint hosting is set up to run your websites quickly and to minimise potential downtime. There are also optimisations you can do to ensure your specific site loads quickly.
* [How to change your PHP version in cPanel](/web-hosting/software-guides/how-to-change-your-php-version-in-cpanel)
* [Hosting Performance Tweaks: Opcode Caching, Expires Headers, and Gzip Compression](/web-hosting/performance/hosting-performance-tweaks-opcode-caching-expires-headers-and-gzip-compression)
### Advanced options
We provide advanced tools you may also find useful:
* [Cron Jobs](/web-hosting/performance/cron-jobs)
* [How to restore your database or files using JetBackup](/web-hosting/backups/how-to-restore-your-database-or-files-using-jetbackup)
# Choosing between VARCHAR and TEXT in MySQL
Source: https://kb.stablepoint.com/web-hosting/databases/choosing-between-varchar-and-text-in-mysql
When designing MySQL tables, one of the common decisions is whether to use VARCHAR or TEXT for string columns. Both store character data, but they behave differently.
## VARCHAR
* Stores variable-length strings up to a declared maximum (VARCHAR(255), VARCHAR(1000), etc., up to 65,535 bytes shared across the row).
* Can have a DEFAULT value.
* Can be fully indexed (up to index length limits).
* Stored inline with the row, which generally makes reads faster for shorter values.
## TEXT
* Stores up to 65,535 bytes (TEXT), with larger variants MEDIUMTEXT (16MB) and LONGTEXT (4GB).
* Cannot have a DEFAULT value.
* Can only be indexed with a prefix length (e.g. the first 191 characters).
* May be stored off-page, which can add I/O for reads but keeps the main row compact.
## Which should you choose?
**Use VARCHAR when:**
* The value has a sensible, known maximum length (usernames, emails, titles, slugs).
* You want to index or sort by the full column.
* You need a DEFAULT value.
**Use TEXT when:**
* The content is long-form or unbounded (article bodies, descriptions, serialized data, logs).
* You rarely filter or sort on the column directly.
## Practical tips
* Don't declare VARCHAR(255) by habit — pick a realistic limit. Length limits act as a basic data-quality guard.
* In utf8mb4, indexes on VARCHAR columns are limited to 191 characters with the older index format — relevant when adding unique indexes.
* Avoid SELECT \* on tables with large TEXT columns when you don't need them; fetching large off-page values adds overhead.
* For repeated fixed sets of values, consider ENUM or a lookup table rather than free-text columns.
Both types are fully supported on Stablepoint hosting — the choice is purely about your application's data model.
# Creating MySQL Databases and Users
Source: https://kb.stablepoint.com/web-hosting/databases/creating-mysql-databases-and-users
In this article, we'll cover the steps needed for successfully creating a new database and a new user that will be assigned to it. This is usually only required for setting up a script or application from scratch — where possible, we'd suggest using the Softaculous Auto-Installers, which will set up an application like WordPress, Joomla, or Magento for you.
First, *log in to your cPanel account*, navigate to the **"Databases"** tab and look for **"MySQL Database Wizard"**.
Once you have accessed this tool, you'll go through a few steps, the first of which is the creation of the database — specifically, **the name of the database**. The database name will be prefixed with your cPanel username, e.g. `cpaneluser_dbname`. It's best to use something descriptive to avoid confusion later, so something like 'wp' or 'wordpress' is better than just 'db'.
On the following page, you'll be asked what **your database username** should be, along with the **password**. It is often easiest to create the database user with the same username as the database name. For the password, set one of your choice or use the built-in *"Password Generator"*. Once ready, click the **"Create User"** button.
The last step is **assigning the user** you just created **to the database**. In almost all cases, *all privileges* will be needed, so simply tick the box next to **"All Privileges"**. Once done, click **"Next Step"**.
# What databases do we provide?
Source: https://kb.stablepoint.com/web-hosting/databases/database-overview
We provide MySQL (MariaDB) databases with all of our hosting packages. These can be [created in your cPanel account](/web-hosting/databases/creating-mysql-databases-and-users). We do not limit the number of databases you can create.
Almost all common website applications (including WordPress and Joomla) use a MySQL database for their data.
## Other database formats
If you require a MongoDB database, we recommend using [MongoDB Atlas](https://www.mongodb.com/cloud-database/benefits). They have a free tier which you can connect to remotely.
We do not provide PostgreSQL.
We do not provide MSSQL databases or MSSQL Express. These are Windows database formats.
# Database Privileges
Source: https://kb.stablepoint.com/web-hosting/databases/database-privileges
MySQL database users can be granted a range of privileges to restrict or grant access to a given database. Typical privileges include INSERT, UPDATE, SELECT, and DELETE, among others, that represent actions or queries a user might run against a database. Some people use these privileges to restrict DELETE or other potentially harmful queries to a specific scope or method of access. That said, for most modern web applications you will need to grant 'all privileges' to a database user to ensure the user can connect to and manipulate the database in the way the application expects. Creating a post in WordPress, for example, involves SELECT and INSERT queries, while removing a plugin might involve DELETE and UPDATE queries.
If you haven't already created a MySQL database, please read [Creating MySQL Databases and Users](/web-hosting/databases/creating-mysql-databases-and-users).
To access the MySQL user privileges section:
1. Log in to cPanel and click **MySQL Databases**.
2. Scroll down and find **Add User to Database**.
3. Select the specific user from the **User** drop-down.
4. Select the database you want to grant or adjust privileges on in the **Database** drop-down.
5. Click **Add**, and then you can manage the privileges granted to that specific user on that specific database.
# How to change your Wordpress password from the database
Source: https://kb.stablepoint.com/web-hosting/databases/how-to-change-your-wordpress-password-from-the-database
Have you forgotten your WordPress password and need a quick fix? No worries — you have full access to the database which holds your login credentials.
It is a little tricky, so to avoid any problems here's how you can do it yourself in a few easy steps.
1. Log in to your database via the **phpMyAdmin** button in cPanel.
2. Select the database from the left-hand menu, then click on the `_users` table.
3. Locate the user you want to change the password for and click **Edit**.
4. You'll now see the details for that user. Passwords are encrypted, so you will never be able to see the existing password.
5. On the `user_pass` line, select **"MD5"** from the drop-down menu, then on the right type the password you want in **PLAIN TEXT**.
6. Once done, click **"Go"**. Your password has now been updated and encrypted.
Of course, if you need any assistance with this you can always contact us.
# How to create separate database access
Source: https://kb.stablepoint.com/web-hosting/databases/how-to-create-separate-database-access
This is very useful when you want to provide access to one database only within the cPanel account.
You need to create separate phpMyAdmin access through the Softaculous App Installer. Install a direct phpMyAdmin instance under your site URL (like [https://newdomain.com/phpmyadmin/](https://newdomain.com/phpmyadmin/)), and use it to connect with the database credentials set for your site.
You can check how to create MySQL databases and users in [Creating MySQL Databases and Users](/web-hosting/databases/creating-mysql-databases-and-users).
# How to use a remote MySQL database with cPanel
Source: https://kb.stablepoint.com/web-hosting/databases/how-to-use-a-remote-mysql-database-with-cpanel
By default, applications hosted with us connect to MySQL on the same server using localhost. But sometimes you need the reverse — an application running elsewhere (your local machine, another server, a reporting tool) connecting to a database hosted on your cPanel account. That's remote MySQL.
## Step 1: Allow the remote host in cPanel
1. Log in to cPanel.
2. In the **Databases** section, click **Remote MySQL**.

3. In the **Add Access Host** field, enter the IP address of the machine that will connect.
* You can use the % wildcard (for example, 203.0.113.%) to allow a range.
* To find your current IP, visit [http://ipfinder.us](http://ipfinder.us).
4. Click **Add Host**.
> [!WARNING]
>
> Avoid adding % (all hosts) on its own. That allows connection attempts from anywhere on the internet, and your database security then rests entirely on the password.
## Step 2: Connect from the remote application
Use these connection details:
| Setting | Value |
| :- | :- |
| Host | Your domain name or server IP address |
| Port | 3306 |
| Database | Your full database name (including the cPanel prefix) |
| Username | Your full database username (including the cPanel prefix) |
| Password | The database user's password |
Example from the MySQL command line:
```shell theme={null}
mysql -h yourdomain.com -P 3306 -u cpuser_dbuser -p cpuser_dbname
```
Example from PHP:
```php theme={null}
[!NOTE]
>
> For security and latency reasons, keep the application and database on the same server where possible. Use remote MySQL for management tools, reporting, and integrations rather than as the primary application connection.
# Importing and Exporting as SQL
Source: https://kb.stablepoint.com/web-hosting/databases/importing-and-exporting-as-sql
You have learned how to log in and use phpMyAdmin in the previous article; now let's see how you can import and export the database.
## Exporting
Log in to phpMyAdmin, select the database you want to export from the left-hand menu, then click **Export** at the top.
Typically it is fine to leave the settings as they are and just press **"Go"** — after which a download box will appear to save your `.sql` file locally.
## Importing
Log in to phpMyAdmin, select the database you wish to import content into from the left-hand menu, and click **Import** at the top.
By default, the settings are set to import a standard `.sql` file like the one you exported previously. Simply press **"Choose File"**, select the database file from your local environment, press **"Go"** and let it upload for a couple of minutes.
> [!NOTE]
>
> If you have any issues performing any of the above, please contact us for further assistance.
# MySQL Stored Procedures
Source: https://kb.stablepoint.com/web-hosting/databases/mysql-stored-procedures
A stored procedure in a MySQL database is a query or sequence of queries that operates on your data and returns some set of results. It can be a good way to automate reporting and other common queries.
When importing a database with stored procedures, you may see lines like this:
```text theme={null}
DEFINER=`root`@`localhost`
```
or
```text theme={null}
DEFINER=`username`@`localhost`
```
The DEFINER for each stored procedure needs to be set to the MySQL user that you are importing the database as. So if this is `username_db123`, then change the lines in your `.sql` dump to say:
```text theme={null}
DEFINER=`username_db123`@`localhost`
```
The import of the stored procedures should then complete successfully.
One issue with stored procedures is that you won't be able to edit them from phpMyAdmin when logged in to cPanel, because the cPanel phpMyAdmin user is dynamically generated and doesn't match the security definer. To edit a stored procedure, the easiest way in cPanel/phpMyAdmin is to dump the procedure, edit the SQL, and then drop and re-import the specific procedure.
# Databases
Source: https://kb.stablepoint.com/web-hosting/databases/overview
Creating and managing MySQL databases on your hosting — phpMyAdmin, users and privileges, importing and exporting data, stored procedures, and remote connections.
# Remote database connections
Source: https://kb.stablepoint.com/web-hosting/databases/remote-database-connections
### Remote connection
The first step is to obtain the IP address from which the remote connection is being established. You can retrieve this information from [http://ip.me.uk/](http://ip.me.uk/).
Now access *your cPanel account* and click on `Remote MySQL`.
On the next page, add the IP address in the **Host** field and, if necessary, attach a **Comment**. Once ready, click `Add Host`.
At the bottom of the page you can find the *existing IP addresses* that are added to the Remote MySQL list, from which such connections can be established successfully.
### Remote MySQL configuration
The settings you would need to use for establishing such a connection are as follows:
* **Hostname:** your server name or the IP address of the server
* **Database:** your database name
* **Username:** your database username
* **Password:** your database username's password
* **Port:** `3306`
> [!NOTE]
>
> If asked for a Connection Method, select `TCP/IP`.
You can access it using software such as [MySQL Workbench](https://www.mysql.com/products/workbench/).
# Using phpMyAdmin
Source: https://kb.stablepoint.com/web-hosting/databases/using-phpmyadmin
In this article, we'll cover the steps needed to access and use phpMyAdmin. phpMyAdmin is a management tool for MySQL databases, and lets you manage and manipulate data within your databases on your hosting. For example, WordPress stores posts, pages and user data within a MySQL database.
To access phpMyAdmin, *log in to your cPanel account* and look for the 'phpMyAdmin' icon (or use the search bar in the top right-hand corner).
Once you have clicked on that, a new tab will open — this is the phpMyAdmin interface:
1. On the left-hand side you'll see a list of your databases under the cPanel account. If you do not have any databases, nothing will be listed here.
2. At the top of the bar you'll see the database you are currently in, and the actions you can take within it (e.g. SQL query, Search, Export, Import).
3. Finally, the tables are listed. You can expand a table by clicking on it to see its contents.
# How can I give access to my developer
Source: https://kb.stablepoint.com/web-hosting/files-and-access/how-can-i-give-access-to-my-developer
To give access to your developer, you have a few options available.
**First option:** Provide the main cPanel logins for the relevant account to give full access to the data. Note that you can't generate a separate cPanel user — only the main one for the relevant account will work.
**Second option:** Provide access only to the site content (using FTP) and the database. See:
* [How to create FTP account](/web-hosting/files-and-access/how-to-create-ftp-account)
* [How to create separate database access](/web-hosting/databases/how-to-create-separate-database-access)
**Third option:** Use the **Manage Team** feature in cPanel to create separate login details for your developer.
# How To Clone A Website In cPanel
Source: https://kb.stablepoint.com/web-hosting/files-and-access/how-to-clone-a-website-in-cpanel
There can be many reasons you'd want to clone a website in cPanel. Before we cover the process, here is some basic terminology to help you understand it.
## What is a cloned website?
Cloning a website means creating an exact replica or duplicate of a site hosted on your server. The cloned website will have identical files and database contents compared to the original. What differentiates the clone from the original is that the clone is hosted on a different domain or directory.
## Why do you need to clone a website?
* **Deploying a testing or staging site.** If your new website is for testing purposes, you might want to quickly clone it and test rather than build it fresh.
* **Setting up a new site with a basic configuration.** Reuse the configuration you already spent time getting right, rather than reconfiguring from scratch.
* **Providing designers and developers a live-like working environment.** Some functions can only be previewed in a live version, saving a lot of testing and error-fixing time.
## Why clone using cPanel?
There are several tools to accomplish website cloning. The command line is one, but it is error-prone and time-consuming. cPanel allows you to automate steps where mistakes are likely and impactful, reducing cloning time and making the process seamless.
We will cover two methods:
1. **WordPress Toolkit method** — WordPress-specific, quick and easy.
2. **Manual cloning method** — works for CMS & eCommerce sites, whether or not built on WordPress.
## WordPress Toolkit method
1. Open WordPress Toolkit.
2. Locate the site to be copied.
3. Expand to the detailed view.
4. Click **Clone**.
5. Select the subdomain and path to clone the website to. (If the path and subdomain don’t exist, WordPress Toolkit will create them.)
6. Start cloning by clicking the button at the bottom of the page.
At the end of the process, along with the cloned site, you get a new database and database user, and the site is automatically configured to use the new database.
## Manual cloning method
Any website built on WordPress, Joomla, or Drupal has two types of files that need to be copied over: the PHP code files, and static files stored in the site's database (images, JavaScript, CSS).
### 1. Create a new directory for the new website
1. Go to the Files section of the cPanel main menu.
2. Create and name a new folder where all the files will be copied.
### 2. Copy the original site's content to the new directory
1. Select the site-to-be-cloned directory.
2. Click **Copy** in the toolbar.
3. Enter the name of the folder created in step 1.
### 3. Copy over the database
1. Create a new database using the MySQL tools in cPanel: go to the Databases menu, open **MySQL Databases**, name your new database, and click **Create Database**.
2. Export the original site's database: go to the Databases menu, open **phpMyAdmin**, select the database from the left sidebar, select the **Export** tab, choose the quick export method, and click **Go**. An SQL file is downloaded to your local machine.
3. Import into the new database: in phpMyAdmin, select the new database, choose the **Import** tab, click **Choose File**, select the SQL file you downloaded, and click **Go**.
You can access the database through the existing user or assign a new one. To assign a new user, go to the MySQL Databases page, scroll to **Add New User**, create a username and strong password, click **Create User**, then under **Add User to Database** select the new user and database, click **Add**, select “All Privileges”, and confirm.
### 4. Configure the new website's database
For a WordPress site (other CMSs are similar):
1. Go to File Manager and select the new site's directory.
2. Select the `wp-config.php` file and click **Edit**.
3. In the MySQL settings section, update `DB_NAME`, `DB_USER`, and `DB_PASSWORD` with the new database name, user, and password.
4. Save changes.
You can also update the new site's URL from wp-config.php by updating the `WP_HOME` and `WP_SITEURL` values.
## Conclusion
The Toolkit method is more convenient but specific to WordPress. For other sites, the manual method works, so knowing both is useful.
## Frequently asked questions
**What does it mean to clone a website?**
Cloning a website involves creating an exact duplicate, maintaining identical files and database content, and hosting it on a different domain or directory.
**Why would I need to clone a website?**
Cloning serves various purposes, such as deploying a testing or staging site quickly, replicating a site's basic configuration, and providing designers and developers with a live-like working environment for accurate testing.
**Why should I choose cPanel for website cloning?**
cPanel offers a user-friendly and efficient platform for cloning. It automates critical steps, reducing errors and saving time compared to manual methods or command-line tools.
# How to Configure and Manage WebDAV Web Disks With cPanel
Source: https://kb.stablepoint.com/web-hosting/files-and-access/how-to-configure-and-manage-webdav-web-disks-with-cpanel
cPanel and WHM provide several options for managing files on your account, including a File Manager, FTP, SFTP, and a Web Disk. Web Disk also enables you to use an encrypted connection, making it more secure than traditional techniques like FTP. With Web Disks, cPanel users can use appropriate applications on PCs and mobile devices to manage and modify files kept on their server. Web Disk is cPanel's implementation of the WebDAV standard. In this guide we break down the configuration process, but first let's look at Web Disk and WebDAV.
## An overview of WebDAV & Web Disks
Web Distributed Authoring & Versioning (WebDAV) is an HTTP protocol extension that enables remote web content authoring by clients. The protocol lays a foundation for users to create, modify, and move files on a server using a supported program. WebDAV is natively supported by macOS and Windows, and there are several WebDAV-compatible apps for Android and iOS. One of WebDAV's most useful features is that it allows you to keep track of author and modification-date properties, as well as manage namespaces, collections, and overwrite protection.
Web Disk is based on an extension to the web's original HTTP and HTTPS protocols, unlike other technologies such as SMB and FTP. It's worth remembering that WebDAV's versioning features aren't as sophisticated as Git's — if you're seeking a modern code version control solution, look at cPanel's Git integration instead. Other protocols such as CalDAV and CardDAV are built on top of WebDAV, providing shared calendar and contact information on a remote server.
cPanel can automatically create a Web Disk account for individuals to manage files in their home directory from anywhere. Users can create additional accounts to share folders within their home directory.
## FTP, SFTP, SMB, WebDAV — which one is better?
* **SMB** is a "true" file-sharing protocol that enables low-level file locking and sharing control, but it is not an ideal candidate for WAN file sharing: it is difficult to firewall, is sensitive to network latency, and is largely tied to Windows.
* **FTP** is old and widespread, so FTP servers and clients are available for practically all platforms. Security is generally weak, though it can transport large files quickly (while being inefficient with small ones).
* **WebDAV** brings simplicity, security (with SSL) and versioning to online file sharing. It uses HTTPS as a transport, which adds overhead and can be slower and more memory-intensive with large files. It does not support file locking except in the scope of content revision control.
* **SFTP** (Secure File Transfer Protocol) is far safer than plain FTP and highly functional, though not well suited to collaborative workflows. If your server supports it, prefer it over FTP.
## WebDAV configuration process on cPanel
1. Log in to cPanel to reach your dashboard.
2. Select **Web Disk** from the Files section.
3. The main Web Disk account is visible. Its username and password are the same as your cPanel account — you would not want to share those with every user, so create a separate Web Disk account for them:
* Enter the Web Disk account's username.
* Enter a domain from your cPanel.
* Use the Password Generator or enter your own password.
* Enter the directory the Web Disk account should use. (It's not a good idea to put new users' directories in your public\_html folder, as that exposes their contents. You can also give access to your full home folder.)
* Choose whether the account's directory should have read/write or read-only permissions.
4. Click **Create**. cPanel then launches the Web Disk, and you can access data from your devices.
## How to use your devices to access WebDAV Web Disks
There are various methods to access Web Disks, and they vary based on your device's operating system and preferred WebDAV client.
* On **Windows**, click "Enable Digest Authentication" first.
* To connect a client to the primary account of your Web Disk, click "Change Client Access".
cPanel automatically detects your operating system and provides a direct link with configuration instructions. If detection fails, select your platform manually. For desktops (Finder on macOS, Windows Explorer, Linux file managers) a custom configuration script is provided — download it and run it (you may need to make it executable). The script configures your system's file browser so you can view and modify files as if they were stored locally. On mobile operating systems like iOS and Android, you'll need a third-party app that supports WebDAV.
# How to create a WordPress staging site with cPanel
Source: https://kb.stablepoint.com/web-hosting/files-and-access/how-to-create-a-wordpress-staging-site-with-cpanel
If you have a live WordPress website, it's wise to avoid actions that could break your public-facing site. It is necessary to update and edit your site over time, but the problem arises when you apply major edits without testing them first. To avoid this, we advise creating a WordPress staging website with cPanel.
## What is a WordPress staging website?
A staging website is a mirror image of your live WordPress website — a clone with the same features. It is also called a testing site or a development site. The public cannot view it because it stays in a separate subdomain that only you can access. Changes you make to it will not appear on the live site unless you want them to. Use a staging site if:
* You have a new landing page you want to test before showing it to customers.
* You want to check if updates are compatible.
* You need to alter the website code to add a new function.
* You intend to develop a new theme or improve an existing one.
## Steps to create a WordPress staging site with cPanel
Log in to your web hosting account and find cPanel. We assume you already have an active WordPress website (so you have a domain name and URL).
### Step 1: Make a subdomain
Log in to cPanel and locate **Subdomains**. Create your subdomain and give it a relevant name — this will host your staging website.
### Step 2: Make an FTP account
Create a new FTP account to keep the new subdomain separate. Locate the **FTP Accounts** button, click it, and enter the new account details, including the directory of your subdomain.
### Step 3: Add your WordPress files to the new site
The new FTP account lets you place files on the staging site. If you are not using the latest WordPress version, download it first, then upload the files. You can use cPanel's File Manager to upload larger files, or use FTP throughout.
### Step 4: Add your live site's database
1. Install and activate a plugin that helps you export and import database data (such as WP Migrate DB).
2. Use the plugin to export data, entering the directory path and URL for your subdomain correctly.
3. Create a new database for the staging site using **MySQL Databases**, then create a new database user and add them to the new database.
4. Open **phpMyAdmin**, click **Import**, select the file you exported, and click **Go**.
### Step 5: Modify wp-config.php
Edit the `wp-config.php` file on the staging site to use the new database name and username. Check your live site's table prefix and make sure you use the same one. Upload the edited file back to the server, then log in to your new staging site using the same credentials as your live site.
### Step 6: Restrict access
Stop search engines from visiting and indexing your staging website: go to **Settings -> Reading**, and enable "Discourage search engines from indexing this site".
## Conclusion
Creating a WordPress staging site with cPanel is an easy and quick exercise once you know how. With a staging site you can make changes without risking your main website, verify your edits, and then apply them to the live site without affecting its performance.
# How to create FTP account
Source: https://kb.stablepoint.com/web-hosting/files-and-access/how-to-create-ftp-account
FTP is used when you want to provide access to the site content only. You can create such an FTP account directly in cPanel, under **Files -> FTP Accounts**, where you have a few options available:
* **Option 1:** Create an FTP account with access to all data/folders within the account.
* **Option 2:** Create an FTP account with access to the main site only within the account.
* **Option 3:** Create an FTP account with access to a separate folder within the account.
# How to Use PuTTY SSH with cPanel
Source: https://kb.stablepoint.com/web-hosting/files-and-access/how-to-use-putty-ssh-with-cpanel
SSH stands for Secure Shell (or Secure Socket Shell). When a user or administrator wants to share data with another system/server over an unsecured network, they use the SSH protocol so that their communication session and data transfer remain safe and protected from external malicious elements. In other words, SSH is used to make data exchange over an unsecured network secure.
Whenever you need to directly access the server — to reach the command line and run scripts — you need to make sure your communication session is secure. If you were to access your server without securing the connection first, you would risk having your data intercepted.
## What is the PuTTY SSH client?
A protocol is a set of rules for how something is done; a client is what gives the protocol a usable interface. Take FTP: it's just a protocol, so a user needs a client that makes use of it. The PuTTY SSH client is one such application that gives users the ability to use the SSH protocol.
## How to use PuTTY SSH with cPanel
To follow along, you will need your cPanel login details and the IP address for a hosting account (or server) that allows SSH connections.
### 1. Install PuTTY
Download and install PuTTY on your device. If you don't have it, you can get it from [this link](https://www.chiark.greenend.org.uk/~sgtatham/putty/latest.html).
### 2. Launch and enter details
Open PuTTY. In the field at the top, enter the IP address for your hosting account (remember, it must be an account that allows SSH connections). The adjacent field is the port — by default this is 22, which is what you should use under normal circumstances (only change it if your hosting provider has specifically changed the port). Set the connection type to ‘SSH’, then click ‘Open’.
### 3. Enter login details in the terminal emulator
After clicking ‘Open’, the terminal emulator opens. Enter your cPanel username and press Enter, then enter your password. The server will validate your request and a command prompt will appear. You can now access the command-line tools offered by Linux and run scripts.
## Conclusion
Under usual circumstances you'll be fine using cPanel and WHM for managing your server and hosting accounts. But if you ever do need to work on the command line, follow the steps above and you'll be good to go.
# How to use the cPanel terminal
Source: https://kb.stablepoint.com/web-hosting/files-and-access/how-to-use-the-cpanel-terminal
The Terminal interface allows you to access an in-browser terminal application for direct command-line access within a cPanel session. It is located under the “Advanced” section.
For all basic hosting packages it is enabled by default. If you are a Reseller and for some reason it is not enabled for a certain account, you can enable it under WHM -> choose the account -> click on “+” then Modify account. Below you will see “Shell Access” — enable it.
You can check some major commands in our [Secure Shell (SSH) Overview](/web-hosting/files-and-access/secure-shell-ssh-overview).
# Managing Disk Usage
Source: https://kb.stablepoint.com/web-hosting/files-and-access/managing-disk-usage
You can see a total of your disk space usage in the cPanel statistics panel, but to see more detail you can click the `Disk Usage` icon.
### Usage by category
The `Disk Usage` section first breaks down usage into different categories to help you manage your space effectively. Below this, you can drill down into specific folders within the webspace, with each folder's space usage summarised.
### What causes usage to rise?
There are four common culprits of unexpectedly high disk usage:
* **Software website backups.** These are backups taken by your software (e.g. WordPress), usually configured in a plugin. We take regular backups of your entire cPanel account so there is no need to take these. If you do want your own backups, we recommend storing them elsewhere.
* **Website error logs.** These are usually in files named `error_log`, created due to a PHP error on a website with logging enabled. The log includes details of the reason for the error (which you might want to fix), or you can disable logging in the PHP options in "PHP Selector".
* **Cache files.** Software can create cache files which in theory should be removed but sometimes are not. These can take up large amounts of space unnecessarily. Cache should be cleared regularly.
* **Emails.** Emails are included in account usage. If you keep all your messages on the server, have a catch-all address, or receive a large amount of spam, this may be filling up space. Bear in mind emails in your "Trash" folder also use up space, so empty the Trash if you have a lot of them.
Once you have identified the cause of high disk usage, you can use the cPanel File Manager or FTP to clear the source — or, in the case of emails, within Webmail or a mail client.
# Managing Files in cPanel
Source: https://kb.stablepoint.com/web-hosting/files-and-access/managing-files-in-cpanel
Stablepoint hosting operates a *folder structure* similar to that of a desktop computer file system. Website files are located in a subfolder called `public_html`, and subfolders of the website correspond to that directory.
If you add additional domains and/or their subdomains to your hosting, then they will have their own folders created outside public\_html unless you specify a different "Document Root" when adding them to your plan.
There are a few ways of managing your files and folders in cPanel.
### cPanel File Manager
cPanel provides an online *File Manager*. This includes a graphical interface similar to a computer file manager. You can find this through the `File Manager` link on your cPanel dashboard.
The *File Manager* is fairly intuitive. You can browse folders on the left, and drill down to specific files, which can also be edited online. There are various available functions, including:
* File uploads
* File permission changes
* Viewing and editing files
* Compressing to an archive
While excellent for quick operations, it is better to use a full file management protocol for more advanced or numerous changes.
### FTP & SFTP
**FTP** stands for **File Transfer Protocol**. This is a communication method you can use to connect to a web server from another computer (e.g. your desktop machine) to manipulate files. One of the most popular desktop FTP software applications is Filezilla. We have a guide on [Using FTP](/web-hosting/files-and-access/using-ftp).
**SFTP** is a more secure form of FTP that functions through the SSH protocol.
Both **FTP** and **SFTP** can be used with your cPanel username and password. The FTP hostname can be your domain name, and the ports are `21` (FTP) and `22` (SFTP) respectively.
You can also set up additional FTP accounts in your cPanel under `FTP Accounts`. These can be locked down to specific folders. When setting one up, make sure you set the desired path the FTP account should have access to (to give it full account access, clear the field so only `/home/user/` remains). You can check the settings you need for your FTP client by clicking "Configure FTP Client".
### SSH
For advanced users, shell access (SSH) is enabled by default on port `22` with the cPanel username and password.
We have a guide to [Shell (SSH)](/web-hosting/files-and-access/secure-shell-ssh-overview) basics.
# Files and Access
Source: https://kb.stablepoint.com/web-hosting/files-and-access/overview
Accessing and managing your website files — FTP, SSH and PuTTY, the cPanel File Manager and terminal, WebDAV, disk usage, and WordPress staging sites.
# Secure Shell (SSH) Overview
Source: https://kb.stablepoint.com/web-hosting/files-and-access/secure-shell-ssh-overview
SSH is a way of connecting to your web space using the command line. You can manage files and run commands, and for power users this is a really important feature. To use **SSH**, you must use an SSH client to connect to the server. Once connected, you can manually run commands within a terminal application.
* On **macOS** and **Linux** you can use `Terminal`.
* If you are running **Windows**, you can download an SSH client, such as `PuTTY`.
If you have a command prompt, you can type `ssh`, followed by your *shell username (cPanel username)*, an `@` sign, then your *server name*. For example:
```text theme={null}
ssh username@server.stablepoint.com
```
Once you have logged in, you can edit files, move files, run PHP commands and so on. Our system also supports key-based authentication, which is more secure than using a password and saves having to type it every time. Just generate a private key on your computer, then upload the contents of the public key part to a file called .ssh/authorized\_keys. If you need any help with this, please don't hesitate to get in touch.
Now we will go over some basic commands to use after you have logged in.
## Navigation
`pwd` — lists the path you are currently in, so you don't get lost. The output usually looks like */home/user/public\_html/example*, meaning you are in the folder "example".
`ls -lah` — lists the files in the folder you are currently in, along with additional information such as size, last modified time and date, and permissions.
`cd` — used to move to the relevant folder/directory.
## Creating / modifying / viewing
`mkdir [directoryname]` — creates a new directory in your current location.
`touch [filename.ext]` — creates a new file. Note you should put the extension at the end, such as *.txt*.
You can modify files with one of two editors. By default `nano` is used more often by less experienced users:
`nano [filename].txt` — opens the file in nano. You can read full information on how to use it by pressing **F1** or **Ctrl+G**.
You can also use `vim` to edit files. This editor is for more advanced users; press **F1** for help with commands once the file is open:
`vim [filename].php`
You can view a file using `cat` — for example `cat [filename.txt]` will display the contents of filename.txt in text format.
**Tip:** You can use `cat` in combination with `grep` to find text inside a file. The content will be displayed but the requested text will be highlighted in `red` so you can find it more easily:
`cat [filename.txt] | grep "Nov 13 13:07"` — displays the contents of \[filename.txt], then (the `|` is called a pipe, and separates commands) highlights text matching "Nov 13 13:07" exactly.
If you find a command on the web and would like to understand it, we recommend [https://explainshell.com](https://explainshell.com), which breaks down what the command does — it's excellent for learning.
# Using FTP
Source: https://kb.stablepoint.com/web-hosting/files-and-access/using-ftp
FTP accounts are a way of manipulating files on a web server, over a protocol. It allows desktop software such as Filezilla to upload, download and move files on your hosting accounts.
We'll now cover the steps needed for connecting with FTP to your account.
Your FTP credentials will be as follows:
1. For **Host** you can use either your domain name, or the server IP — you can find the IP in your cPanel main menu on the right side as "Shared IP".
2. The **Username** and **Password** are either your cPanel username and password, or those that you created as standalone FTP accounts. Note that if this is a standalone account, the FTP account will be in the format `username@domain.com` rather than your cPanel username, with the password you set up for it.
3. The port is `21` for plain FTP and `22` for SFTP.
### FTP usage
If you have not used FTP before, we suggest downloading Filezilla from [https://filezilla-project.org/](https://filezilla-project.org/).
Key commands are:
* Double-click on a folder to enter it.
* Double-click on the ".." folder to go back to the previous folder.
* Double-click on a file to download it.
* Drag-and-drop or double-click on files on your local computer to upload them to the server.
* Right-clicking on files/folders will open a menu with more options, such as `Copy`, `Delete`, `Move`, `File Permissions`, etc.
# Firewall IP block
Source: https://kb.stablepoint.com/web-hosting/firewall-ip-block
Our servers run a firewall that automatically blocks IP addresses after repeated failed login attempts — to cPanel, FTP, email, or SSH. This protects accounts from brute-force attacks, but it occasionally catches legitimate users who mistyped a password a few times.
## Symptoms of an IP block
If your IP has been blocked, the server becomes unreachable **from your connection only**:
* Your website times out, but online tools (e.g. [https://downforeveryoneorjustme.com](https://downforeveryoneorjustme.com)) show it's up.
* cPanel, webmail, FTP, and email all fail to connect at the same time.
* The site works fine from your phone on mobile data, but not on your Wi-Fi.
That combination almost always means a firewall block rather than a site problem.
## Common causes
* Wrong email password saved in a mail client (which retries automatically and racks up failures fast — the most common cause)
* Repeated failed cPanel/FTP logins
* An old device (phone, tablet) still trying an outdated password in the background
## How to get unblocked
1. Find your public IP address — visit [http://ipfinder.us](http://ipfinder.us) **from the blocked connection** (use a device on the same network that still has web access, or mobile data won't show the right IP).
2. Contact our support team via live chat or ticket (from a working connection) and give us that IP address.
3. We'll check the firewall, remove the block, and tell you which service caused it so you can fix the stored password.
## Preventing repeat blocks
* Update the password in **every** device and mail client after changing an email or cPanel password.
* Remove accounts from old devices you no longer use.
* Use a password manager so typos don't accumulate.
If you're being blocked repeatedly, tell us — we can whitelist your static IP so it doesn't happen again.
# Addon Domain
Source: https://kb.stablepoint.com/web-hosting/hosting-overview/addon-domain
What is an addon domain?
An addon domain is, as its name implies, an additional domain name you can add to your hosting plan (if the plan you chose has additional slots as mentioned in our specifications under each hosting plan's information).
You can give an addon domain email addresses, forwarders, and more the same way you would to a primary (main) domain on the account.
When you create an addon domain, under **Domains**:
* A folder is created in the root directory with the name of the domain name, unless you specify another path/name for the folder.
* A subdomain is created for the primary domain and attached to the new folder. Every addon domain will have an addon.maindomain.com linked to the primary domain name, which can be used to preview websites as well.
To add an addon domain you need to log into cPanel -> click on **Domains** -> enter your domain at the top, and in the last field set the location of your document root.
# Aliases vs. Redirects
Source: https://kb.stablepoint.com/web-hosting/hosting-overview/aliases-vs-redirects
They both work in the same way, to take your visitors to another website page. However the end result differs.
## Aliases
Alias URLs (unlike redirects) do not change in a web browser. This means that when visitors type in the alias URL (example.org), their browser will load the original content on example.com, but their URL window will still say "example.org".
A downside to aliases: when you use an alias, your website traffic numbers will be split (some visitors will use the alias URL and others will use the original domain URL). This is not as good for SEO and website stats (the better option is a redirect).
With us, they can be set in cPanel from **Domains**. When creating it, leave the option enabled for **Share document root (/home/example.com/public\_html) with “example.com”**.
## Redirects
A redirect allows you to make one domain redirect to another domain, either for a website or a specific web page.
Redirect URLs (unlike aliases) do change in a web browser. This means that when visitors type in the redirecting URL (example.org), their browser will load the original content on example.com, and their URL window will say "example.com".
With us, they can be set in cPanel from the **Redirects** menu.
# FFMPEG Support
Source: https://kb.stablepoint.com/web-hosting/hosting-overview/ffmpeg-support
FFMPEG is a collection of libraries that allows applications to process video files in a variety of codecs. Common uses for this would be uploading video to your WordPress site, and encoding the video to a specific resolution to save on disk space and bandwidth. FFMPEG is installed and available to use on all of our hosting systems. The FFMPEG binary version is provided by our Linux package installer, and unfortunately it's not possible to change this on our shared hosting systems for standardisation purposes; however this can be changed on our dedicated hosting servers.
# How to change your WHM/cPanel password
Source: https://kb.stablepoint.com/web-hosting/hosting-overview/how-to-change-your-cpanel-password
You need to change your password for a reason or another in cPanel but can't find how?
First of all you will need your old password which you can find in your Stablepoint customer area.
Products & Services -> Click on the active hosting package -> Overview -> Change password
Your password has now been changed and you can login!
In case you forgot your password and can't access your account for any reason, please contact us for further assistance.
# How to Create a Cookie-Free Domain for WordPress
Source: https://kb.stablepoint.com/web-hosting/hosting-overview/how-to-create-a-cookie-free-domain-for-wordpress
## Cookies: why you need them and why you don’t
Cookies are small bits of data that a website stores on your web browser so that it can recognize you should you visit again. Some websites you re-visit have your preferences or settings adjusted the same way as you had left them — that’s what cookies do.
When unnecessary cookies are stored on your browser, things start to get slow. Cookies that have no purpose get collected on your browser, and the website has to contend with all of them before it loads, slowing down your loading speed.
## Cookie-free domains and static content
With dynamic content — content that has to be created and tailored to your need — there is no choice but to use cookies. Static content, on the other hand, is content that stays the same regardless of who visits it (an ‘About Us’ page, for example).
So, with a cookie-free domain, you can serve static content without the overhead of cookies. The usual way to set this up is to create a sub-domain. For example, if a website has the domain name ‘[www.webstore.com’](http://www.webstore.com’) then a subdomain could be ‘blog.webstore.com’.
## How to create a cookie-free domain on WordPress with cPanel
### Creating a subdomain
The way to create a cookie-free domain is to make a subdomain that serves only the static content.
Go over to the ‘Domains’ menu. In the top field write the name of the subdomain, and below that the name of the top domain. Below these two fields is the Document Root — enter the ‘wp-content’ directory here.
### Editing the ‘wp-config.php’ file
Once the above step is done, set up WordPress so that it knows to serve static content via the new subdomain.
From the main menu, go to the ‘Files’ category and click on ‘File Manager’. Click on the ‘wp-config.php’ file and then choose ‘Edit’.
Thereafter, enter these directives in the file:
```php theme={null}
define("WP_CONTENT_URL", "static.example.com");
define("COOKIE_DOMAIN", "www.example.com");
```
Of course, change the lines to match the names of your domain and subdomain.
## Conclusion
The above process will create the subdomain and direct WordPress to serve the static content from it. However, this will not migrate existing static content to the new subdomain — for that, there is an additional step via phpMyAdmin. What we discussed above should be sufficient for creating a cookie-free domain and setting it up to work.
# How to fix contact form not working
Source: https://kb.stablepoint.com/web-hosting/hosting-overview/how-to-fix-contact-form-not-working
In order for a contact form to work properly, we recommend installing an SMTP plugin like WP Mail SMTP or similar. The quick guide below is for this plugin, but the setup is pretty much similar if you prefer to use a different one.
**Step 1:** Create the email account in cPanel -> Email Accounts (if not already created). See [Creating an email account](/email/email/creating-an-email-account).
**Step 2:** Install and configure the SMTP plugin (WP Mail SMTP -> Settings).
You can check the default SMTP settings for your account in [How to Set Up SMTP in cPanel](/email/set-up-cpanel-smtp).
**Step 3:** Test the settings to make sure everything is working correctly.
# How to Forward a Domain
Source: https://kb.stablepoint.com/web-hosting/hosting-overview/how-to-forward-a-domain
At the moment the only way to forward a domain is using one of our hosting plans and a domain slot inside them.
Once your domain is added to our hosting plan you will need to go to the `Redirects` button.
Then select the domain name from the second drop down.
Leave the document root empty if you want to redirect the whole domain, or enter the path if you want to redirect only a specific folder inside it. e.g. `/public_html/wp-admin/`
And finally in the last field enter the target URL to redirect to.
Once you save the changes it will take about 5-10 minutes to take full effect.
# How to Increase the PHP Max Upload Size in cPanel?
Source: https://kb.stablepoint.com/web-hosting/hosting-overview/increase-cpanel-php-upload-size
When the size of the file that you’re trying to upload to your website exceeds the uploading file size limit, you’ll be given an error and the process will stop. The error will notify you that the attempted upload is bigger than the allowed limit, and it will prompt you to increase the max uploading size.
For people who don’t have an idea about why this error occurs and how to resolve it, this situation could be unnecessarily annoying and alarming. Turns out, there is an easy fix.
## What is the Upload Max Filesize?
The ‘upload\_max\_filesize’ value is what decides the limit of the file size that can be uploaded to a website. When this value is set to a certain number of bytes, all uploads beyond it will be turned down and will fail to be uploaded.
By default, this value is set to 2 MBs in PHP. That is a low threshold, and nowadays, with newer websites and applications, it can be quite insufficient.
## How to increase the PHP Max Upload Size in cPanel?
With cPanel, it’s very easy to increase the max upload size:
1. Head over to the main menu in cPanel. Go under **Software** and open **Select PHP version**.
2. Click on **Options** and scroll down to ‘upload\_max\_filesize’.
3. From the drop-down menu, set the maximum file size you would like. That’s it.
## Some things to remember
* When increasing the uploading max filesize, the post max size should be equal to or greater than the upload max filesize. There is another value called the ‘Memory limit’, and this should be larger or equal to the post max size as well:
Upload Max Filesize ≤ Post Max Size ≤ Memory Limit
* This limit applies when uploading to the site directly, e.g. within the /wp-admin/media folder. The upload filesize within the File Manager in cPanel is up to 2GB.
* If you need to upload larger files than 2GB, use FTP or SSH.
## How much should the max file size be increased?
The standard 2M limit is too low for most modern sites. How much you raise it depends on the type of files your site handles. For a site of written material and blog posts, 20M could be enough. For audio files, 30M or 40M could be sufficient. Setting the limit either too low or too high could be problematic, so calculate it based on your needs.
## Conclusion
If you are facing the file size exceeding the maximum upload limit error, you will need to increase the capacity by going to the PHP selector in cPanel. The process is straightforward.
# LVE Limits Explained
Source: https://kb.stablepoint.com/web-hosting/hosting-overview/lve-limits-explained-1
In this article we will explain what exactly is being offered when you look at our packages, in terms of LVE limits.
Here are our LVE limits on the current plans we have:
## **Memory(RAM)**
RAM memory is storing temporary data needed to perform tasks. This resource is affected by scripts, actions you take on your website as well as users accessing various pages of your website and MySQL data queries. Once a task is completed, the data is then removed so the space can be used by the next task. We allocate an X amount of Gigabytes(GB) for each package to your use.
A few tips to keep your RAM usage optimal:
* Install a caching plugin! - Serving cached content to users will reduce the active tasks that use up RAM from repeated visits;
* Disable automatic cron tasks (example: wp\_cron from Wordpress) from running by themselves, and have them running at set intervals of time from the "Cron Jobs" tab in cPanel;
* Keep your CMS tidy with the latest versions of Core,Plugins and Themes. Make sure to remove unneeded plugins to avoid straining the memory usage with tasks that you don't need.
* Optimize
## **CPU Cores**
CPU is basically a piece of hardware used in processing of data, it has sockets with "cores" that each perform tasks requested. CPU will first serve cached data if available, and if not it will refer to the data served by RAM to be processed during the actions taken over your site (as mentioned above for RAM usage). We allocate an X number of cores that your account can use to process tasks.
A few tips to keep your CPU usage optimal:
* Caching!!! CPU will always serve Cache first before RAM, Cache is served much easier and faster than a new task processed via RAM, the more cached content the less strain on CPU cores;
* Use a CDN like Cloudflare which you can enable from your cPanel menu. This option helps offload searching and delivering of your website data, which also helps keep strain off the server;
* Again, make sure your website is optimized, up to date, and tidy(remove content/data you don't need).
## **Entry Processes**
Entry processes are the number of processes that enter your account: for example every PHP page accessed by a user, SSH sessions and cron jobs. These are usually come-and-go, they are processed fast by the CPU depending on the type of request that is being made. We allocate an X number of processes being called at once.
A few tips to keep your Entry Processes from hitting the limit:
* Optimise your SQL queries;
* Simplify the code in your website, so the process can be dealt with faster;
* Disable automated tasks like wp\_cron and admin-ajax.php(for Wordpress) ;
* Condition search engine crawlers using a robots.txt file;
* Optimize website to avoid unnecessary processes from running.
## **Number of inodes**
Inodes are, to explain in simple terms, little storage "boxes" used to hold the data of each file and folder under your hosting space. So let's say 70.000 inodes used = 70.000 files and folders.
There are no limits to how many inodes you can use on any of our hosting plans.
## **Iops and IO**
IOPS stands for Input/Output Operations Per Second. This limit affects the number of write/read data blocks served on your website.
IO stands for Input/Output and is measured in MB per second. This limits affects the size of write/read data blocks served on your website.
It is generally affected by the other limits mentioned above, should you optimize those appropriately, you shouldn't have issues with these two either.
## **CageFS Security**
CageFS is a feature offered by Cloudlinux, it defines the LVE limits explained above for each account, not allowing them to interfere with other accounts. It is the wall that prevents your neighbor from entering/harming your apartment in a block (so to speak).
Please note that this does not apply for MySQL. While the resources are separated and maintained per cPanel account, MySQL is elementary for all accounts to use.
If you require a visualisation of this, think of it just as the above comparison with the apartments - while you have your own space and resources, the piping is shared through the walls, so if you were to break a pipe it would affect all residents until fixed. That being said please be mindful of others when organizing your database operations.
If you have any further questions or concerns on the matter, feel free to contact our support team any time - we are available to help 24/7.
# Hosting Overview
Source: https://kb.stablepoint.com/web-hosting/hosting-overview/overview
The essentials of managing your cPanel hosting — logging in, domains and subdomains, aliases and redirects, SSL, running multiple sites, and common fixes.
# Running Multiple Websites
Source: https://kb.stablepoint.com/web-hosting/hosting-overview/running-multiple-websites
There are two ways to run multiple websites with Stablepoint. This can either be done in a single shared hosting account, or it can be done through a reseller account by separating the websites in different cPanel accounts.
### On shared hosting
cPanel has two options for additional domains: **parked domains** (aliases) and **addon domains**. Both of these options are set under **domains**.
**Parked domains** let you add an additional domain to your control panel as an alias of your main domain. For instance, you may want to add both a `.com` and a `.net` domain but point them to the same website. You would add the extra domain as a parked domain.
Note that to avoid duplicate content penalties by search engines like Google, you should redirect one domain to the other. Most software automatically does this, but you can set this by clicking "Manage Redirection" after adding the parked domain.
**Addon domains** point additional domains to external folders. Your main domain runs from the public\_html folder by default. Addon domains can run from folders such as `public_html/newdomain` or just `newdomain`.
If you have a large number of websites to run, if your sites are functionally independent, and if you can afford it, we **strongly** recommend using a reseller account to manage multiple websites as an alternative to addon domains. The big downside of cPanel addon domains is that each website runs under the same user on the server, meaning that all website files are accessible inside one account, so any security vulnerabilities found on one site could affect the others as well. Another reason is that all websites will be using that one account's resources, whereas in separate accounts they will benefit from more resource abundance.
### On reseller hosting
On reseller hosting, you have the **Web Host Manager** (WHM) interface, which gives you the ability to create multiple independent cPanel accounts.
You can then use the **List Accounts** function to display and log in to each cPanel account. Additionally, you can modify how many parked or addon domains each account can have, as well as other resources.
# Sub Domains
Source: https://kb.stablepoint.com/web-hosting/hosting-overview/sub-domains
A subdomain is a domain that is part of a larger domain; the only domain that is not also a subdomain is the root domain.
For example, west.example.com and east.example.com are subdomains of the example.com domain, which in turn is a subdomain of the .com top-level domain (TLD).
In order to add a subdomain to a domain, log in to your cPanel and click on "Subdomains".
Here you will see the first field, where you will enter your subdomain only, such as `"west"` in `"west.example.com"`.
The second field will be the domain name you are setting this for.
The third field will be the document root where the files will be located for this subdomain.
# What is 403 forbidden error and how to fix it
Source: https://kb.stablepoint.com/web-hosting/hosting-overview/what-is-403-forbidden-error-and-how-to-fix-it
The HTTP 403 is an HTTP status code meaning access to the requested resource is forbidden. In most cases, it is a misconfiguration of the site.
You will know the error when it is displayed on the main page or when you try to save some changes.
**Here are a few solutions you should check to fix it.**
**1. Look for AddHandler code set in the .htaccess file.** Go to cPanel -> File Manager -> Settings -> enable "Show Hidden Files". Then look for the code and remove it. It is most probably left from an old migration. The PHP version should be set only within the PHP Selector in cPanel.
**2. Check for a deny rule set within the .htaccess file and remove it.**
**3. Check for a .htaccess file under the main directory (like /home/user) and remove it.**
**4. Check file/folder permissions.** Another possible cause is incorrect permissions set for files or folders. File permissions should be 644 and folders should be 755. If set differently, you can change them directly within the File Manager: select the file -> right click on it -> Change permissions -> set the correct value -> click Change.
**5. Disable the security plugin for WordPress sites.** If it is a WordPress site and you have a security plugin, try to disable it by renaming the folder to something like currentplugin\_stop. You can do that within the File Manager.
**6. Run a malware scan.** Sometimes the site can be infected/hacked, which can cause such a forbidden issue. We would suggest running a malware scan for the account under cPanel -> Imunify360 -> Start scanning.
If none of the above helps, contact our support and we will investigate further for you.
# How long does it take to set up my account?
Source: https://kb.stablepoint.com/web-hosting/how-long-does-it-take-to-set-up-my-account
Account setup with Stablepoint is **instant** for most orders.
As soon as your payment is confirmed, our systems automatically provision your hosting account and send your welcome email, which contains everything you need to get started:
* Your control panel login details
* Nameserver information
* Server details for FTP and email
## If you haven't received your welcome email
1. Check your spam or junk folder.
2. Confirm the order shows as paid/active in your [client area](https://clients.stablepoint.com).
3. If the email still hasn't arrived within a few minutes, contact our support team and we'll resend it.
## Orders that may need review
Occasionally, an order is flagged for manual review by our fraud-screening systems (for example, when payment details don't match the account information). These reviews are usually completed quickly, and we'll contact you if we need anything.
## Domain registrations
If you ordered a domain with your hosting, the domain is registered at the same time as the account setup. New domains typically resolve within minutes, but DNS propagation worldwide can take up to 24 hours.
If you have any questions while getting set up, our support team is available 24/7 via live chat, phone, or ticket.
# Can we enable LiteSpeed Crawler?
Source: https://kb.stablepoint.com/web-hosting/performance/can-we-enable-litespeed-crawler
The LiteSpeed Crawler is a feature of the LiteSpeed Cache plugin for WordPress that proactively visits your site's pages to warm the cache — so visitors always hit a cached (fast) version rather than waiting for the first uncached request.
## Availability
Crawling is resource-intensive at the server level, since it generates requests for every page of every site that runs it. For that reason, the crawler is **disabled by default** on our shared hosting platform, which is the standard configuration for shared LiteSpeed environments.
If your site would benefit from cache warming, please contact our support team:
* On some plans and servers, we may be able to enable the crawler with sensible limits.
* For resource-heavy sites that depend on crawling, a plan with dedicated resources may be the better fit, and we can advise on options.
## Alternatives to the crawler
Even without the crawler, you can keep your cache warm:
* **Longer cache TTL** — increase cache lifetime in LiteSpeed Cache settings so pages stay cached longer.
* **Preload on update** — LiteSpeed Cache automatically purges and re-caches changed pages; the first visitor re-warms each page naturally.
* **External uptime monitors** — services that ping your key pages periodically keep those pages cached.
For most sites, well-configured caching without the crawler already delivers excellent performance. If you have questions about your LiteSpeed Cache configuration, we're happy to help.
# Cron Jobs
Source: https://kb.stablepoint.com/web-hosting/performance/cron-jobs
A cron job is a scheduled task that runs automatically at defined intervals. Common uses include running maintenance scripts, sending queued emails, processing imports, and triggering application schedulers (such as WordPress's wp-cron or Laravel's scheduler).
## Creating a cron job in cPanel
1. Log in to cPanel.
2. In the **Advanced** section, click **Cron Jobs**.

3. Under **Add New Cron Job**, set the schedule. You can pick a common preset from the **Common Settings** dropdown (for example, "Once Per Day") or set the five schedule fields manually:
* **Minute** (0-59)
* **Hour** (0-23)
* **Day** (1-31)
* **Month** (1-12)
* **Weekday** (0-6, Sunday = 0)
4. In the **Command** field, enter the command to run.
5. Click **Add New Cron Job**.
## Example commands
Run a PHP script:
```shell theme={null}
/usr/local/bin/php /home/username/public_html/script.php
```
Fetch a URL (for example, to trigger wp-cron):
```shell theme={null}
wget -q -O /dev/null https://example.com/wp-cron.php?doing_wp_cron
```
Run a script and discard all output:
```shell theme={null}
/usr/local/bin/php /home/username/script.php > /dev/null 2>&1
```
> [!NOTE]
>
> Replace username with your cPanel username and adjust paths to match your account.
## Email output
By default, cron sends any command output to your account's email address. Set the email in the **Cron Email** section of the Cron Jobs page, or append `> /dev/null 2>&1` to a command to silence its output.
## Tips
* **Don't schedule jobs too frequently.** Very frequent jobs (every minute) that run heavy scripts can consume your account's resources. Choose the longest interval that meets your needs.
* **Replace wp-cron with a real cron job.** WordPress's built-in wp-cron runs on page visits, which is unreliable on low-traffic sites and wasteful on busy ones. Disable it in wp-config.php with `define('DISABLE_WP_CRON', true);` and schedule the wget command above every 10-15 minutes instead.
* **Use full paths** in commands — cron runs with a minimal environment and may not find binaries otherwise.
If you need help setting up a cron job, contact our support team.
# Hosting Performance Tweaks: Opcode Caching, Expires Headers, and Gzip Compression
Source: https://kb.stablepoint.com/web-hosting/performance/hosting-performance-tweaks-opcode-caching-expires-headers-and-gzip-compression
There are several hosting features you can use to increase your website's performance. This article covers three of them: opcode caching, expires headers, and gzip compression.
## Opcode caching
PHP is an interpreted language. When a PHP script runs, the interpreter compiles the source code into opcode, and then executes it. Opcode caching stores the compiled opcode in memory, so subsequent requests for the same script skip the compilation step entirely. This can significantly speed up PHP applications like WordPress.
Our servers support **OPcache**. To enable it for your account:
1. Log in to cPanel.
2. Go to **Select PHP Version** (or **MultiPHP INI Editor**, depending on your server).
3. In the extensions list, enable **opcache**.
After enabling OPcache, most PHP applications see an immediate performance improvement with no code changes.
> [!NOTE]
>
> When developing and making frequent changes to PHP files, cached opcode can serve stale versions of your scripts for a short time. OPcache re-validates files periodically, but if you need changes visible instantly, you can temporarily disable OPcache while developing.
## Expires headers
Expires headers tell browsers how long they can cache static resources (images, CSS, JavaScript) before requesting them again. With proper expires headers, repeat visitors load your site much faster because their browser reuses locally cached files.
To add expires headers, edit the *.htaccess* file in your site's document root and add:
```text theme={null}
ExpiresActive On
ExpiresByType image/jpeg "access plus 1 year"
ExpiresByType image/png "access plus 1 year"
ExpiresByType image/gif "access plus 1 year"
ExpiresByType image/webp "access plus 1 year"
ExpiresByType text/css "access plus 1 month"
ExpiresByType application/javascript "access plus 1 month"
ExpiresByType image/x-icon "access plus 1 year"
```
Adjust the durations to suit how often you change these files. If you version your assets (for example, style.css?v=2), you can safely use long durations.
## Gzip compression
Gzip compression reduces the size of text-based resources (HTML, CSS, JavaScript) before they are sent to the browser, often by 60-80%. Smaller transfers mean faster page loads, especially on slower connections.
To enable gzip compression, add this to your *.htaccess* file:
```text theme={null}
AddOutputFilterByType DEFLATE text/html
AddOutputFilterByType DEFLATE text/css
AddOutputFilterByType DEFLATE text/plain
AddOutputFilterByType DEFLATE text/xml
AddOutputFilterByType DEFLATE application/javascript
AddOutputFilterByType DEFLATE application/json
AddOutputFilterByType DEFLATE application/xml
AddOutputFilterByType DEFLATE image/svg+xml
```
> [!NOTE]
>
> Already-compressed formats such as JPEG, PNG, and video files should not be gzipped — it wastes CPU for little or no size reduction.
## Testing your configuration
After making these changes, you can verify them with tools such as:
* [GTmetrix](https://gtmetrix.com) — checks expires headers and compression as part of its report
* [Google PageSpeed Insights](https://pagespeed.web.dev) — overall performance scoring
* Browser developer tools (Network tab) — check the Content-Encoding: gzip response header
If you need help enabling any of these features, our support team is available 24/7.
# HTTP/2 Overview
Source: https://kb.stablepoint.com/web-hosting/performance/http-2-overview
HTTP/2 is a major revision of the HTTP protocol that makes websites load faster. All Stablepoint hosting supports HTTP/2 out of the box — there is nothing you need to enable.
## What HTTP/2 improves
* **Multiplexing** — multiple requests and responses share a single connection simultaneously, instead of queuing. This eliminates the head-of-line blocking problem of HTTP/1.1.
* **Header compression (HPACK)** — request and response headers are compressed, reducing overhead on every request.
* **Server push** — the server can proactively send resources the browser will need.
* **Binary protocol** — more efficient to parse than HTTP/1.1's text format.
The practical effect: pages with many resources (images, scripts, stylesheets) load noticeably faster, because they no longer wait in line for a limited number of connections.
## Requirements
Browsers only use HTTP/2 over **HTTPS**, so your site needs a valid SSL certificate. All Stablepoint plans include free SSL certificates, so this is already covered.
## Checking that your site uses HTTP/2
1. Open your site in Chrome or Firefox.
2. Open developer tools (F12) and go to the **Network** tab.
3. Right-click the column headers and enable the **Protocol** column.
4. Reload the page — resources served over HTTP/2 show **h2** in the protocol column.
Alternatively, use an online checker such as [https://tools.keycdn.com/http2-test](https://tools.keycdn.com/http2-test).
## Optimization notes
Some old HTTP/1.1 optimization techniques are unnecessary (or counterproductive) with HTTP/2:
* **Domain sharding** (spreading assets across multiple domains) — no longer needed; a single multiplexed connection is more efficient.
* **Image sprites and file concatenation** — less important; many small files are handled efficiently, and separate files cache more granularly.
Standard good practices — compression, caching headers, optimized images — still apply and complement HTTP/2 well.
# Performance and Advanced
Source: https://kb.stablepoint.com/web-hosting/performance/overview
This section covers performance optimization and advanced hosting features, including caching, HTTP/2, cron jobs, and server specifications.
# Setting timezones in PHP
Source: https://kb.stablepoint.com/web-hosting/performance/setting-timezones-in-php
PHP scripts use the server's default timezone unless told otherwise. If your application shows the wrong times — timestamps a few hours off, scheduled tasks firing at unexpected hours — setting the correct timezone usually fixes it.
## Method 1: Set the timezone in cPanel (recommended)
1. Log in to cPanel.
2. Open **MultiPHP INI Editor** (or **Select PHP Version** → **Options**, depending on your server).
3. Select your domain.
4. Find the **date.timezone** setting.
5. Enter your timezone identifier, for example `Europe/London` or `America/New_York`.
6. Save.
This applies to all PHP scripts on the domain. You can find the full list of valid timezone identifiers at [https://www.php.net/manual/en/timezones.php](https://www.php.net/manual/en/timezones.php).
## Method 2: Set the timezone in .htaccess
Add this line to the *.htaccess* file in your document root:
```text theme={null}
SetEnv TZ Europe/London
```
## Method 3: Set the timezone in your PHP code
At the top of your script (or in a shared include):
```php theme={null}
[!NOTE]
>
> Database timestamps are a separate concern — MySQL has its own timezone handling. If you store times in the database, it's best practice to store them in UTC and convert for display.
## Verifying the change
Create a file containing:
```php theme={null}
[!TIP]
>
> Keep the old hosting active for a few days after the switch, until DNS has fully propagated and you've confirmed email is flowing to the new server.
## Speeding things up
If you can obtain a full cPanel backup from your old host, upload it to your account with us and tell us the filename — we'll restore it directly, which is often the fastest route. See [Requesting site migration from another host](/accounts-billing/billing-accounts/site-migration-request) for details.
# Can I livestream audio or video?
Source: https://kb.stablepoint.com/web-hosting/software-guides/can-i-livestream-audio-or-video
Live streaming audio or video directly from shared hosting is generally **not suitable**, and here's why — along with the right way to do it.
## Why shared hosting isn't built for livestreaming
Live streaming has a fundamentally different resource profile from serving web pages:
* **Persistent connections:** every viewer holds a connection open for the duration of the stream. Web servers on shared platforms are tuned for many short requests, not thousands of long-lived ones.
* **Constant bandwidth per viewer:** a 720p stream consumes roughly 1.5-3 Mbps per viewer, continuously. Even a modest audience multiplies this quickly.
* **Specialized software:** real streaming uses media servers and protocols (RTMP ingest, HLS/DASH delivery) that aren't part of a standard cPanel stack.
Running a stream from a shared account would degrade performance for the account and the server, so streaming servers aren't something we support on shared or reseller hosting.
## What works instead
**Use a streaming platform and embed the player on your site (recommended):**
* **YouTube Live** and **Twitch** — free, unlimited viewers, and both provide embed codes you can place on any page hosted with us.
* **Vimeo Livestream, Cloudflare Stream, Mux** — paid options with white-label players and more control.
Your website stays on our hosting and simply embeds the stream — this is how virtually every site with live video does it.
**Audio/radio streaming:** dedicated services like Shoutcast/Icecast hosting providers, Radio.co, or Live365 handle the stream; you embed their player on your site.
**Pre-recorded video** is different: you can host video files on your account and serve them normally, though for anything beyond light traffic a video platform or CDN will deliver a better viewer experience and save your bandwidth.
## Need more control?
If you need to run your own media server (e.g. OBS → RTMP → HLS with nginx), that requires a VPS or dedicated server with root access. Contact us and we can discuss options that fit.
# How do I upload a project to cPanel using WP Toolkit
Source: https://kb.stablepoint.com/web-hosting/software-guides/how-do-i-upload-a-project-to-cpanel-using-wp-toolkit
If you've built a WordPress site elsewhere — locally, on a staging host, or with another provider — the WordPress Toolkit and cPanel give you several ways to bring it in.
## Method 1: WP Toolkit migration (recommended for WordPress)
The toolkit can pull a WordPress site directly from another server:
1. In cPanel, open **WP Toolkit**.
2. Click **Install** dropdown → **Migrate** (or the **Migration** option, depending on version).
3. Provide the source site's details: URL and admin credentials, or FTP/SSH details for the old host.
4. Choose the destination domain on your account.
5. Start the migration — the toolkit copies files and database and fixes URLs automatically.
## Method 2: Manual upload of a local project
If your project is on your own machine:
1. **Export the database** from your local environment (phpMyAdmin → Export, or `mysqldump`).
2. **Zip the site files** (the WordPress folder contents, including wp-content).
3. In cPanel **File Manager**, upload the zip to public\_html (or a subfolder) and **Extract** it.
4. Create a database and user in **MySQL Databases**, then import your .sql file via **phpMyAdmin → Import**.
5. Edit wp-config.php with the new database name, user, and password (host: localhost).
6. Update URLs if your local site used a different address:
* WP-CLI over [SSH](/web-hosting/files-and-access/secure-shell-ssh-overview): `wp search-replace 'http://localhost/mysite' 'https://yourdomain.com'`
* Or set WP\_HOME and WP\_SITEURL temporarily in wp-config.php.
7. Visit the site and log in; re-save **Settings → Permalinks** to refresh rewrite rules.
After the import, the site appears in WP Toolkit automatically (or use **Scan** in the toolkit to detect it).
## Method 3: Duplicator / All-in-One WP Migration plugins
Plugin-based packages also work well:
1. On the source site, create the package/export with the plugin.
2. On our hosting, install a fresh WordPress via [Softaculous](/web-hosting/software-guides/using-the-softacoulous-autoinstaller), install the same plugin, and import the package.
## Non-WordPress projects
For static sites or custom PHP applications, upload the files via File Manager or FTP and import any database via phpMyAdmin — the same steps as [Manually installing software](/web-hosting/software-guides/manually-installing-software).
> [!TIP]
>
> Prefer a hands-off move? Migrations to Stablepoint are free — open a ticket with your old host's access details and our team does the whole thing. See [Site Migrations](/web-hosting/site-migrations).
# How to change your PHP version in cPanel
Source: https://kb.stablepoint.com/web-hosting/software-guides/how-to-change-your-php-version-in-cpanel
You can change the PHP version for your account (or per domain) directly in cPanel. This is useful when an application requires a newer version, or occasionally when legacy software needs an older one.
## Changing the PHP version
1. Log in to cPanel.
2. In the **Software** section, click **Select PHP Version**.

3. In the **Current PHP version** dropdown, choose the version you want.
4. Click **Apply** / **Set as current**.
The change takes effect immediately for your account.
## Per-domain PHP versions
If you have multiple domains and need different versions per domain:
1. In cPanel, open **MultiPHP Manager**.
2. Tick the domain(s) to change.
3. Choose the PHP version from the dropdown.
4. Click **Apply**.
> [!NOTE]
>
> Depending on the server configuration, either Select PHP Version (CloudLinux PHP Selector) or MultiPHP Manager may be the primary tool. If both are present, MultiPHP Manager controls the per-domain version and PHP Selector controls extensions/options for the CloudLinux version.
## Managing PHP extensions
On the **Select PHP Version** page, after picking a version you can enable or disable extensions (e.g. imagick, intl, soap, opcache) with checkboxes. Most applications list their required extensions in their documentation.
## Which version should I use?
Use the newest version your application supports — newer PHP versions are significantly faster and receive security fixes. For WordPress, the current recommendation is PHP 8.1 or newer.
> [!WARNING]
>
> Before switching a live site to a new major version, verify plugin/theme compatibility. If the site breaks after switching, you can switch back the same way — the change is instant and reversible.
See also [Changing PHP settings](/web-hosting/software-guides/how-to-increase-your-php-maximum-execution-time) for adjusting limits like max\_execution\_time and memory\_limit.
# How to change your timezone in cPanel
Source: https://kb.stablepoint.com/web-hosting/software-guides/how-to-change-your-timezone-in-cpanel
If timestamps in your applications are off by a few hours, the PHP timezone likely doesn't match your local timezone. You can change it in cPanel.
## Changing the timezone via MultiPHP INI Editor
1. Log in to cPanel.
2. In the **Software** section, click **MultiPHP INI Editor**.
3. Select your domain from the dropdown.
4. Switch to **Editor Mode** (the raw editor).
5. Add or update this line:
```text theme={null}
date.timezone = "Europe/London"
```
6. Save.
Replace Europe/London with your timezone from the official list: [https://www.php.net/manual/en/timezones.php](https://www.php.net/manual/en/timezones.php).
## Changing the timezone via PHP Selector
If your server uses the CloudLinux PHP Selector:
1. In cPanel, click **Select PHP Version**.
2. Click **Options**.
3. Find **date.timezone** and set your timezone.
## Verifying
Create a file called tz.php in your document root:
```php theme={null}
[!NOTE]
>
> Applications may have their own timezone settings that override PHP's — WordPress (Settings → General), for example. Set both for consistent behavior. For more background, see [Setting timezones in PHP](/web-hosting/performance/setting-timezones-in-php).
# How to debug WordPress with cPanel and WordPress Toolkit
Source: https://kb.stablepoint.com/web-hosting/software-guides/how-to-debug-wordpress-with-cpanel-and-wordpress-toolkit
When a WordPress site misbehaves — white screen, 500 errors, broken features — systematic debugging finds the cause fastest. Here's how to do it with cPanel and the WordPress Toolkit.
## Step 1: Check the error logs
1. In cPanel, open **Errors** (Metrics section) for recent Apache/PHP errors, and check the error\_log files that PHP writes into your site's directories (visible in **File Manager**, typically in public\_html or the folder where the error occurred).
2. The most recent entries usually name the failing file — often a specific plugin or theme file. That's your prime suspect.
## Step 2: Enable WP\_DEBUG logging
Edit wp-config.php (File Manager → Edit) and add above the "That's all" line:
```php theme={null}
define('WP_DEBUG', true);
define('WP_DEBUG_LOG', true);
define('WP_DEBUG_DISPLAY', false);
@ini_set('display_errors', 0);
```
Errors, warnings, and notices are now written to wp-content/debug.log without being shown to visitors. Reproduce the problem, then read the log.
> [!WARNING]
>
> Remove or set these back to false when you're done — debug logging on a live site grows the log file and can leak information if misconfigured to display.
## Step 3: Isolate plugins and themes with the Toolkit
The classic conflict test, made painless by [WP Toolkit](/web-hosting/software-guides/how-to-edit-my-wordpress-website-in-cpanel-using-wp-toolkit) — no wp-admin needed (useful when wp-admin itself is broken):
1. In cPanel → **WP Toolkit**, open the site's card.
2. Under **Plugins**, deactivate all plugins. Site fixed? Reactivate them one at a time until it breaks again — the last one activated is the culprit.
3. Still broken with all plugins off? Under **Themes**, switch to a default theme (Twenty Twenty-Four). If that fixes it, the theme is at fault.
On Deluxe, do this on a **clone** instead of the live site for zero risk.
## Step 4: Check PHP version and limits
* Fatal errors mentioning syntax or undefined functions after an update often mean a [PHP version mismatch](/web-hosting/software-guides/how-to-change-your-php-version-in-cpanel) — try the version the plugin/theme requires.
* "Allowed memory size exhausted" → raise memory\_limit; timeouts → raise [max\_execution\_time](/web-hosting/software-guides/how-to-increase-your-php-maximum-execution-time).
## Step 5: Common specific fixes
* **White screen after editing functions.php:** fix or revert the edit via File Manager — the log from Step 1 gives the exact line number.
* **Too many redirects:** check siteurl/home values (must both be https and consistent) and any redirect plugins.
* **Changes not appearing:** clear all caches — LiteSpeed Cache/plugin cache, and browser cache.
* **wp-admin locked out entirely:** use WP Toolkit's login button; if even that fails, deactivate plugins via the toolkit and retry.
## When to hand it over
If the logs point at something server-side, or you're stuck, open a support ticket with the exact error text and the timestamps — our team can check server-level logs that aren't visible in cPanel.
# How to edit my WordPress website in cPanel using WP Toolkit
Source: https://kb.stablepoint.com/web-hosting/software-guides/how-to-edit-my-wordpress-website-in-cpanel-using-wp-toolkit
The WordPress Toolkit in cPanel gives you a management layer over all your WordPress installations — including tools for editing and maintaining your site without hunting through wp-admin.
## Opening the WordPress Toolkit
1. Log in to cPanel.
2. In the **Applications** or **Domains** section, click **WP Toolkit**.

3. Your WordPress installations are listed with status, version, and available actions.
## Logging in to edit your site
Click **Log in** on an installation's card — the toolkit signs you straight into wp-admin without a password prompt (single sign-on). From there you edit posts, pages, menus, and widgets in WordPress as usual.
## Site management from the toolkit
Without entering wp-admin at all, the toolkit card for each site lets you:
* **Change basic settings:** site title, admin password, search-engine indexing toggle
* **Manage plugins and themes:** activate, deactivate, update, install, and remove
* **Enable maintenance mode:** show a "be right back" page to visitors while you work
* **Update WordPress:** core, plugin, and theme updates, individually or all at once
* **Configure automatic updates:** the toolkit's Smart Updates can even test updates on a temporary clone before applying them (availability depends on the toolkit edition — see [WP Toolkit Lite vs Deluxe](/web-hosting/software-guides/wp-toolkit-lite-vs-wp-toolkit-deluxe-a-feature-comparison))
## Safe editing workflow
For significant edits — theme changes, page-builder work, plugin swaps — use this pattern:
1. In the toolkit, click **Clone** to create a staging copy of the site (e.g. on a subdomain).
2. Make and test the edits on the clone.
3. Use **Copy Data** to push the changes from the clone back to the live site.
This keeps your live site untouched until you're happy with the result.
## Troubleshooting an edit gone wrong
* Toggle **maintenance mode** on while you fix things.
* Use the toolkit to **deactivate** a plugin that broke the site — no wp-admin access needed.
* Restore from a Softaculous or JetBackup backup if necessary (see [JetBackup restores](/web-hosting/backups/how-to-restore-your-database-or-files-using-jetbackup)).
For debugging tools specifically, see [How to debug WordPress with cPanel and WordPress Toolkit](/web-hosting/software-guides/how-to-debug-wordpress-with-cpanel-and-wordpress-toolkit).
# How to host Dynamic DNS domains with cPanel
Source: https://kb.stablepoint.com/web-hosting/software-guides/how-to-host-dynamic-dns-domains-with-cpanel
cPanel includes a **Dynamic DNS** feature that lets a hostname on your domain always point at a device whose IP address changes — such as a home server, office router, or Raspberry Pi on a residential connection.
## How Dynamic DNS works
You create a dynamic DNS hostname (e.g. home.yourdomain.com) in cPanel. cPanel gives you a private update URL. A device on your network calls that URL periodically; whenever its public IP has changed, the DNS record is updated automatically. The hostname then always resolves to your current IP.
## Creating a Dynamic DNS hostname
1. Log in to cPanel.
2. In the **Domains** section, click **Dynamic DNS**.
3. Click **Create**.
4. Enter the subdomain to use (e.g. home.yourdomain.com) and an optional description.
5. Click **Create**.
6. cPanel displays the **Dynamic DNS URL** — copy it and keep it private. Anyone with this URL can update the record.
> [!NOTE]
>
> Your domain's DNS must be hosted with us (using our nameservers) for cPanel's Dynamic DNS records to be authoritative.
## Configuring the client
On the device whose IP changes, call the update URL on a schedule.
**Linux / Raspberry Pi (cron):**
```shell theme={null}
*/15 * * * * curl -s "YOUR_DYNAMIC_DNS_URL" > /dev/null 2>&1
```
This checks in every 15 minutes.
**Routers:** many routers support custom dynamic DNS providers — configure the update URL directly in the router's DDNS settings if supported.
When the URL is called, the record is set to the public IP the request came from, so run the client from inside the network whose IP you want tracked.
## Uses
* Reach a home NAS, camera system, or media server by name
* Self-hosted services on a residential connection
* Remote access to an office network with a dynamic IP
> [!TIP]
>
> Combine the dynamic hostname with non-standard ports or a VPN for anything sensitive — a stable hostname makes your device easier for you to reach, and also easier for others to find.
# How to host Git repositories with cPanel
Source: https://kb.stablepoint.com/web-hosting/software-guides/how-to-host-git-repositories-with-cpanel
cPanel includes **Git Version Control**, which lets you host Git repositories directly on your hosting account — useful for deploying sites with git push and for keeping private repositories.
## Creating a repository
1. Log in to cPanel.
2. In the **Files** section, click **Git Version Control**.

3. Click **Create**.
4. Either:
* **Clone an existing repository:** enable Clone, paste the clone URL (e.g. from GitHub), and set the repository path, or
* **Create a new empty repository:** disable Clone and set the path and name.
5. Click **Create**.
## Pushing to your cPanel repository
Your repository's clone URL uses SSH:
```shell theme={null}
ssh://username@yourdomain.com:PORT/home/username/repositories/myrepo
```
(The exact URL is shown in the repository's details in cPanel.) On your local machine:
```shell theme={null}
git remote add cpanel ssh://username@yourdomain.com:PORT/home/username/repositories/myrepo
git push cpanel main
```
> [!NOTE]
>
> SSH access must be enabled on your account for git-over-SSH to work. Your SSH port and credentials are the same as for shell access — see [SSH overview](/web-hosting/files-and-access/secure-shell-ssh-overview).
## Deploying on push
cPanel supports push-to-deploy with a .cpanel.yml file in the repository root:
```yaml theme={null}
---
deployment:
tasks:
- export DEPLOYPATH=/home/username/public_html/
- /bin/cp -R * $DEPLOYPATH
```
When you push to the repository (and the working tree is clean), cPanel runs the tasks — in this example copying files to public\_html. You can also trigger deployment manually with **Manage → Pull or Deploy → Deploy HEAD Commit**.
## Managing repositories
From Git Version Control you can:
* View the repository's clone URL and current branch
* Pull changes from a linked remote
* Deploy manually
* Remove repositories (files remain on disk unless you delete them)
> [!TIP]
>
> Keep your repository outside public\_html (e.g. in /home/username/repositories/) and deploy into public\_html with .cpanel.yml — this way your .git directory and source files aren't web-accessible.
# How to increase your PHP maximum execution time
Source: https://kb.stablepoint.com/web-hosting/software-guides/how-to-increase-your-php-maximum-execution-time
PHP's max\_execution\_time limits how long a script may run before the server stops it (default is typically 30 seconds). Long-running tasks — large imports, backups, migrations — sometimes need more.
## Method 1: MultiPHP INI Editor
1. Log in to cPanel.
2. In the **Software** section, click **MultiPHP INI Editor**.
3. Select your domain.
4. In **Basic Mode**, find **max\_execution\_time** and enter a higher value (e.g. 300 for five minutes).
5. Click **Apply**.
## Method 2: PHP Selector options
If your server uses the CloudLinux PHP Selector:
1. In cPanel, click **Select PHP Version** → **Options**.
2. Find **max\_execution\_time** and set the value.
## Method 3: .htaccess
On servers where PHP runs in a mode that allows it, you can add this to your *.htaccess*:
```text theme={null}
php_value max_execution_time 300
```
> [!NOTE]
>
> If adding php\_value lines to .htaccess causes a 500 error, your PHP handler doesn't accept them — remove the line and use Method 1 or 2 instead.
## Method 4: In the script
For a single script:
```php theme={null}
[!WARNING]
>
> Raise limits to what the task genuinely needs, not to extreme values. A script that needs 30+ minutes is usually better run as a [cron job](/web-hosting/performance/cron-jobs) or from the [command line over SSH](/web-hosting/files-and-access/secure-shell-ssh-overview), where web-request time limits don't apply.
# How to install WordPress
Source: https://kb.stablepoint.com/web-hosting/software-guides/how-to-install-wordpress
WordPress powers over 40% of the web, and installing it on Stablepoint hosting takes about a minute with Softaculous.
## Installing WordPress with Softaculous (recommended)
1. Log in to cPanel.
2. In the **Softaculous Apps Installer** section, click **WordPress**.
3. Click **Install Now**.
4. Complete the form:
* **Choose Protocol:** https\:// (SSL is free and automatic on our hosting).
* **Choose Domain:** the domain to install WordPress on.
* **In Directory:** leave **empty** to install at yourdomain.com, or enter a folder (e.g. blog) for yourdomain.com/blog.
* **Site Name / Description:** you can change these later in WordPress settings.
* **Admin Username:** choose something other than "admin".
* **Admin Password:** use a strong password.
* **Admin Email:** a real address you can access — password resets go here.
5. Optionally enable **automated backups** and select an update policy.
6. Click **Install**.
After a few seconds, Softaculous shows your site URL and the admin URL (yourdomain.com/wp-admin).
## Installing WordPress manually
If you prefer the manual route:
1. Download WordPress from [https://wordpress.org/download/](https://wordpress.org/download/).
2. Upload and extract the archive into your document root via File Manager or FTP.
3. Create a MySQL database and user in cPanel (**MySQL Databases**), and add the user to the database with all privileges.
4. Visit your domain — the WordPress installer starts. Enter the database details (host: localhost), then complete the site and admin details.
## After installation
* Log in at yourdomain.com/wp-admin.
* Go to **Settings → Permalinks** and choose "Post name" for clean URLs.
* Delete the default plugins/themes you won't use.
* Install a caching plugin (e.g. LiteSpeed Cache on our LiteSpeed servers) for performance.
* Review our [WordPress security guide](/security/wordpress-security).
> [!TIP]
>
> If your domain's DNS doesn't point at our server yet, you can still install and preview WordPress — ask our support team about a temporary preview URL, or use your local hosts file to preview the site before switching DNS.
# How to run a different PHP version in the subdomain/addon domain
Source: https://kb.stablepoint.com/web-hosting/software-guides/how-to-run-a-different-php-version-in-the-subdomainaddon-domain
Sometimes different sites on the same account need different PHP versions — a modern main site on PHP 8.2 alongside a legacy application on an addon domain that still needs PHP 7.4. cPanel supports this per domain.
## Using MultiPHP Manager (per-domain versions)
1. Log in to cPanel.
2. In the **Software** section, click **MultiPHP Manager**.
3. The list shows every domain on the account — main, addon domains, and subdomains — each with its current PHP version.
4. Tick the subdomain or addon domain you want to change.
5. Select the PHP version from the dropdown.
6. Click **Apply**.
Only the selected domain changes; the rest of the account keeps its existing version. The change is immediate.
## Verifying the version per domain
Create a file called v.php in that domain's document root:
```php theme={null}
[!TIP]
>
> Keep legacy applications on old PHP versions only as a stopgap — outdated PHP stops receiving security fixes. Plan an upgrade path for the application itself.
# Manually installing software
Source: https://kb.stablepoint.com/web-hosting/software-guides/manually-installing-software
If an application isn't available in [Softaculous](/web-hosting/software-guides/using-the-softacoulous-autoinstaller), you can install it manually. The process is broadly the same for most PHP applications.
## Step 1: Upload the files
1. Download the application's release package (usually a .zip) from the official website.
2. In cPanel, open **File Manager** and navigate to where the app should live:
* Domain root: public\_html
* Subfolder: public\_html/appname
3. Upload the zip file and use **Extract** to unpack it.
4. If the archive extracted into its own folder (e.g. appname-1.2.3/), move the contents up so the application's index file sits in the intended directory.
Alternatively, upload via [FTP](/web-hosting/files-and-access/using-ftp) or use wget/unzip over [SSH](/web-hosting/files-and-access/secure-shell-ssh-overview) for large packages.
## Step 2: Create a database
Most applications need a MySQL database:
1. In cPanel, open **MySQL Databases**.
2. Create a new database.
3. Create a new database user with a strong password.
4. Add the user to the database with **All Privileges**.
5. Note down the full database name, username, and password (they include your cPanel prefix, e.g. cpuser\_appdb).
## Step 3: Run the installer
1. Visit the application's URL in your browser (e.g. [https://yourdomain.com/appname](https://yourdomain.com/appname)).
2. Most applications launch a web installer that asks for:
* Database host: **localhost**
* Database name, username, and password from Step 2
* Site name and admin account details
3. Follow the installer to completion.
## Step 4: Post-installation checks
* Delete or rename the installer directory if the application instructs you to.
* Verify file permissions: directories 755, files 644.
* Confirm the correct [PHP version](/web-hosting/software-guides/how-to-change-your-php-version-in-cpanel) for the application's requirements.
* Set up any cron jobs the application needs (see [Cron Jobs](/web-hosting/performance/cron-jobs)).
If you hit any problems during a manual installation, our support team is happy to help.
# Software guides
Source: https://kb.stablepoint.com/web-hosting/software-guides/overview
This section covers installing and managing software on your hosting, including WordPress, Softaculous, Node.js, Python, and the WordPress Toolkit.
# Python applications
Source: https://kb.stablepoint.com/web-hosting/software-guides/python-applications
Our cPanel hosting supports Python web applications through the **Setup Python App** feature (CloudLinux Python Selector), which runs WSGI applications such as Flask and Django via Phusion Passenger.
## Creating a Python application
1. Log in to cPanel.
2. In the **Software** section, click **Setup Python App**.
3. Click **Create Application** and complete the form:
* **Python version:** choose the version your app needs.
* **Application root:** folder for the app (e.g. pyapp), relative to your home directory.
* **Application URL:** domain or subdomain/path where the app is served.
* **Application startup file:** typically passenger\_wsgi.py (created automatically).
* **Application Entry point:** the WSGI callable, typically application.
4. Click **Create**.
cPanel creates a virtual environment for the app and wires up the URL.
## A minimal Flask example
Activate the app's virtual environment over [SSH](/web-hosting/files-and-access/secure-shell-ssh-overview) (the activation command is displayed at the top of the app's page in cPanel), then:
```shell theme={null}
pip install flask
```
Create app.py in the application root:
```python theme={null}
from flask import Flask
app = Flask(__name__)
@app.route('/')
def hello():
return 'Hello from Python on Stablepoint!'
```
Edit passenger\_wsgi.py to load it:
```python theme={null}
from app import app as application
```
Then click **Restart** on the app in cPanel.
## Installing dependencies
With the virtual environment activated over SSH:
```shell theme={null}
pip install -r requirements.txt
```
Or add packages one at a time with pip install. cPanel's Python App page also lets you install packages listed in a requirements.txt via the interface.
## Django notes
Django works well under this setup:
* Point passenger\_wsgi.py at your project's WSGI module:
```python theme={null}
from myproject.wsgi import application
```
* Run management commands (migrations, collectstatic) over SSH inside the virtual environment.
* Serve static files from a folder mapped under your document root, or via WhiteNoise.
## Troubleshooting
* Check stderr.log in the application root for startup errors.
* After code changes, always **Restart** the application.
* Import errors usually mean dependencies were installed outside the app's virtual environment — activate the right environment and reinstall.
If you need help getting a Python application running, our support team is happy to assist.
# Using Node.js apps
Source: https://kb.stablepoint.com/web-hosting/software-guides/using-nodejs-apps
Our cPanel hosting supports Node.js applications through the **Setup Node.js App** feature (CloudLinux Node.js Selector), letting you run Express, Next.js, and other Node.js applications alongside your PHP sites.
## Creating a Node.js application
1. Log in to cPanel.
2. In the **Software** section, click **Setup Node.js App**.

3. Click **Create Application** and complete the form:
* **Node.js version:** pick the version your app requires.
* **Application mode:** Development or Production.
* **Application root:** the folder containing your app (e.g. nodeapp), relative to your home directory.
* **Application URL:** the domain or subdomain/path where the app is served.
* **Application startup file:** your entry point (e.g. app.js or server.js).
4. Click **Create**.
cPanel configures the environment and routes web traffic on your chosen URL to the application via Phusion Passenger.
## A minimal example app
Create app.js in your application root:
```javascript theme={null}
const http = require('http');
const server = http.createServer((req, res) => {
res.writeHead(200, { 'Content-Type': 'text/plain' });
res.end('Hello from Node.js on Stablepoint!');
});
server.listen(process.env.PORT || 3000);
```
> [!NOTE]
>
> Passenger sets the port — always listen on process.env.PORT rather than a hard-coded port.
## Installing dependencies
After uploading your package.json:
* On the app's row in **Setup Node.js App**, click **Run NPM Install**, or
* Connect via [SSH](/web-hosting/files-and-access/secure-shell-ssh-overview), enter the app's virtual environment (the command is shown at the top of the app's edit page — it looks like `source /home/user/nodevenv/nodeapp/18/bin/activate`), and run `npm install`.
## Managing the application
From **Setup Node.js App** you can:
* **Restart** the app after deploying new code
* **Stop/Start** the app
* Set **environment variables** (e.g. NODE\_ENV, API keys)
* Change the Node.js version
## Troubleshooting
* Check the **stderr.log** in the application root for startup errors.
* "503" or Passenger error pages usually mean the app crashed on boot — the log tells you why.
* After any code change, click **Restart**.
For larger applications with heavy build steps or persistent processes beyond web requests, consider whether a plan with dedicated resources fits better — we're happy to advise.
# Using the Softaculous Autoinstaller
Source: https://kb.stablepoint.com/web-hosting/software-guides/using-the-softacoulous-autoinstaller
Softaculous is a one-click application installer included with all our cPanel hosting. It can install and manage over 400 applications — WordPress, Joomla, Drupal, PrestaShop, phpBB, and many more — without any manual configuration.
## Accessing Softaculous
1. Log in to cPanel.
2. Scroll to the **Software** section and click **Softaculous Apps Installer**, or use the application icons shown in the **Softaculous** section of the cPanel home page.

## Installing an application
1. In Softaculous, find the application (use the search box or browse categories).
2. Click the application, then click **Install Now**.
3. Complete the installation form:
* **Choose Protocol:** select https\:// (SSL is free on all our plans).
* **Choose Domain:** the domain or subdomain to install on.
* **In Directory:** leave empty to install at the domain root, or enter a folder name (e.g. blog) to install at yourdomain.com/blog.
* **Site Settings:** site name, description, and application-specific options.
* **Admin Account:** choose a strong admin username and password — avoid "admin".
4. Click **Install**. Softaculous creates the database, uploads the files, and completes the configuration automatically.
## Managing installations
The **All Installations** view in Softaculous lists everything installed through it. From there you can:
* **Update** applications when new versions are released
* **Back up** an installation (files + database) and restore it later
* **Clone** an installation to another location
* **Create a staging copy** and push changes back to live (supported apps)
* **Remove** an installation cleanly, including its database
## Automatic backups and updates
When installing (or later via **Edit Details**), you can enable:
* **Automated backups** on a schedule, with a rotation limit
* **Auto-upgrade** for the application core, and for WordPress also plugins and themes
> [!TIP]
>
> Enable automated backups with at least a few rotations before enabling auto-upgrade — if an automatic update ever causes an issue, you can restore the previous state in a couple of clicks.
If you need an application that isn't in Softaculous, you can [install it manually](/web-hosting/software-guides/manually-installing-software).
# WP Toolkit Lite vs WP Toolkit Deluxe: A feature comparison
Source: https://kb.stablepoint.com/web-hosting/software-guides/wp-toolkit-lite-vs-wp-toolkit-deluxe-a-feature-comparison
The WordPress Toolkit comes in two editions: **Lite** (included) and **Deluxe**. Here's how they compare so you can decide whether the upgrade is worth it for your workflow.
## Feature comparison
| Feature | WP Toolkit Lite | WP Toolkit Deluxe |
| :- | :- | :- |
| Install WordPress | ✅ | ✅ |
| One-click admin login (SSO) | ✅ | ✅ |
| Detect existing installations | ✅ | ✅ |
| Update core, plugins, themes | ✅ | ✅ |
| Basic hardening status check | ✅ | ✅ |
| Maintenance mode | ❌ | ✅ |
| Clone / staging | ❌ | ✅ |
| Copy data (staging → production) | ❌ | ✅ |
| Smart Updates (test updates on a clone before applying) | ❌ | ✅ |
| Full security hardening (apply/rollback measures) | ❌ | ✅ |
| Backup/restore integration per site | ❌ | ✅ |
| Bulk plugin/theme management across sites | ❌ | ✅ |
| Password protection for sites | ❌ | ✅ |
## Who is Lite for?
Lite covers the essentials: installing WordPress, logging in without passwords, and keeping core/plugins/themes updated. For a single straightforward site that you update by hand, Lite is often enough — especially combined with Softaculous staging/backups and JetBackup restores, which cover some of the same ground.
## Who benefits from Deluxe?
* **Agencies and freelancers** managing several client sites — bulk updates and security hardening across all installations save real time.
* **Anyone making regular site changes** — clone/staging plus Copy Data gives you a safe test-then-deploy loop.
* **Update-cautious site owners** — Smart Updates test each update on a temporary clone and only apply it to production if nothing visibly breaks.
## How to get Deluxe
If you'd like WP Toolkit Deluxe on your account, contact our support team and we'll advise on availability and pricing for your plan.
# SSL Certificates
Source: https://kb.stablepoint.com/web-hosting/ssl-certificates-1
All Stablepoint hosting plans include **free SSL certificates** for every domain and subdomain, issued and renewed automatically.
## How it works
Our servers use AutoSSL with Let's Encrypt/Sectigo certificates:
1. Point your domain to our hosting (via our nameservers or an A record).
2. Within a short time of DNS resolving to the server, a certificate is issued automatically.
3. Certificates renew automatically before expiry — you never need to reissue them manually.
## Checking your SSL status
1. Log in to cPanel.
2. In the **Security** section, click **SSL/TLS Status**.
3. Each domain and subdomain is listed with its certificate status. You can click **Run AutoSSL** to trigger issuance immediately if a domain shows as uncovered.
## Forcing HTTPS
Once your certificate is active, we recommend redirecting all traffic to HTTPS:
* In cPanel, go to **Domains** and toggle **Force HTTPS Redirect** for the domain, or
* Add a redirect in your *.htaccess* file:
```text theme={null}
RewriteEngine On
RewriteCond %{HTTPS} off
RewriteRule ^(.*)$ https://%{HTTP_HOST}%{REQUEST_URI} [L,R=301]
```
## Common questions
**Do I need to pay for SSL?** No. SSL certificates are included free on all plans.
**Can I install my own certificate?** Yes. If you've purchased a certificate elsewhere (for example an EV or OV certificate), you can install it via cPanel → **SSL/TLS** → **Install and Manage SSL**.
**Why does my site show "Not Secure"?** Usually one of: the domain doesn't point to our server yet, AutoSSL hasn't run since DNS propagated, or the page loads mixed content (http\:// resources on an https\:// page). For mixed content on WordPress, a plugin like Really Simple SSL fixes most cases.
If you have any SSL issues, contact our support team and we'll sort it quickly.
# What is AuDA?
Source: https://kb.stablepoint.com/what-is-au-da
The Australian Domain Administrator (auDA) is a legal Australian body responsible for the administration of .au domain names. It is the policy authority and self-regulatory industry body for the **.au** domain space. It is formally endorsed by the Australian Government.Webcentral is one of a only a handful of companies in Australia recognised by auDA as a registrar of .au domain names. Amongst other capabilities, this means we can register and renew domain names that end .au.Webcentral is subject to the rules and policies set forth by the auDA related to domain name registration.